background image

English -

33

To pause recording

Press the REC PAUSE button to pause a recording in
progress. 

Press the REC PAUSE button again to resume 
recording.

You can switch channels by pressing the 

CH (

/

)

buttons while recording pauses.

To stop recording

Press the STOP (

) button to stop or finish a recording

in progress.

When using DVD-RAM/DVD-RW/DVD-R discs, the
message
‘Updating the information of disc. Please wait for a
moment’ is displayed.

3

Press the CH (

/

) or number (

~

)

buttons to select the current program you
want to record.

4

Press the REC MODE button repeatedly, (or
Press the REC MODE button and then press
the 

…†

button) to select the recording

speed(quality).

➞ 

SP 

➞ 

LP 

➞ 

EP 

➞ 

XP 

5

Press the REC button.

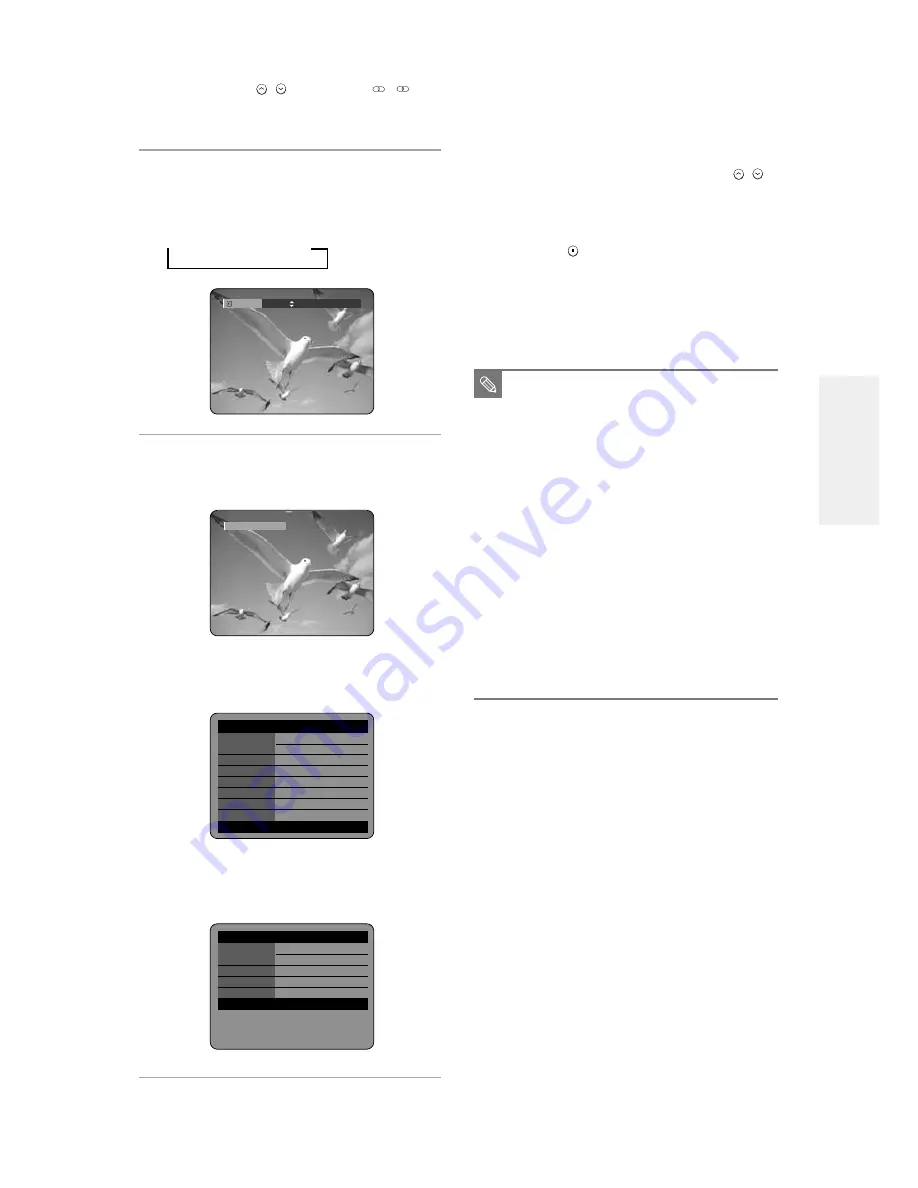
Information concerning the channel is displayed on the
screen and then recording begins.

To view the current status of the disc and progress of
recording : Press the INFO. button, and the information
about the disc will appear.

Press the INFO. button once again. 
Then you can check the information about the title
under recording.

Record Mode

SP

Recording : CH 7  [Mono]

■ 

You can not change the recording mode
and the channel while recording.

■ 

Recording will stop automatically if there
is no free space left for recording.

■ 

Up to 99 titles can be recorded onto a
disc.

■ 

Recording will stop automatically if a copy
protected image is selected.

■ 

If you are using a Cable Box(no antenna),
you cannot watch a cable TV program
while recording another cable TV 
program.

■ 

DVD-RAM/DVD-RW discs must be 
formatted before starting to record. 
Most new discs are sold unformatted. 

■ 

Do not use DVD-R authoring discs with
this unit.

NOTE

DVD-RAM(VR) Disc 

Info

Disc Name 

Total Title 

15

Total Playlist 

2

Recordable Time 

03:00 SP

Protection Not 

Protected

Main Screen 

Recording: CH 7 [Mono]

PIP Screen 

- -

APR 24 2004 SAT

12:00 AM

DVD-RAM(VR) Recording 

Info

Name 

APR/04/2004 12:00 AM

Recording Title

15

Created Time

APR/04/2004 12:00 AM

Recording Time 

00:02:05 

APR 24 2004 SAT

12:00 AM

R

ecording

Summary of Contents for DVD-R100

Page 1: ...Instruction Manual DVD R100 CA CA AK68 00427C 01 www samsung ca ...

Page 2: ...de blade of plug to wide slot fully insert Attention Pour éviter les chocs électriques introduíre la lame la plus large de la fiche dans la borne correspondante de la prise et pousser jusqu au fond This product satisfies FCC regulations when shielded cables and connectors are used to connect the unit to other equipment To prevent electromagnetic interference with electric appliances such as radios...

Page 3: ...perate normally or has been dropped Handling Cautions Before connecting other components to this recorder be sure to turn them all off Do not move the recorder while a disc is being played or the disc may be scratched or broken and the recor der s internal parts may be damaged Do not put a flower vase filled with water or any small metal objects on the recorder Be careful not to put your hand into...

Page 4: ...disc in VR Mode and then record in V Mode be sure to execute Format Be careful when executing Format because all the recorded data may be lost A DVD RW blank disc is initialized to VR Mode when first initialized 4 English Do not apply labels or stickers to discs Do not use discs fixed with exposed tape adhesive or leftover peeled off stickers Do not use scratch proof protectors or covers Do not us...

Page 5: ...sult your DVD RAM DVD RW DVD R manufacturer Use of poor quality DVD RAM DVD RW DVD R discs may cause following unexpected problems including without limitation recording failure loss of recorded or edited materials or damage to the recorder Do not use the following discs LD CD G CD I CD ROM DVD ROM DVD R and DVD RW discs should not be used in this product Note Disc types that can be played CD CD R...

Page 6: ...Pr in 480i mode 17 Method 4 Connecting to Component video input jacks Y Pb Pr in 480p mode 18 Step 4 Connecting the Audio cable 18 Method 1 Connecting to your TV 18 Method 2 Connecting to a stereo amplifier with analog input jacks 19 Method 3 Connecting to an AV amplifier with a digital input jack 19 Step 5 Connecting external devices 20 Method 1 Connecting a VCR Set Top Box STB or DVD player to t...

Page 7: ...ing Recorded Time Slip 35 Making a One Touch Recording OTR 36 Setting a Timer Recording 37 Flexible Recording for Timer recording only 38 Editing the Scheduled Record List 38 Deleting the Scheduled Record List 39 Recording the Scheduled Record List 40 Playback Playback Before Playing 41 Region code DVD Video only 41 Disc types that can be played 41 Discs that cannot be played 41 Playing a Disc 42 ...

Page 8: ...rding Mode You can set your recorder to one of five different recording speeds each varying in recording quality and length EP mode yields the most recording time LP SP modes provide less recording time with higher quality recording and XP mode gives you the highest quality recording There s also the FR Flexible Recording mode that lets you record with the best picture quality possible for the rec...

Page 9: ...able JPEG in a data picture CD CD R or CD RW This involves a function available MP3 in a data CD CD R or CD RW on which MP3 is recorded This involves a case where a Caution function does not operate or settings may be cancelled This involves tips or instructions NOTE on the page that help each function operate One Touch A function that can be operated by button using only one button Step 2 Format ...

Page 10: ...cessary First finish all editing and recording operations then finalize the disc When using a DVD RW disc in VR Mode Although finalizing is generally unnecessary when playing the disc on a VR Mode compatible component a finalized disc should be used for playback on that type of component When using a DVD RW disc in Video Mode The disc should be finalized first to enable playback on anything other ...

Page 11: ...he disc tray 7 STOP Stops disc playback 8 PLAY PAUSE Plays a disc or pauses playback 9 SEARCH Goes to the next title chapter track or goes back to the previous title chapter track 10 RECORD MODE Selects the recording mode 11 REC Starts recording 12 CH Selects TV channels 13 REC PAUSE Pauses recording 14 TIME SLIP The Time Slip function allows you to view a recorded program through the PIP window a...

Page 12: ...Connects the input of external equipment using a Video or S Video cable 5 COMPONENT VIDEO OUT Connects to equipment having Component video input jacks 6 AUDIO VIDEO LINE 1 IN Connects the output of external equipment using an audio video or S Video cable 7 VHF UHF Connects antenna cables Rear Panel 1 2 3 4 5 6 7 Fan The fan always revolves when the power is on Ensure a minimum of 4 clear space on ...

Page 13: ...rame forward 25 PLAY LIST TITLE MENU Button Use this to return to the Title menu or to view the recorded files list 26 ANYKEY Button Use this to view the status of the disc that is being played 27 CANCEL Button 28 REPEAT A B Button Press to repeat between A B disc 29 SUBTITLE Button Press this to switch the DVD s subtitle language 30 TIMER Button Press to directly enter the Timer Recording Mode me...

Page 14: ...ernal components and required initial setting modes Step 1 Unpacking Step 2 Connecting the Antenna Cable Step 3 Connecting the Video Cable Step 4 Connecting the Audio Cable Step 5 Connecting the external devices Step 6 Connecting the Power Cord Step 7 Preparing the Remote Control Step 8 Initial Setup Note to CATV system installer This reminder is provided to call CATV system installer s attention ...

Page 15: ...our DVD Recorder Select one of the following antenna connections that best suits you below Method 1 Antenna DVD Recorder TV No Cable box Method 2 Antenna Cable box DVD Recorder TV Cable box with many scrambled channels Method 3 Antenna DVD Recorder Cable box TV Cable box with a few scrambled channels Step 2 Connecting the Antenna Cable If you are using an off air antenna that has 300 ohm twin flat...

Page 16: ...ALOG AUDIO OUT jacks on the DVD Recorder and AUDIO IN jacks on TV or AV amplifier See page 19 Method 3 Antenna DVD Recorder Cable box TV Cable box with a few scrambled channels You can record non scrambled channels by selecting the channel on the cable box You cannot record scrambled channels that require a cable box There are several ways to connect your DVD Recorder Select one of the following v...

Page 17: ... an S video cable not supplied between the S VIDEO OUT jack on DVD Recorder and S VIDEO IN jack on the TV or AV amplifier You will enjoy high quality images S Video separates the picture element into black and white Y and color C signals to present clearer images than regular video input mode COMPONENT Pr Pb Y 2 1 If you change the component video output switch when the power is off the startup sc...

Page 18: ...igital input jack Method 1 Connecting to your TV This connection will use your TV s speakers Step 4 Connecting the Audio cable Manufactured under license from Dolby Laboratories Dolby and the double D symbol are trademarks of Dolby Laboratories DTS and DTS Digital Out are trademarks of Digital Theater Systems Inc If you change the component video output switch when the power is off the startup scr...

Page 19: ... or DTS decoder and a digital input jack use this connection To enjoy Dolby Digital or DTS sound you will set up the audio settings See page 28 Method 2 Connecting to a stereo amplifier with analog input jacks If your stereo amplifier only has audio input jacks L and R use the analog audio out jacks Connecting Setting UP ...

Page 20: ...cord their outputs Method 1 Connecting a VCR Set Top Box STB or DVD player to the AUDIO VIDEO LINE 1 IN jacks Method 2 Connecting a Camcorder to the LINE 2 jacks Method 3 Connecting a Camcorder to the DV IN jack Method 1 Connecting a VCR Set Top Box STB or DVD player to the AUDIO VIDEO LINE 1 IN jacks Connecting a VCR or external device to AUDIO VIDEO LINE 1 IN jacks of the DVD Recorder You can re...

Page 21: ...y Replace the battery cover If remote does not operate properly Check the polarity of the batteries Dry Cell Check if the batteries are drained Check if remote sensor is blocked by obstacles Check if there is any fluorescent lighting nearby Dispose of batteries according to local environmental regulations Do not put them in the household trash Setting the Remote Control You can control part of ano...

Page 22: ... 22 78 LOEWE TV POWER 06 69 LOEWE OPTA TV POWER 06 57 MAGNAVOX TV POWER 40 METS TV POWER 57 MITSUBISHI TV POWER 06 48 62 65 MIVAR TV POWER 52 77 NEC TV POWER 83 NEWSAN TV POWER 68 NOBLEX TV POWER 66 NOKIA TV POWER 74 NORDMENDE TV POWER 72 73 75 PANASONIC TV POWER 53 54 74 75 PHILIPS TV POWER 06 55 56 57 PHONOLA TV POWER 06 56 57 PIONEER TV POWER 58 59 73 74 RADIOLA TV POWER 06 56 RADIOMARELLI TV P...

Page 23: ...to set the time to use timer recording 1 With the unit in Stop mode press the MENU button 2 Select Setup using the buttons then press the or ENTER button You can t use the Setup functions while playing a disc If the language for the startup screen is not set the settings may change whenever you turn the power on or off Therefore make sure that you select the language you want to use NOTE RETURN SE...

Page 24: ...t On Clock Data CH Automatic Time Zone Automatic Daylight Saving Automatic Off On 7 Select the sub menu Clock Data CH Time Zone or Daylight Saving using the buttons then press the or ENTER button Clock Data CH Select a channel that carries a time signal using the buttons then press the or ENTER button Select Auto to set the channel automatically Time Zone Select the time zone of your area using th...

Page 25: ...es No or Automatic using the buttons then press the or ENTER button Select Automatic to set the daylight saving automatically If your clock cannot be set automatically set the clock manually 5 Select Manual Clock Set using the buttons then press the or ENTER button Manual Clock Set RETURN SELECT MOVE EXIT Auto Clock Set DVD VIDEO Auto Clock Set On Clock Data CH Automatic Time Zone Automatic Daylig...

Page 26: ...el Memory NOTE Method 1 and 3 Method 2 Select the item that matches the antenna connection you selected on pages 15 16 method 1 2 or 3 3 Channel Set You can set the Antenna Cable TV settings automatically 1 With the unit in Stop mode press the MENU button on the remote control 2 Select Setup using the buttons then press the or ENTER button You can t use the Setup functions while playing a disc 3 S...

Page 27: ... Memory Use the Manual Channel Setting to delete unnecessary channels after using the Auto Channel Memory 1 With the unit in Stop mode press the MENU button on the remote control 2 Select Setup using the buttons then press the or ENTER button You can t use the Setup functions while playing a disc 3 Select System using the buttons then press the or ENTER button Select Channel Set using the buttons ...

Page 28: ... Digital Output PCM DTS Off Dynamic Compression On PCM Bitstream RETURN SELECT MOVE EXIT No Disc Digital Output PCM DTS Off Dynamic Compression Off Off On Select the item that matches the audio connection you selected on pages 18 19 method 1 2 or 3 4 Setting Up the Audio Options Allows you to setup the audio device and sound status settings depending on the audio system in use 1 With the unit in S...

Page 29: ...vel 7 5 IRE 3D Noise Reduction Off Front Display Auto Dim 4 3 LetterBox 4 3 Pan Scan 16 9 Wide 5 Setting Up the TV Aspect This allows you to set up the TV screen settings 1 With the unit in Stop mode press the MENU button on the remote control 2 Select Setup using the buttons then press the or ENTER button You can t use the Setup functions while playing a disc 3 Select Video using the buttons then...

Page 30: ...t 40 This section shows various DVD recording meth ods Disc Types Recording Recording Finalizing Additional Recording in format Device Samsung Recorder DVD RAM VR Mode Samsung X Recordable Other Company X Recordable Samsung finalized Not recordable VR Mode not finalized Recordable Other Company finalized Not recordable DVD RW not finalized Recordable Samsung finalized Not recordable V Mode not fin...

Page 31: ...fer to Formatting a Disc on page 82 DVD R Formatting DVD is unnecessary and only Video Mode Recording is supported DVD RW Video mode R This mode automatically creates chapters at specified intervals during finalization Simple editing erasing titles changing title name DVD RW VR mode RAM This mode allows multiple editing functions such as deletion of the whole of a title partial deletion of a title...

Page 32: ...e disc space Disc Information When recording on an used disc make sure that there is enough disc space for recording With DVD RWs or DVD RAMs you can free up disc space by erasing titles Press the INFO button The disc information display window appears Items in the display differ depending on the disc type or recording format Disc Type Current information display status Disc Name Total Titles Tota...

Page 33: ...information about the disc will appear Press the INFO button once again Then you can check the information about the title under recording Record Mode SP Recording CH 7 Mono You can not change the recording mode and the channel while recording Recording will stop automatically if there is no free space left for recording Up to 99 titles can be recorded onto a disc Recording will stop automatically...

Page 34: ...used whether to format or not will be asked first See page 31 If an unused DVD RW disc is used whether to initialize or not will be asked first See page 31 3 Press the INPUT button to select the input source according to the connection you made The front panel display changes in the following sequence Channel Number L1 L2 DV If you connect a digital camcorder press the INPUT button to select DV 4 ...

Page 35: ...ne at the same time During the operation of Time Slip playback related buttons control the PIP window On the time slip screen you can play scan or perform other operations for the recorded program using the playback related buttons Press the button to scan the recording in reverse order from end to the start Press the button to scan recently recorded 10 second images When the INFO button is presse...

Page 36: ...FO button once again Then you can check the information about the title under record ing 30 seconds before the recording is done the mes sage which asks whether you want the recorder to power off when the recording is done will appear on your screen To stop recording Press the STOP button The message Do you want to stop recording is displayed Press the œ buttons to select Yes and then press the EN...

Page 37: ...the current setting Press the MENU or TIMER button To return to the previous menu Press the RETURN button if you don t want to set a timer recording Setting a Timer Recording You need to set clock Initial Setup Clock Set before proceeding with a timer recording See page 23 1 Press the OPEN CLOSE button and place a recordable disc on the disc tray 2 Press the OPEN CLOSE button to close the disc tra...

Page 38: ...e MENU button in stop mode 2 Press the buttons to select Timer Rec and then press the ENTER or the button Editing the Scheduled Record List RETURN SELECT MOVE EXIT Timer Record DVD RAM VR Timer Record Scheduled Record List RETURN SELECT MOVE EXIT Scheduled Record List DVD RAM VR 01 CH 09 11 22 09 22AM 10 30AM Once SP 02 CH 05 12 10 12 30AM 09 00PM Weekly LP 03 No Source Date Start End Type Mode Ed...

Page 39: ...heduled Record List and then press the ENTER or button RETURN SELECT MOVE EXIT Timer Record DVD RAM VR Timer Record Scheduled Record List RETURN SELECT MOVE EXIT Timer Record DVD RAM VR Timer Record Scheduled Record List RETURN SELECT MOVE EXIT Scheduled Record List DVD RAM VR 01 CH 09 11 22 09 22AM 10 30AM Once SP 02 CH 05 12 10 12 30AM 09 00PM Weekly LP 03 No Source Date Start End Type Mode Edit...

Page 40: ...the STOP button and the message that asks whether to end recording or not will be displayed When Yes is selected Recording stops When No is selected Recording continues Timer Recording is going to be started soon Do you want to cancel timer recording Yes No Do you want to stop recording Yes No Timer Recording is going to be ended soon And power will be turned off automatically Press ENTER to conti...

Page 41: ...icture CD 56 Playing the Title List 57 This section introduces basic functions of playback and playback by disc type Disc Types Disc Logo Recorded content Disc Shape Max Playing Time Single sided 5 240 DVD VIDEO AUDIO VIDEO Double sided 5 480 Single sided 3 5 80 Double sided 3 5 160 VIDEO CD AUDIO VIDEO Single sided 5 74 Single sided 3 5 20 AUDIO CD AUDIO Single sided 5 74 Single sided 3 5 20 JPEG...

Page 42: ...refer to this if necessary Do not allow the disc to become dirty or scratched Fingerprints dirt dust scratches or deposits of cigarette smoke on the recording surface may make it impossible to use the disc for recording To protect a DVD RAM RW R disc from damage use a cartridge DVD RAM RW R discs may not be able to play on some DVD players depending on the player disc and the condition of the reco...

Page 43: ...utton Title Menu 1 Press the TITLE MENU button to move to the title menu of the disc Use this button if the disc contains more than one title Some type of discs may not support the title menu function For DVD RAM RW R discs 1 Press the TITLE LIST button to move to the Title List Title List Title refers to a recorded video stream Title List shows a list to help you select a title Since the title li...

Page 44: ... chapter or track or marker DVD RAM DVD RW VR mode Slow Motion Play 1 In pause or step mode press the button on the remote control If you press the button Slow 1 8 Slow 1 4 Slow 1 2 If you press the œœ button Slow 1 8 Slow 1 4 Slow 1 2 To return to normal speed playback press the button Press and hold the button during pause and the disc will play slowly at a 1 4 speed If the button is released th...

Page 45: ... to a desired time to help you find a scene 1 Press the ANY KEY button during playback 2 Press the buttons to select the Time 3 Enter the time in the sequence of hours minutes and seconds using the number but tons and then press the ENTER button Repeat Off Repeat Title CHANGE MOVE DVD VIDEO 1 10 1 40 00 01 45 Off ENG D 5 1CH Off 1 1 Off NUMBER MOVE DVD VIDEO 1 10 1 40 00 01 45 Off ENG D 5 1CH Off ...

Page 46: ... the REPEAT button or buttons to select the Track or Disc you want to play repeatedly Press the ENTER button For MP3 discs you can select Track Folder or Disc DVD RAM DVD RW VR mode unfinal ized DVD R and unfinalized DVD RW Video mode do not repeat a chapter NOTE CHANGE MOVE DVD VIDEO 1 10 1 40 00 01 45 Off ENG D 5 1CH Title 1 1 Off CHANGE MOVE DVD VIDEO 1 10 1 40 00 01 45 Off ENG D 5 1CH Title 1 ...

Page 47: ...ress the CANCEL button to return to normal playback Using the REPEAT A B button Using the REPEAT A B button 1 Press the REPEAT A B button 2 Press the REPEAT A B button repeatedly to set start point A 3 Press the ENTER button again to set end point B Repeat playback of the A B section starts If you set point B before five seconds has lapsed the prohibition mark will appear You can also activate Nor...

Page 48: ...yback 2 Press the SUBTITLE button or buttons to select the desired subtitle language Using the ANY KEY button Using the ANY KEY button 1 Press the ANY KEY button during playback 2 Press the buttons to select Subtitle and press the œ buttons to select the desired subtitle language CHANGE MOVE DVD VIDEO 1 10 1 40 00 01 45 Off ENG D 5 1CH Title 1 1 Off CHANGE MOVE DVD VIDEO 1 10 1 40 00 01 45 ENG ENG...

Page 49: ...ngle function This is only available during playback 1 Press the ANY KEY button during playback 2 Press the buttons to select Angle and press the œ buttons or number buttons to select the desired angle This function is disc dependent and may not work all DVDs This function does not work when a DVD has not been recorded with a multi cam era angle system NOTE CHANGE MOVE DVD VIDEO 1 10 1 40 00 01 45...

Page 50: ...w TV while playing a DVD disc 1 Press the PIP button The current disc is played in the PIP screen located at the bottom right of the screen To view the current status and progress of playback Press the INFO button Switching between the PIP and the main screens 2 Press the PIP button again The main and PIP screen will be switched The input source is played in the PIP screen located at the bottom ri...

Page 51: ... memorized 3 Press the œ button to move to the next position 4 Press the ENTER button when the desired scene appears The number 2 is displayed and the scene is memorized Repeat above to bookmark other positions You can bookmark up to 10 scenes RETURN SELECT MOVE Bookmark RETURN CANCEL MOVE Bookmark 1 PLAY RETURN CANCEL MOVE Bookmark 1 2 PLAY RETURN CANCEL MOVE Bookmark 1 2 PLAY Clearing a Bookmark...

Page 52: ...CEL MOVE PLAY Marker N 2 01 02 1 Press the MARKER button 2 Press the œ buttons to select a bookmarked scene 3 Press the ENTER or button to start playing from the selected scene If you press the NEXT SKIP button or the PREVIOUS SKIP button in marker mode when the next or current marked point plays for shorter than three seconds playback starts from the previous marked point 1 Press the MARKER butto...

Page 53: ... press the ENTER button or button 2 2 Press the number buttons to select the track song and the track song is played automatically 1 Repeat mode Repeat off Repeat Track Repeat Disc 2 Current track song Displays the number of the track currently being played 3 Displays the current play index and total track number 4 This shows the operating state of a disc and a playback time corresponding to a por...

Page 54: ...ng you want to hear and then press the ENTER button or button 2 2 Press the number buttons to select the track song and the track song is played automatically 1 Repeat mode Repeat off Repeat Track Repeat Folder or Repeat Disc 2 Current track song Displays the name of the track being played 3 Displays the current folder and play index 4 This shows the operating state of a disc and a playback time c...

Page 55: ...the play option is changed Intro The first 10 seconds of each track will be played If you want to listen to the music that you have selected press the ENTER button or button The play option will be changed to Normal Play If you Press button the recorder will skip to next track with play option of Intro When Intro Play is completed Normal Play is performed Playlist The Playlist playback option allo...

Page 56: ... CD with JPEG files and MP3 files mixed CD 1 When mixed CD is played a menu will be shown in order to have you choose which contents either JPEG or MP3 you want to play 1 1 If you want to play MP3 files on a mixed CD choose Music on the menu then it will take you to MP3 playing back screen See page 54 1 2 If you want to play JPEG files on a mixed CD choose Photo on the menu then it will take you t...

Page 57: ...MENU button 1 Press the MENU button RETURN SELECT MOVE EXIT Title List DVD RAM VR Title List RETURN SELECT MOVE EXIT Title List DVD RAM VR No Title Length Edit APR 19 2004 12 00 AM CH12 APR 19 2004 12 00 AM SP 01 APR 19 2004 1 00 00 21 02 APR 19 2004 1 00 00 03 03 APR 20 2004 2 00 00 15 04 APR 20 2004 2 00 00 16 05 APR 21 2004 1 00 06 32 06 APR 21 2004 1 00 08 16 07 APR 22 2004 1 00 09 36 RETURN S...

Page 58: ...Edit APR 19 2004 12 00 AM CH12 APR 19 2004 12 00 AM SP 01 APR 19 2004 1 00 00 21 02 APR 19 2004 1 00 00 03 03 APR 20 2004 2 00 00 15 04 APR 20 2004 2 00 00 16 05 APR 21 2004 1 00 06 32 06 APR 21 2004 1 00 08 16 07 APR 22 2004 1 00 09 36 1 2 3 4 5 7 6 This may depend on the type of disc DVD R DVD RW Video has limited editing function NOTE You can also play a recorded program by pressing the ANY KEY...

Page 59: ...namic Compression Video Setting Setup of the Display Options Use to select which type of screen you want to watch and several display options TV Aspect Input Level Black Level 3D Noise Reduction Front Display Parental Control Setup of the Parental Level Allows users to set the level necessary to prevent children from viewing unsuitable movies such as those with violence adult subject matter etc Pa...

Page 60: ...sponding to the set time is skipped and then the next section is played RETURN SELECT MOVE EXIT System DVD R V Clock Set Channel Set CM Skip Time 15 Sec RETURN SELECT MOVE EXIT System DVD R V Clock Set Channel Set CM Skip Time 15 Sec CM Skip CM Skip can be performed only during normal playback When the time set is less than a remaining time of a current title The next title is played from the begi...

Page 61: ...or ENTER button You can t use the Setup functions during disc playback 3 Select Language using the buttons then press the or ENTER button Language setup menu will be displayed Language Setting RETURN SELECT MOVE EXIT Timer Record No Disc Timer Record Scheduled Record List RETURN SELECT MOVE EXIT Setup No Disc System Language Audio Video Parental Control RETURN SELECT MOVE EXIT Setup No Disc System...

Page 62: ...ettings depending on the audio system in use 1 With the unit in Stop mode press the MENU button on the remote control 2 Select Setup using the buttons then press the or ENTER button You can t use the Setup functions during disc playback 3 Select Audio using the buttons then press the or ENTER button Audio option menu will be displayed Audio Setting RETURN SELECT MOVE EXIT Timer Record No Disc Time...

Page 63: ...nu will be displayed Video Display Setting RETURN SELECT MOVE EXIT Timer Record No Disc Timer Record Scheduled Record List RETURN SELECT MOVE EXIT Setup No Disc System Language Audio Video Parental Control RETURN SELECT MOVE EXIT Setup No Disc System Language Audio Video Parental Control RETURN SELECT MOVE EXIT Video No Disc TV Aspect 16 9 Wide Input Level Darker Black Level 7 5 IRE 3D Noise Reduc...

Page 64: ... press the or ENTER button You can t use the Setup functions during disc playback 3 Select Parental Control using the buttons then press the or ENTER button When you operate your DVD recorder for the first time the Create the Password message will be displayed Parental Control RETURN SELECT MOVE EXIT Timer Record No Disc Timer Record Scheduled Record List RETURN SELECT MOVE EXIT Setup No Disc Syst...

Page 65: ...ress the or ENTER button and then select On using the buttons The Parental Control screen appears RETURN SELECT NUMBER EXIT Parental Control No Disc Create the password RETURN SELECT NUMBER EXIT Parental Control No Disc Confirm the password RETURN SELECT MOVE EXIT Parental Control No Disc Password Off Press the RETURN or œ button to return to the previous menu Press the MENU button to exit the men...

Page 66: ...our password again using the 0 to 9 buttons on the remote control About the Change Password RETURN SELECT MOVE EXIT Parental Control No Disc Password On Rating Level Level 1 Kids Change Password RETURN SELECT NUMBER EXIT Change Password No Disc Enter the password RETURN SELECT NUMBER EXIT Change Password No Disc Confirm the password RETURN SELECT NUMBER EXIT Change Password No Disc Enter the passw...

Page 67: ...rmation necessary for playing a desired scene is included in a playlist even if that playlist is deleted the original stream will not be deleted If recording or editing could have not been finished properly because of any kinds of error such as sudden power failure the recording or editing might have not been done Please be aware that a material that has been damaged is unable to be retrieved to i...

Page 68: ...19 2004 12 00 AM SP 01 APR 19 2004 1 00 00 21 02 APR 19 2004 1 00 00 03 03 APR 20 2004 2 00 00 15 04 APR 20 2004 2 00 00 16 05 APR 21 2004 1 00 06 32 06 APR 21 2004 1 00 08 16 RETURN SELECT MOVE EXIT Title List DVD RAM VR No Title Length Edit Sports A1 APR 19 2004 12 00 AM SP 01 APR 19 2004 1 00 00 21 02 APR 19 2004 1 00 00 03 03 APR 20 2004 2 00 00 15 04 APR 20 2004 2 00 00 16 05 Sports A1 00 06 ...

Page 69: ...2004 12 00 AM SP 01 Drama 00 00 21 02 Music 00 00 03 03 Sports 00 00 15 04 Movie 00 00 16 05 Sports A1 00 06 32 06 Edu 1 00 08 16 RETURN SELECT MOVE EXIT Title List DVD RAM VR No Title Length Edit APR 19 2004 12 00 AM CH12 APR 19 2004 12 00 AM SP 01 Drama 00 00 21 02 Music 00 00 03 03 Sports 00 00 15 04 Movie 00 00 16 05 Sports A1 00 06 32 06 Edu 1 00 08 16 Play Rename Delete Edit Protection RETUR...

Page 70: ...rts A1 00 06 32 06 Edu 1 00 08 16 RETURN SELECT MOVE EXIT Title List DVD RAM VR No Title Length Edit Sports A1 APR 19 2004 12 00 AM SP 01 Drama 00 00 21 02 Music 00 00 03 03 Sports 00 00 15 04 Movie 00 00 16 05 Sports A1 00 06 32 06 Edu 1 00 08 16 Play Rename Delete Edit Protection RETURN SELECT MOVE EXIT Title List DVD RAM VR Sports A1 APR 19 2004 12 00 AM SP Do you want to delete Related playlis...

Page 71: ...st No 05 Start 00 00 06 End 00 00 00 RETURN SELECT MOVE EXIT Edit Title List DVD RAM VR Sports A1 APR 21 2004 11 50 PM 00 10 15 Start End Delete Return Title List No 05 Start 00 00 06 End 00 10 10 RETURN SELECT MOVE EXIT Edit Title List DVD RAM VR Sports A1 APR 21 2004 11 50 PM 00 10 15 Start End Delete Return Title List No 05 Start 00 00 06 End 00 10 10 RETURN SELECT MOVE EXIT Edit Title List DVD...

Page 72: ...splayed on the Start window The yellow colored selection bar moves to the End item Select the starting point of the section from which you want to create a new scene using the playback related buttons Advanced Editing Play List RETURN SELECT MOVE EXIT Playlist DVD RAM VR New Playlist Edit Playlist RETURN SELECT MOVE EXIT Make Scene DVD RAM VR New Playlist APR 19 04 12 00 AM 00 00 10 Start End Make...

Page 73: ... you want to edit from the Playlist and then press the ENTER or button The Edit Playlist menu is displayed Play Rename Edit Screen Copy Delete RETURN SELECT MOVE EXIT Edit Playlist DVD RAM VR No Title Length Edit APR 23 2004 06 43 AM 7 Scenes APR 23 2004 06 43 AM 01 APR 23 2004 0 00 00 21 02 APR 23 2004 0 00 00 03 03 APR 24 2004 0 00 00 15 04 APR 24 2004 1 00 00 16 05 APR 25 2004 2 00 06 32 RETURN...

Page 74: ...en the disc has stopped Press the buttons to select Playlist and then press the ENTER or button Press the buttons to select Edit Playlist and then press the ENTER or button 2 Press the buttons to select the title you want to edit from the Playlist and then press the ENTER or button The Edit Playlist menu is displayed Play Rename Edit Scene Copy Delete 3 Press the buttons to select Rename and then ...

Page 75: ...43 AM 01 Science 00 00 17 02 Sky 00 00 06 03 Dolphin 00 00 06 04 Natural 00 00 37 Play Rename Edit Scene Copy Delete RETURN SELECT MOVE EXIT Edit Playlist DVD RAM VR No Title Length Edit Science 7 Scenes APR 23 2004 06 43 AM 01 Science 00 00 17 02 Sky 00 00 06 03 Dolphin 00 00 06 04 Natural 00 00 37 VR mode RETURN SELECT MOVE EXIT Edit Scene DVD RAM VR Scene No 1 7 Playlist No 3 Play Modify Move A...

Page 76: ... is displayed 6 Press the ENTER button at the start point of the scene The image and starting point time are displayed on the Start window Select the starting or ending point of the section you want to modify using the playback related buttons Modifying a Scene Replacing a Scene RETURN SELECT MOVE EXIT Edit Scene DVD RAM VR Scene No 2 7 Playlist No 2 Play Modify Move Add Delete 01 00 00 26 02 00 0...

Page 77: ...te 01 00 00 26 02 00 00 07 03 00 00 04 04 00 00 03 05 00 00 11 06 00 00 04 RETURN SELECT MOVE EXIT Edit Scene DVD RAM VR Scene No 3 7 Playlist No 3 Play Modify Move Add Delete 01 00 00 26 02 00 00 07 03 00 00 04 04 00 00 03 05 00 00 11 06 00 00 04 RETURN SELECT MOVE EXIT Edit Scene DVD RAM VR Scene No 6 7 Playlist No 6 Play Modify Move Add Delete 01 00 00 26 02 00 00 07 03 00 00 04 04 00 00 03 05 ...

Page 78: ... the PLAY LIST button 1 Press the PLAY LIST button The Edit Playlist screen is displayed Using the MENU button Press the MENU button When the disc has stopped Press the buttons to select Playlist and then press the ENTER or button Press the buttons to select Edit Playlist and then press the ENTER or button 2 Press the buttons to select the title you want to edit from the Playlist and then press th...

Page 79: ...OVE EXIT Edit Playlist DVD RAM VR No Title Length Edit Science 7 Scenes APR 23 2004 06 43 AM 01 Science 00 00 17 02 Sky 00 00 06 03 Dolphin 00 00 06 04 Natural 00 00 37 05 Dolphin 00 00 06 RETURN SELECT MOVE EXIT Edit Playlist DVD RAM VR No Title Length Edit Natural 7 Scenes APR 23 2004 06 43 AM 01 Science 00 00 17 02 Sky 00 00 06 03 Dolphin 00 00 06 04 Natural 00 00 37 RETURN SELECT MOVE EXIT Edi...

Page 80: ...RAM VR Disc Name Disc Protection Not protected Disc Format Delete All Title Lists Cartridge Protection Info A B C D E a b c d e f g h i j k l m n o p q r s t u z n w x y F G H I J K L M N O P Q R S T U V W X Y Z Back Space Space Delete Clear Save RETURN SELECT MOVE EXIT Rename DVD RAM VR A B C D E a b c d e f g h i j k l m n o p q r s t u z n w x y F G H I J K L M N O P Q R S T U V W X Y Z Back Sp...

Page 81: ...itle Lists Cartridge Protection Info Not Protected Portected Formatting a Disc Use these instructions to format a disc The cartridge write protect tab should be set to the unprotect position The disc protect should also be cleared 1 Press the MENU button with the disc stopped 2 Press the buttons to select Disc Manager and then press the ENTER or button 3 Press the buttons to select Disc Format and...

Page 82: ...elect Yes and then press the ENTER button The disc is formatted DVD VR and DVD V are defined according to their recording format Delete All Title Lists 1 Press the MENU button with the disc stopped DVD VR DVD V Possible Inconvenience Partial editing is possible DVD RAM DVD RW DVD RW DVD R Editing DISC RETURN SELECT MOVE EXIT Title List DVD RAM VR Title List RETURN SELECT MOVE EXIT Disc Manager DVD...

Page 83: ... onto a DVD RW DVD R disc with your DVD recorder it needs to be finalized before it can be played back on external devices 1 Press the MENU button with the disc stopped 2 Press the buttons to select Disc Manager and then press the ENTER or button 3 Press the button to select Disc Finalize and then press the ENTER or button RETURN SELECT MOVE EXIT Title List DVD RAM VR Title List RETURN SELECT MOVE...

Page 84: ...ifference Finalizing time may be different depending on the amount of data recorded on the disc Data on the disc will be damaged if the recorder is powered off during finalize process NOTE Unfinalizing a disc V VR mode 1 Press the MENU button with the disc stopped 2 Press the buttons to select Disc Manager and then press the ENTER or button 3 Press the button to select Disc Unfinalize and then pre...

Page 85: ...e finalized or unfinalized in VR mode NOTE Finalize Unfinalize Mark DVD Video RW DVD RW V Operation Same as DVD Video Additional recording protection and deletion are possible Finalize Unfinalize Mark DVD RW VR F DVD RW VR Additional recording Additional recording Operation deletion editing and deletion editing and protection are impossible protection are possible Editing ...

Page 86: ...on Troubleshooting Troubleshooting 86 Specification 90 Warranty 91 The DVD recorder requires some time to initialize and the input will be displayed for approx 10 seconds after it is turned on Checkpoint 1 Check whether the power cord is securely plugged into the power outlet Did you set the DVD recorder channel settings correctly Check the free space on your DVD RAM DVD RW DVD R discs Checkpoint ...

Page 87: ...lay mode settings are different from the settings configured in the Settings menu The aspect ratio is fixed for DVD discs See page 29 Checkpoint 1 Cannot change the aspect ratio Each press of the Stop button during recording creates a title When the REC PAUSE button is pressed the paused state is kept When the REC Pause button is pressed again during REC pause the title under pause will be kept re...

Page 88: ...k the connections and settings Check whether the disc is damaged Clean the disc if necessary Check whether the disc is inserted correctly with the label facing up Checkpoint 1 No audio output Check whether you have selected the correct digital output options in the Audio Output Options menu See page 28 Check whether there is damage to or any foreign material on your disc Some low quality discs may...

Page 89: ...esn t work A recorded disc is played with only the subtitle and the audio signal which were selected during recording Checkpoint 1 Is it possible to change a subtitle and an audio signal on a recorded disc Other Press the and buttons on your DVD recorder simultaneously when the power is on All settings including the password will revert to the factory settings Do not use this unless absolutely nec...

Page 90: ...jack Regular TV broadcasting VHF 2 13 UHF 14 69 Cable TV broadcasting 1 125 Analog output jacks 1 2 Optical Coaxial digital audio output Full scale Analog output level 2Vrms Video output jack 1 S Video output 1 Y 1 0Vp p C 0 286Vp p at 75Ω load Component output 1 Y 1 0Vp p Pb 0 70Vp p Pr 0 70Vp p at 75Ω load MPEG II Dolby Digital 2ch 256kbps XP about 8 Mbps SP about 4 Mbps LP about 2 Mbps EP about...

Page 91: ...st be presented to the authorized service center at the time service is requested This warranty does not cover damage due to accident fire flood and or other acts of God misuse incorrect line volt age improper installation improper or unauthorized repairs commercial use or damage that occurs in shipping Exterior and interior finish lamps glass are not covered under this warranty Customer adjustmen...

Reviews: