7
No. Name
Info
Category
No.
Name
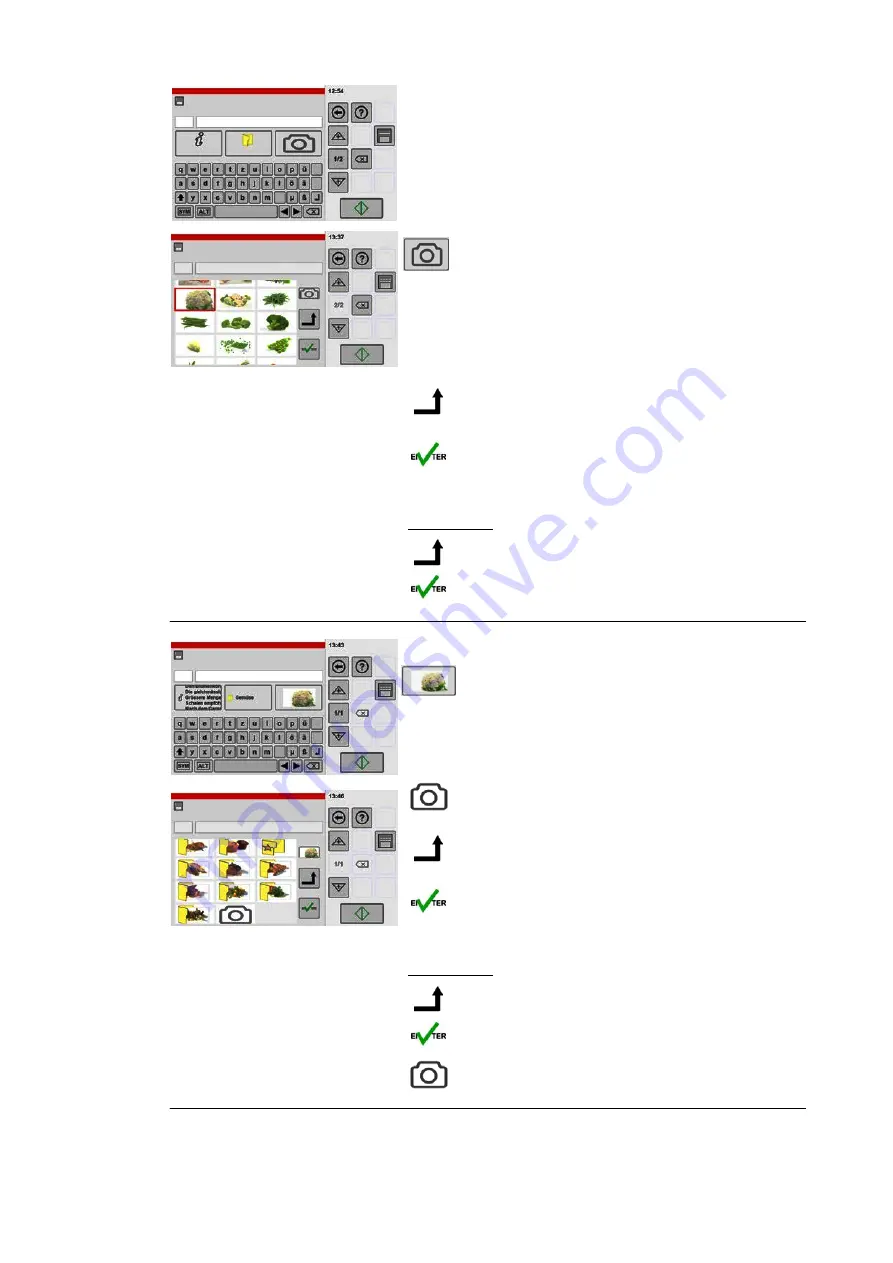
Adding an image
Images for meals have been created as factory
defaults.
If you would like to use your own images, you must
first import them into appliance storage.
For instructions about importing digital photos, see
page 55 , figure 17
.
Tap the "Camera" key.
● An overview of the images stored in the system is
shown.
.
Scroll the display as necessary.
.
Tap the image you want.
● The image is shown with a border.
.
Tap the "Add" key.
● The image is shown above the add key.
.
Tap the "Enter" key.
● The image is now assigned and the "Product en
try" window is shown.
Key legend:
Add the selected image.
Confirm
8
No.
Name
No.
Name
Removing an image
.
Tap the key with the image to be deleted.
● An overview of the images stored in the system is
shown.
.
Scroll up the images shown until the "Camera"
icon is shown at the end.
.
Tap the "Camera" key.
● A border is shown around the camera.
.
Tap the "Add" key.
● The image is displayed above the add key.
.
Tap the "Enter" key.
● The image is now assigned and the "Product en
try" window is shown.
Key legend:
Add the selected image.
Confirm
Remove the image and assign the symbol.
Summary of Contents for VitalityEVO-Easy
Page 79: ...79 80 ...


