35
Tel: 886.909 602 109 Email: [email protected]
5.7.2.
Move marker
1) Use the above “Turn on a Marker” method to select the marker to be moved, making it the currently activated marker;
2) Input the marker frequency value (or distance value) directly via numeric keys, press the appropriate units menu to complete
marker movement; or to move the marker by turning the knob or press
【
↑
】
and
【
↓
】
keys; it can also press and hold the trace marker
and then drag to move the marker after the marker turns red (only available when dragging mode is on).
5.7.3.
Marker peak and valley
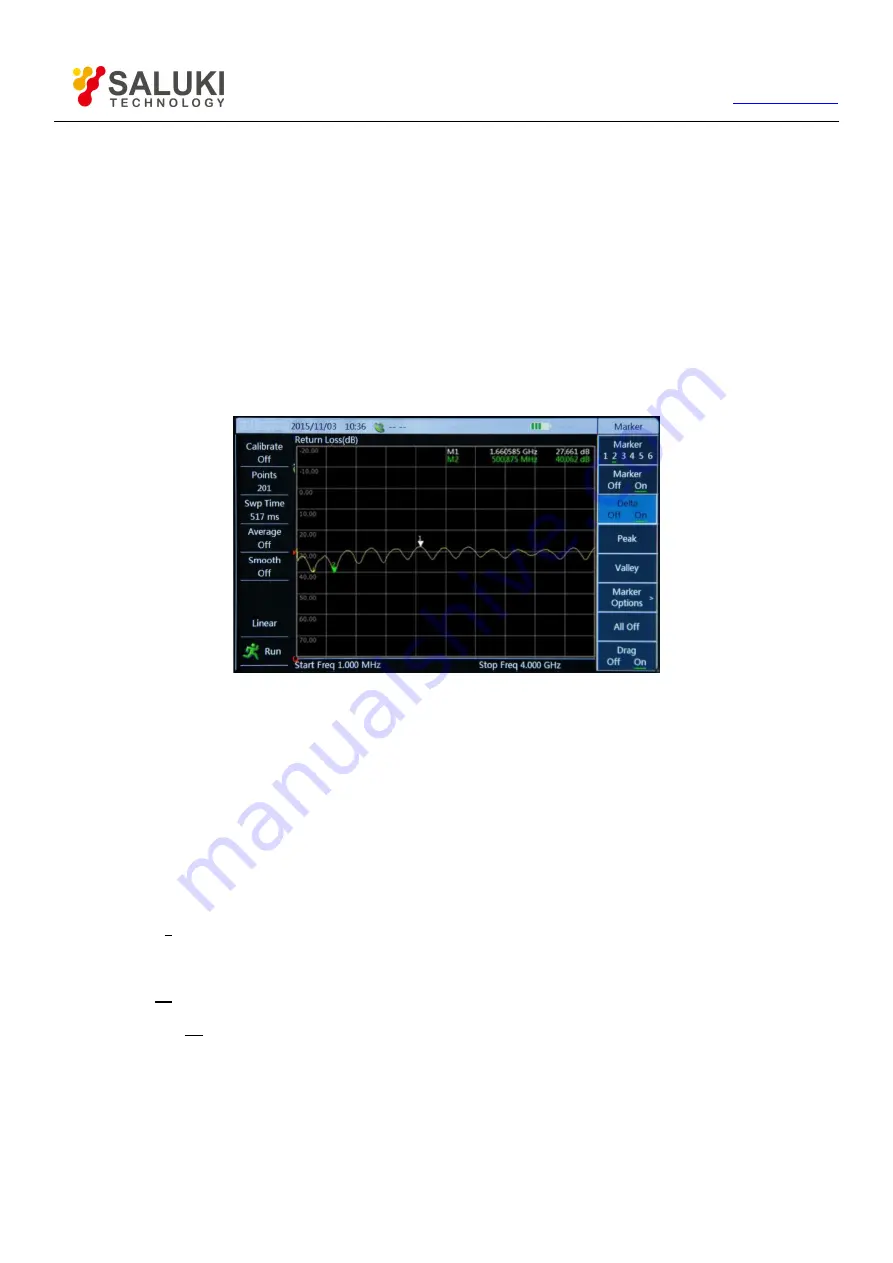
1) After opening the marker, click [Peak] or [Valley] menu, it can search for a peak or valley on this measured trace.
2) Click [Marker Options] to enter quick marker menu bar, and by clicking on the appropriate quick marker menu, it can search for a
peak or valley between the two markers range, or quickly set M1 to peak and M2 to valley, as shown in below figure:
Figure 5-13 Peak & Valley Search
5.7.4.
Marker mode
The Analyzer provides two marker modes - Standard Mode and Delta Mode. Click [Delta Off On] menu to switch between them.
Under standard mode, marker shows the frequency and amplitude value of data points, being the default mode of Analyzer marker;
under delta mode, it displays the differential between the current marker and standard marker as well as frequency (or distance).
5.7.5.
Basic marker operation
1) Press
【
Marker
】
key to enter marker menu bar, and then it opens Marker 1 by default;
2) Click [Marker 1 2 3 4 5 6] menu to select the marker number, it can activate the corresponding marker;
3) Click [Peak] or [Valley] menu to execute marker peak or valley search function;
4) Click [Delta Off On] menu to switch marker mode;
5) Click [Marker Off On] menu to close the currently active marker;
6) Click [All Off] menu to close all open markers in the current active window
Marker function is as shown in Figure 5-14:


