20
May 2013
IMO_294_EN_v0
Roto E-Tec DoorDrive
Subject to change.
Installation
Installation steps
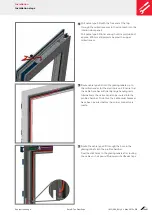
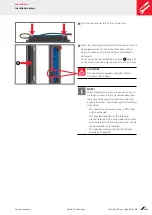
Elongated
hole 1
Elongated
hole 1
Elongated
hole 2
Elongated
hole 2
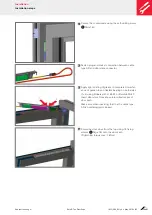
4.
Route cable type S through the specified elongated
hole 1 into the glazing rebate and then through
elongated hole 2 back into the profile chamber.
Seal the drill holes after connecting the electronic
unit using vapour diffusion-proof adhesive tape.
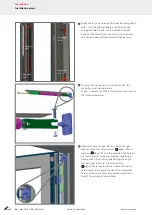
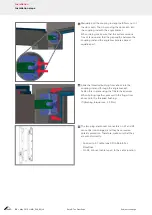
5.
To install the door drive into the door sash, the
assembly must be separated.
To do so, release the fillister head screw and remove
the threaded bushing.
6.
Open door sash to max. 90° and bolt the angle
bracket using four Allen screws (
30
Page 18) and
washers (
40
Page
18) into the specified drill holes in
the frame profile to the counterplate (tightening
torque max. 3 Nm). When positioning the angle
bracket make sure that the Allen screws
(
30
Page 18) are located in the centre of the elon-
gated holes of the angle bracket. The elongated
holes can be used for making positioning correc-
tions if the door sash should sag.
Summary of Contents for E-Tec DoorDrive
Page 51: ......


