


Galaxy A16F-R2422 Installation and Hardware Reference Manual
Subsystem Maintenance
5-22
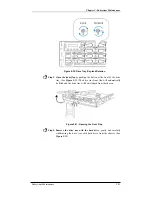
Figure 5-32: Removing a Drive Tray
Step 5.
Remove the four (4) retention screws
located on the sides of the
drive tray (two on each side.) (See
Figure 5-33
)
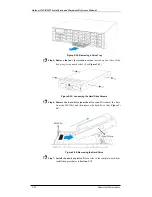
Figure 5-33: Loosening the Hard Drive Screws
Step 6.
Remove the hard drive from the drive tray.
Disconnect the drive
from the MUX kit, and then remove the hard drive. (See
Figure 5-
34
)
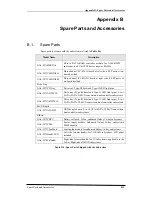
Figure 5-34: Removing the Hard Drive
Step 7.
Install the new hard drive.
Please refer to the complete hard drive
installation procedures in
Section 2.7.3.


