19
(3)
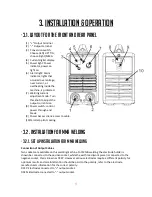
Set the welding current relevant to the electrode type and size being used as
recommended by the electrode manufacturer.
(4)
Place the electrode into the electrode holder and clamp tight.
(5)
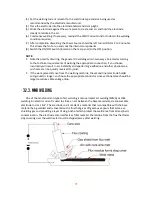
Strike the electrode against the work piece to create and arc and hold the electrode
steady to maintain the arc.
(6)
Commence welding. If necessary, readjust the Weld Current control to obtain the welding
condition required.
(7)
After completion of welding the Power Source should be left turned ON for 2 to 3 minutes.
This allows the fan to run and cool the internal components.
(8)
Switch the ON/OFF Switch (located on the rear panel) to the OFF position.
NOTE:
Note the polarity of wiring, the general DC welding wire in two ways. Selected according
to the technical requirements of welding the appropriate connection, if you choose
incorrectly will result in arc instability and spatter large adhesion and other phenomena,
such cases can be quickly reversed to joints.
If the work piece distance from the welding machine, the second line (electrode holder
and ground) is longer, so choose the appropriate conductor cross-sectional area should be
larger to reduce cable voltage drop.
•
3.2.3. MMA Welding
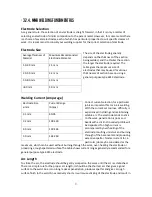
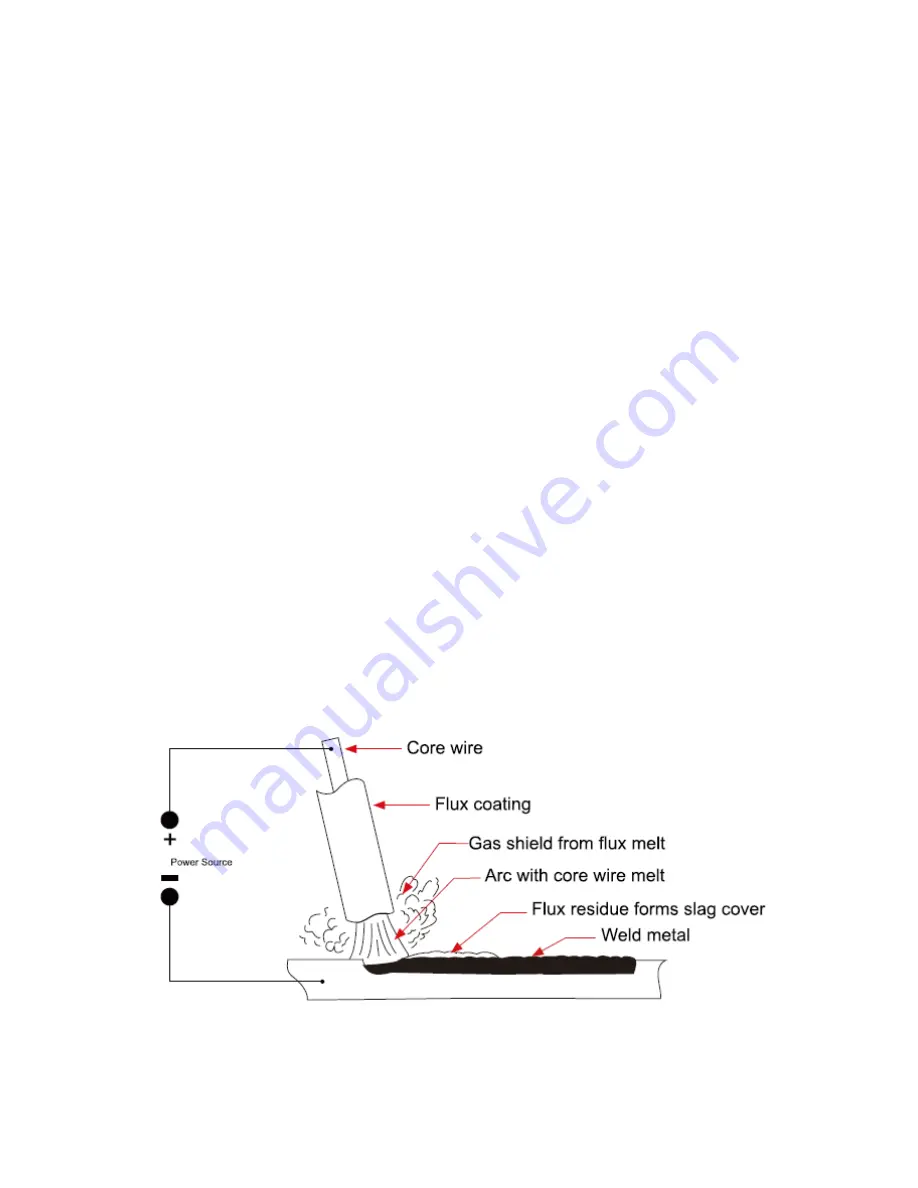
One of the most common types of arc welding is manual metal arc welding (MMA) or stick
welding. An electric current is used to strike an arc between the base material and a consumable
electrode rod or ‘stick’. The electrode rod is made of a material that is compatible with the base
material being welded and is covered with a flux that gives off gaseous vapours that serve as a
shielding gas and providing a layer of slag, both of which protect the weld area from atmospheric
contamination. The electrode core itself acts as filler material the residue from the flux that forms
slag covering over the weld metal must be chipped away after welding.

