24
•
3.3. Installation & Operation for TIG Welding
•
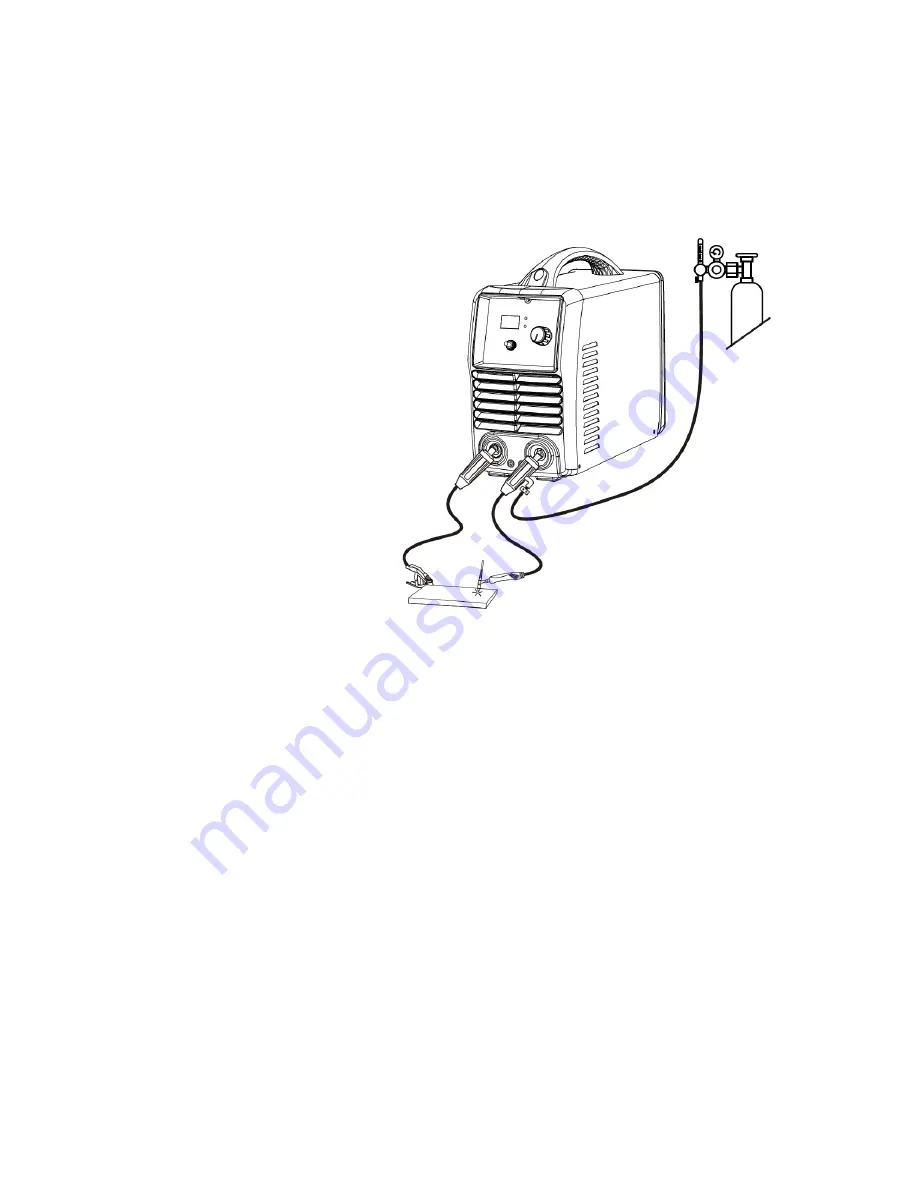
3.3.1. Set up installation for TIG Welding
(1)
Switch the ON/OFF Switch
(located on the rear panel)
to OFF.
(2)
Connect the earth lead to
“+”,
tighten clockwise;
(3)
Connect the TIG torch
cable to “-“, tighten
clockwise;
(4)
Using a secured Argon
cylinder, slowly crack open
then close the cylinder
valve while standing off to
the side of the valve. This
will remove any debris that
may be around the valve &
regulator seat area;
(5)
Install the regulator and
tighten with a wrench;
(6)
Connect the gas hose to
the outlet of the Argon
regulator, and tighten with a wrench;
(7)
Be sure the gas valve on the torch is closed, and slowly open the Argon Cylinder Valve to
the fully open position;
(8)
Connect the ground clamp to your work piece; Contact with the work piece must be firm
contact with clean, bare metal, with no corrosion, paint or scale at the contact point.
(9)
Plug the power cable into the appropriate outlet.
NOTE:
When TIG operation, the shielded gas is inputted to welding gun directly.
Secure the gas cylinder in an upright position by chaining them to a stationary support to
prevent falling or tipping.
•
3.3.2. Operation for TIG Welding
(1)
According to the above method to install is correct, turn the power switch to the “ON”
position, the power L.E.D. light should illuminate, the fan comes on, the device work
properly.
(2)
Select the LIFT TIG function with the LIFT TIG/MMA selector switch.
(3)
Set the weld current control knob to the desired amperage.

