Recording
VIMA JM-8
r
37
5.
Recording your performance as audio data
Your JM-8 allows you to record everything it can transmit to its outputs, i.e. song playback, your playing, your singing,
the harmonies created by the harmony effect (see p. 30) and any audio signal transmitted to the JM-8. (The metronome
signal is not recorded.)
Feel free to connect the master outputs of an external
mixing console to the JM-8’s AUDIO IN sockets if you
want to record your band or the signals of additional
synthesizers, pianos, drum machines, etc., as well.
The resulting audio file is stored in the WAV format (not
mp3), which allows you to burn your recordings onto a
CD.
Recording
Note:
The following is based on the assumption that the
“Audio Recorder Sync” parameter (see p. 85) is active.
(1) Prepare everything you want to record:
Select the song file you want to use as accompani-
ment, connect the microphone(s) and/or instru-
ment(s), set the levels and effects, etc.
(2) Make the following settings (recommended):
The “11 o’clock” position corresponds to the follow-
ing setting:
(3) Start playback of the song you want to use as
backing and sing into the microphone.
If the output signal of your recording distorts when
you listen to it at a later stage, set the above knobs
and parameter to slightly lower levels until the dis-
tortion disappears.
Alternatively, you can activate the “Audio Recorder
Attenuation” parameter on page 85.
(4) Press the [
ª
] button.
(5) Press the [REC] button (it flashes).
Note:
If you pressed [REC] by accident, simply press the [
ª
]
button to leave record standby mode.
(6) Press the [
®÷
π
] button.
The [REC] and [
®÷
π
] buttons light and the JM-8 starts
playing back the selected song and recording. Every-
thing you say, sing (into a connected microphone) or
play (on a connected instrument) is recorded.
(7) At the end of the song, press the [REC] or [
ª
] but-
ton to stop recording.
Song playback and recording stop.
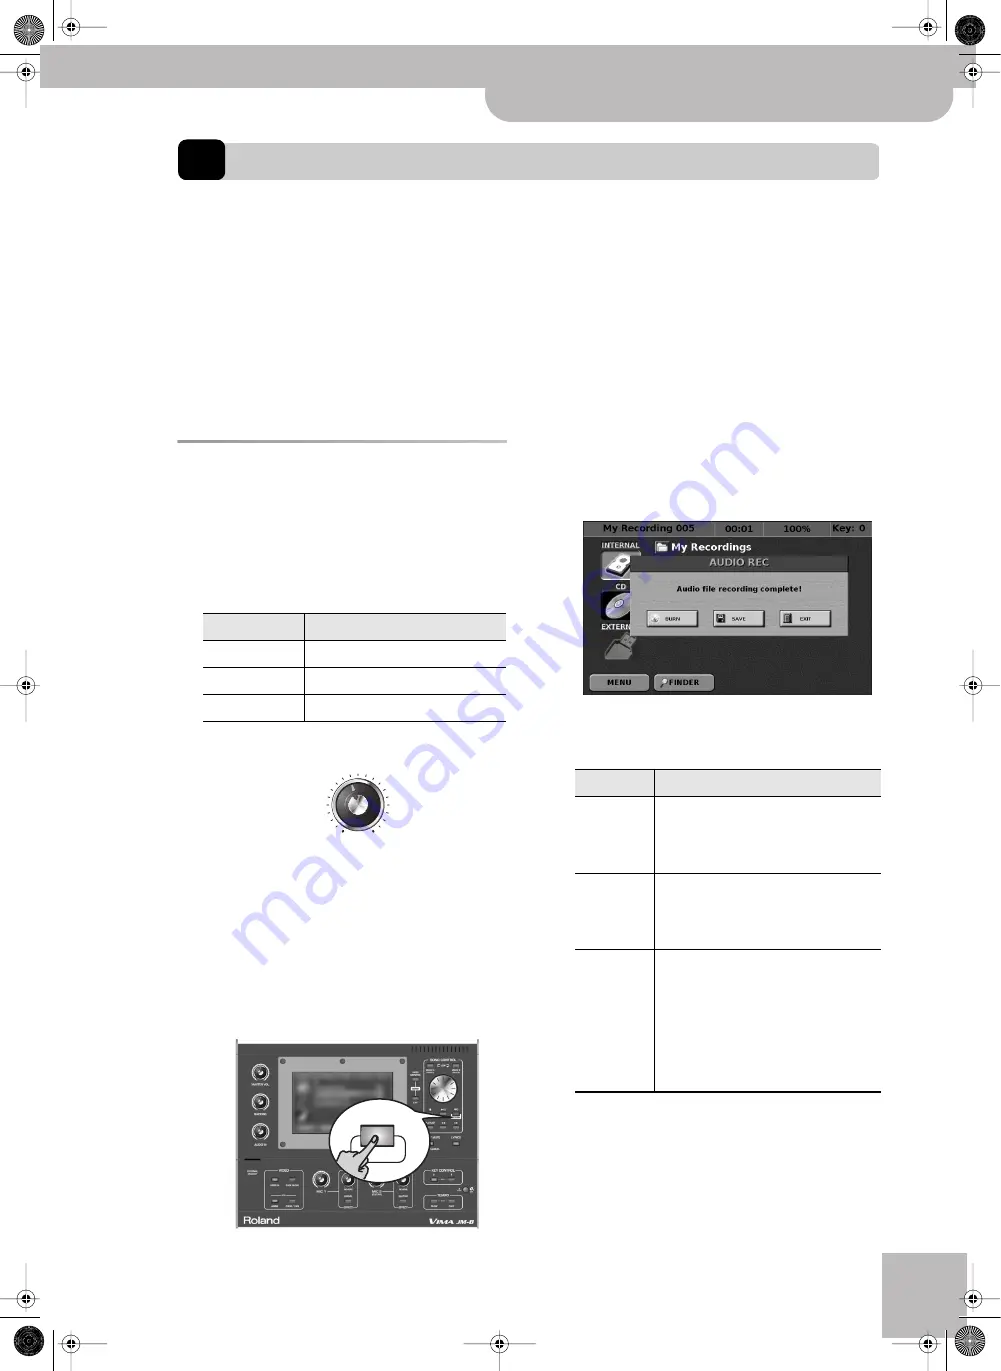
The JM-8 now processes the audio data it has just
recorded and the following message appears:
Note:
If you forgot to insert a CD-R/RW, the
[BURN]
dis-
play button is grayed out and therefore not available.
Here, you can decide the following:
Note:
If you want to record a new version, press the
[EXIT]
display button, then select the original song (see step (1))
again. In step (7), the JM-8 automatically selects the WAV
file you have just recorded, allowing you to listen to it.
Note:
The JM-8 provides a second recording mode that
allows you to start recording before the song you selected.
See “Audio Recorder Sync” on p. 85.
Knob/parameter
Details
BACKING
Set it to “11 o’clock”
MIC 1 (or MIC 2)
Set it to “11 o’clock”
VOCAL EFX LEVEL
REC
CD BURN
Option
Meaning
BURN
Write your recording to a CD-R/RW, which
can then be used as a regular audio CD.
See “Burning your recording to CD” on
p. 38 for the procedure.
SAVE
Save your recording to the “My Record-
ings” folder on the internal hard disk. See
“Saving your recording as an audio file” on
p. 38.
EXIT
Leave the recorded data in the “My
Recordings” folder. It will be called
“My_Recording_001” (with a different
progressive number if the folder already
contains recordings). You can rename the
file and move it to a different storage
device or folder if you like (see “Rename”
on p. 75).
JM-8_OM_GB.book Page 37 Wednesday, July 29, 2009 4:43 PM
Summary of Contents for VIMA JM-8
Page 1: ...r Owner s Manual JM 8_OM_GB book Page 1 Wednesday July 29 2009 4 43 PM ...
Page 174: ...174 rVIMA JM 8 JM 8_OM_GB book Page 174 Wednesday July 29 2009 4 43 PM ...
Page 175: ...For EU Countries For China For China JM 8_OM_GB book Page 175 Wednesday July 29 2009 4 43 PM ...
Page 176: ...R 602 00 0323 01 RES 736 09 JM 8 OM E JM 8 Cov 3 4 GB Page 176 Thursday July 30 2009 10 30 AM ...


