Before you start using the JM-8
16
r
VIMA JM-8
This can be remedied by:
• Changing the orientation of the microphone(s).
• Relocating microphone(s) at a greater distance from
speakers.
• Lowering volume levels.
Connecting an amplifier, active speakers or a
mixer
• Before connecting the JM-8 to an amplification sys-
tem, be sure to switch off both the JM-8 and the
external device.
• Connect the JM-8’s AUDIO OUTPUT sockets to the
line input(s) of your amplifier or mixer.
• After establishing the connections, first switch on the
JM-8, then the amplifier or mixer. See “Turning the
power on/off” on p. 18 for details.
Connecting an external display or a
television
Note:
You can’t use the VIDEO jack and RGB connector at the
same time.
Connecting a television
Note:
Before you make connections to other devices, you
must turn down the volume of all devices and turn off
their power to prevent malfunctions or damage to your
speakers.
(1) Switch off the JM-8 and the television you’ll be
connecting.
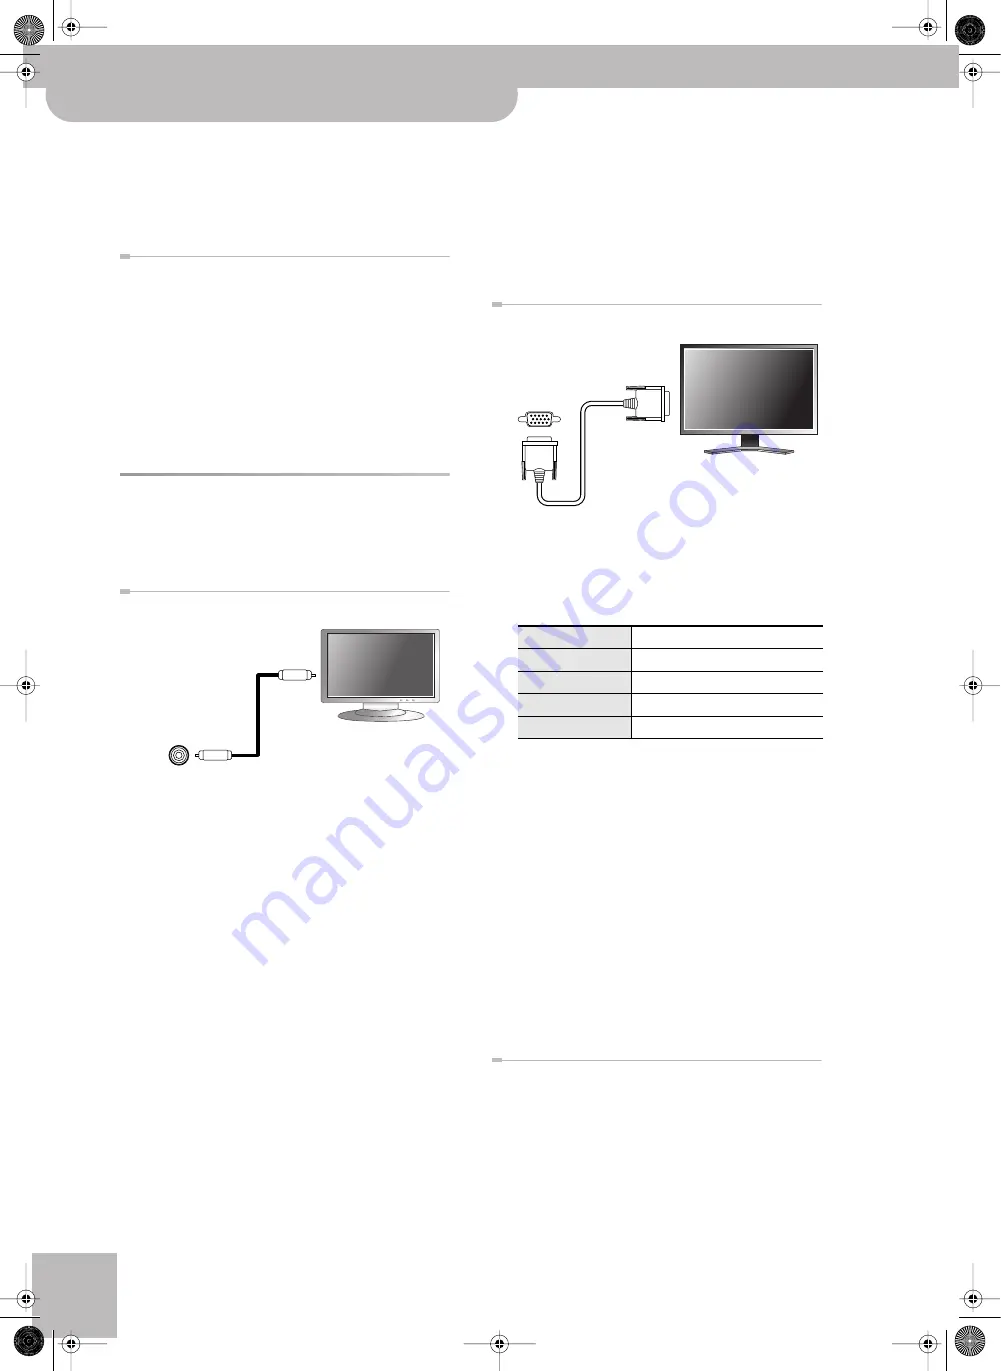
(2) Connect the JM-8 to your television, use a video
cable (commercially available) to connect the
JM-8’s OUTPUT VIDEO jack to the television.
(3) Switch on the JM-8 (see p. 18).
(4) Switch on your television.
(5) Activate the VIDEO OUTPUT
[VIDEO]
display button
(6) (As necessary) Specify the television output format
(7) Specify the aspect ratio (ratio between width and
height) for your television.
• The aspect ratio is the proportional relationship
between the width and height of the screen. The
JM-8’s screen has an aspect ratio of 16:9. Televisions
can have an aspect ratio of either 4:3 or 16:9 (wide
screen).
■
If your television has both a video jack and an
RGB connector
The JM-8’s provides both a VIDEO and an RGB con-
nector. You may use either of these, depending on
the type of connector provided on your television.
We recommend that you use the RGB connection,
because it will provide a higher-quality picture than
the VIDEO connector.
Connecting an external display
■
Types of displays that can be connected
In general, you can connect any display that is sold as
a “multiscan monitor”. However, to be certain, please
check the following specifications before you con-
nect your display.
Note:
Before you make connections to other devices, you
must turn down the volume of all devices and turn off the
power to prevent malfunctions or damage to your speak-
ers.
(8) Switch off the JM-8 and the display you’ll be con-
necting.
(9) Use a commercially available monitor cable to con-
nect the JM-8’s RGB connector to the analog RGB
connector of your display.
(10) Switch on the JM-8 (page 18).
(11) Switch on the connected display.
For details on how to use your external display, refer
to the owner’s manual for your display.
(12) Press the VIDEO OUTPUT
[RGB]
Switching off your television or external display
You must turn off the power of the television or
external display in the following order.
• Minimize the volume of the JM-8.
• Switch off the connected television or external dis-
play.
• Switch off the JM-8 (see p. 19).
Video cable
(Commercially available)
(Rear panel)
VIDEO jack
Television
Resolution
800 x 480 pixels or more
Horizontal scan rate
31.5 kHz
Vertical scan rate
60 Hz
Connector
Three-row 15-pin D-sub type
Signal
Analog
Video cable
(Commercially available)
(Rear panel)
External display
JM-8_OM_GB.book Page 16 Wednesday, July 29, 2009 4:43 PM
Summary of Contents for VIMA JM-8
Page 1: ...r Owner s Manual JM 8_OM_GB book Page 1 Wednesday July 29 2009 4 43 PM ...
Page 174: ...174 rVIMA JM 8 JM 8_OM_GB book Page 174 Wednesday July 29 2009 4 43 PM ...
Page 175: ...For EU Countries For China For China JM 8_OM_GB book Page 175 Wednesday July 29 2009 4 43 PM ...
Page 176: ...R 602 00 0323 01 RES 736 09 JM 8 OM E JM 8 Cov 3 4 GB Page 176 Thursday July 30 2009 10 30 AM ...


