


34.
In the Session key settings, select "Generate a new key every", and enter the same
validity period (in [Seconds] or [Kbytes]) as that specified for [Life Time] on the machine.
35.
Click [OK], and then click [Next].
36.
Click [Finish].
If you are using IPv6, you must repeat this procedure from Step 12 and specify ICMPv6 as an
exception. When you reach Step 22, select [58] as the protocol number for the "Other" target
protocol type, and then set [Negotiate security] to [Permit].
37.
Select the filter action that you have just created, and then click [Next].
38.
Select one of options for an authentication method, and then click [Next].
39.
Click [Finish], and then click [OK] twice.
The new IP security policy (IPsec settings) is specified.
40.
Click [IP Security Policies on Local Computer].
41.
Select the security policy that you have just created, right click on it, and then click
[Assign].
IPsec settings on the computer are enabled.
• To disable the computer's IPsec settings, select the security policy, right click, and then click [Un-
assign].
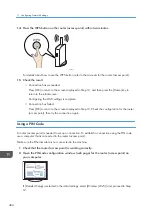
Enabling and Disabling IPsec Using the Control Panel
• This function is available only when an administrator password is specified.
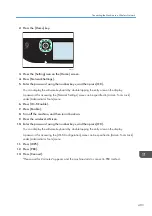
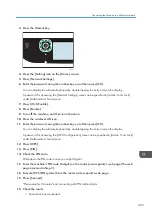
1.
Press the [Setting] icon on the [Home] screen.
2.
Press [Administrator Tools].
3.
Enter the password using the number keys, and then press [OK].
You can display the software keyboard by double tapping the entry area on the display.
A password for accessing the [Network Settings] menu can be specified in [Admin. Tools Lock]
under [Administrator Tools] menu.
4.
Press [IPSec].
5.
Press [Active] or [Inactive].
• A password for accessing the [Administrator Tools] menu can be specified in [Admin. Tools Lock].
For details about [Admin. Tools Lock], see page 251 "Administrator Tools Settings".
• You can press [Exit] to exit to the previous level of the menu tree.
12. Appendix
412
Summary of Contents for M C251FW
Page 2: ......
Page 23: ...3 2 1 ECC105 Interior ECC106 4 3 2 1 Guide to Components 21 ...
Page 45: ...Deleting characters 1 Press to delete characters Entering Characters 43 ...
Page 48: ...1 Guide to the Machine 46 ...
Page 82: ...2 Paper Specifications and Adding Paper 80 ...
Page 100: ...3 Printing Documents 98 ...
Page 124: ...4 Copying Originals 122 ...
Page 170: ...5 Scanning Originals 168 ...
Page 216: ...6 Sending and Receiving a Fax 214 ...
Page 270: ...7 Configuring the Machine Using the Control Panel 268 ...
Page 346: ...6 Close the ADF cover 9 Maintaining the Machine 344 ...
Page 360: ...Main unit DUE292 1 3 2 1 DUE288 2 DUE289 10 Troubleshooting 358 ...
Page 361: ...3 DUE290 Waste toner bottle ECC168 Paper feed unit DUE320 1 Removing Paper Jams 359 ...
Page 440: ...12 Appendix 438 ...
Page 445: ...MEMO 443 ...
Page 446: ...MEMO 444 EN GB EN US EN AU M0EQ 8504A ...
Page 447: ......
Page 448: ...EN GB EN US EN AU M0EQ 8504A 2021 2022 Ricoh Co Ltd ...


