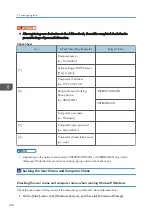

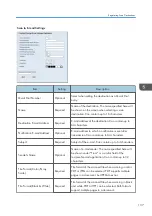


• Depending on the operating system or security settings, you might be able to specify a user name
that does not have a password assigned. However, we recommend that you select a user name
that has a password.
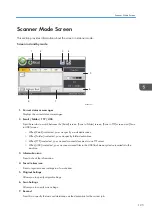
• To check the IP address on the Apple menu, click [System Preferences...], and then click [Network]
on the System Preferences window. Then click [Ethernet] or [Wi-Fi]. The address displayed in the IP
address field is the IP address of the computer.
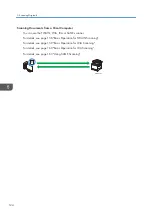
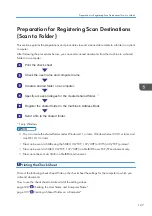
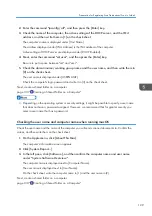
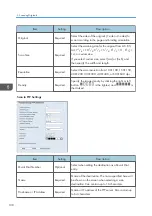
Creating a Shared Folder on a Computer
Creating a shared folder on a computer running Microsoft Windows
Create a shared destination folder in Windows and enable sharing. In the following procedure, a
computer which is running under Windows 10 Pro and participating in a domain is used as an example.
• You must log in as an Administrators group member to create a shared folder.
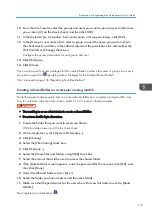
• If "Everyone" is left selected in Step 6, the created shared folder will be accessible by all users. This
is a security risk, so we recommend that you give access rights only to specific users. Use the
following procedure to remove "Everyone" and specify user access rights.
• Do not use double-byte characters.
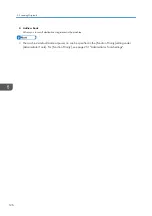
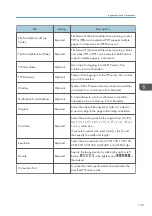
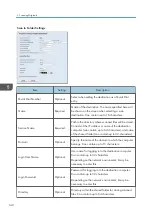
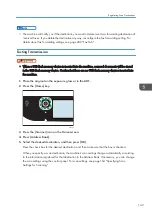
1.
Create a folder, just as you would create a normal folder, in a location of your choice on
the computer. Write the folder name in [4] on the check sheet.
2.
Right-click the folder, and then click [Properties].
3.
On the [Sharing] tab, select [Advanced Sharing...].
4.
Select the [Share this folder] check box.
5.
Click [Permissions].
6.
In the [Group or user names:] list, select "Everyone", and then click [Remove].
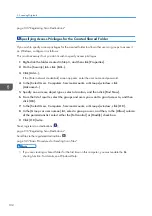
7.
Click [Add...].
If the [Enter network credentials] screen appears, enter the user name and password.
In the [Select Users or Groups] window, add groups or users to whom you want to grant access. In
the following procedure, the procedure to give access privileges to users that you wrote on the
check sheet is used as an example.
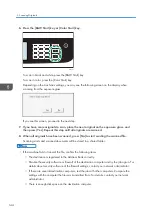
8.
In the [Select Users, Computers, Service Accounts, or Groups] window, click
[Advanced...].
9.
Specify one or more object types, select a location, and then click [Find Now].
5. Scanning Originals
130
Summary of Contents for M C251FW
Page 2: ......
Page 23: ...3 2 1 ECC105 Interior ECC106 4 3 2 1 Guide to Components 21 ...
Page 45: ...Deleting characters 1 Press to delete characters Entering Characters 43 ...
Page 48: ...1 Guide to the Machine 46 ...
Page 82: ...2 Paper Specifications and Adding Paper 80 ...
Page 100: ...3 Printing Documents 98 ...
Page 124: ...4 Copying Originals 122 ...
Page 170: ...5 Scanning Originals 168 ...
Page 216: ...6 Sending and Receiving a Fax 214 ...
Page 270: ...7 Configuring the Machine Using the Control Panel 268 ...
Page 346: ...6 Close the ADF cover 9 Maintaining the Machine 344 ...
Page 360: ...Main unit DUE292 1 3 2 1 DUE288 2 DUE289 10 Troubleshooting 358 ...
Page 361: ...3 DUE290 Waste toner bottle ECC168 Paper feed unit DUE320 1 Removing Paper Jams 359 ...
Page 440: ...12 Appendix 438 ...
Page 445: ...MEMO 443 ...
Page 446: ...MEMO 444 EN GB EN US EN AU M0EQ 8504A ...
Page 447: ......
Page 448: ...EN GB EN US EN AU M0EQ 8504A 2021 2022 Ricoh Co Ltd ...