

• Certificates issued by certification authorities.
You can install only one certificate on the machine.
If you execute [Create New Self-Signed Certificate], [Create Certificate Request], [Install Certificate], or
[Import Certificate and Private Key], the existing certificate on the machine is deleted.
Follow the procedure below to set items:
1. Check the item you want to set.
2. Enter the password.
3. Click [Next].
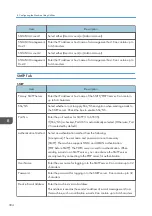
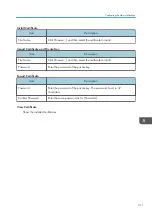
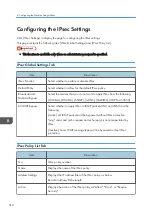
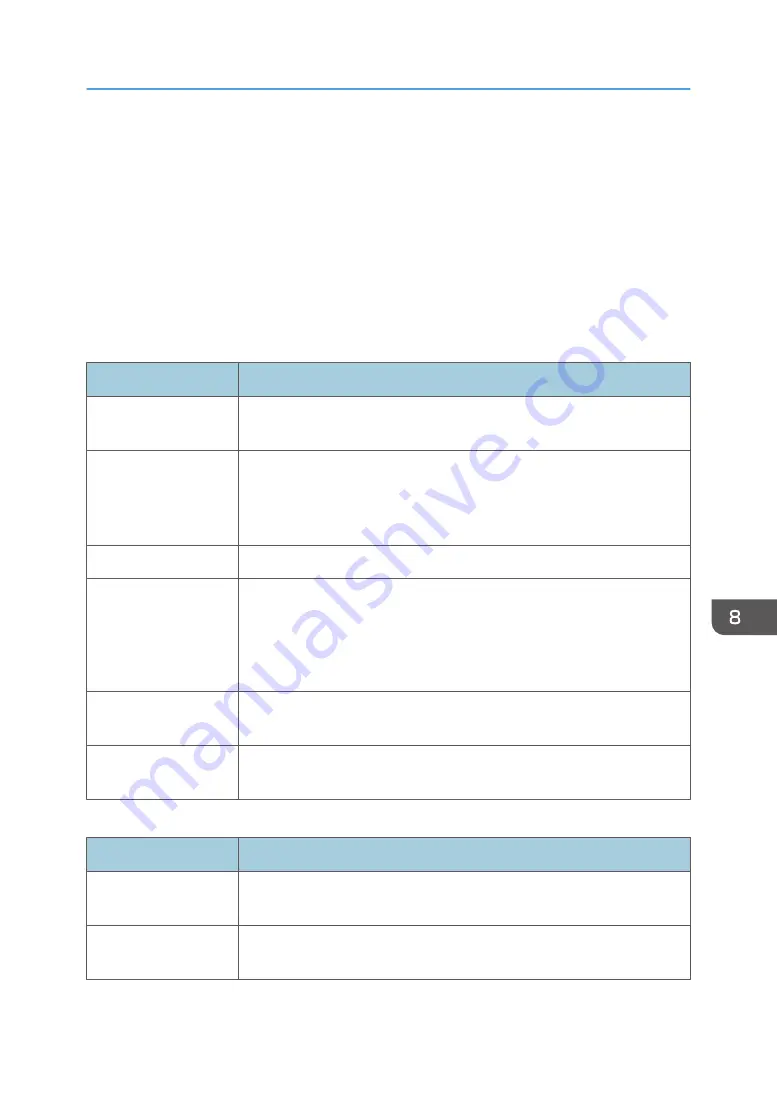
Certificate
Item
Description
Create New Self-
Signed Certificate
Select this item to create a new self-signed certificate.
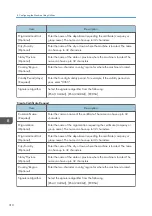
Create Certificate
Request
Select this item to request the certification authority to issue a new
certificate. You can submit a certificate created using this setting to the
certificate authority. Note that you cannot submit a certificate to the
certification authority directly via Web Image Monitor.
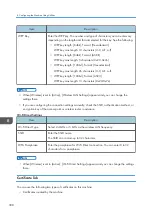
Install Certificate
Select this item to install the certificate issued by the certification authority.
Import Certificate and
Private Key
Select this item to install the certificate created by the machine.
You can use certificates that are in the following formats:
• PEM
• PKCS12
Export Certificate
Select this item to back-up the certificate installed on the machine. The
certificate is exported in PKCS12 format.
View Certificate
Select this item to check details about the certificate that is installed on the
machine.
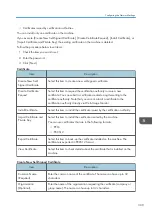
Create New Self-Signed Certificate
Item
Description
Common Name
(Required)
Enter the common name of the certificate. The name can have up to 32
characters.
Organization
(Optional)
Enter the name of the organization requesting the certificate (company or
group name). The name can have up to 32 characters.
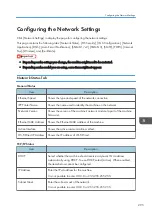
Configuring the Network Settings
309
Summary of Contents for M C251FW
Page 2: ......
Page 23: ...3 2 1 ECC105 Interior ECC106 4 3 2 1 Guide to Components 21 ...
Page 45: ...Deleting characters 1 Press to delete characters Entering Characters 43 ...
Page 48: ...1 Guide to the Machine 46 ...
Page 82: ...2 Paper Specifications and Adding Paper 80 ...
Page 100: ...3 Printing Documents 98 ...
Page 124: ...4 Copying Originals 122 ...
Page 170: ...5 Scanning Originals 168 ...
Page 216: ...6 Sending and Receiving a Fax 214 ...
Page 270: ...7 Configuring the Machine Using the Control Panel 268 ...
Page 346: ...6 Close the ADF cover 9 Maintaining the Machine 344 ...
Page 360: ...Main unit DUE292 1 3 2 1 DUE288 2 DUE289 10 Troubleshooting 358 ...
Page 361: ...3 DUE290 Waste toner bottle ECC168 Paper feed unit DUE320 1 Removing Paper Jams 359 ...
Page 440: ...12 Appendix 438 ...
Page 445: ...MEMO 443 ...
Page 446: ...MEMO 444 EN GB EN US EN AU M0EQ 8504A ...
Page 447: ......
Page 448: ...EN GB EN US EN AU M0EQ 8504A 2021 2022 Ricoh Co Ltd ...


