2. OPTICS
2.1 EXPOSURE GLASS REMOVAL
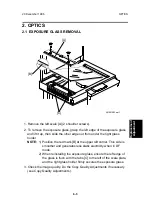
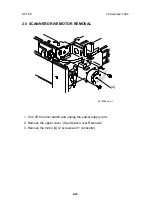
1. Remove the left scale [A] (2 shoulder screws).
2. To remove the exposure glass, grasp the left edge of the exposure glass
and lift it up, then slide the other edge out from under the right glass
holder.
NOTE: 1) Position the red mark [B] at the upper left corner. This side is
smoother and generates less static electricity when in DF
mode.
2) When reinstalling the exposure glass, ensure the left edge of
the glass is flush with the tabs [C] to the left of the scale plate,
and the right glass holder firmly secures the exposure glass.
3. Check the image quality. Do the Copy Quality Adjustments if necessary
(see Copy Quality Adjustments).
[A]
[B]
[C]
A219R502.wmf
Replacement
Adju
stment
20 December 1996
OPTICS
6-5
Summary of Contents for FT 4015
Page 2: ...SECTION 1 OVERALL MACHINE INFORMATION...
Page 14: ...SECTION 2 DETAILED DESCRIPTIONS...
Page 71: ...SECTION 3 INSTALLATION...
Page 90: ...SECTION 4 SERVICE TABLES...
Page 118: ...SECTION 5 PREVENTIVE MAINTENANCE...
Page 126: ...SECTION 6 REPLACEMENT AND ADJUSTMENT...
Page 190: ...SECTION 7 TROUBLESHOOTING...
Page 222: ...SECTION 8 OPTIONS...
Page 223: ...SECTION 9 APPENDIX TIMING CHART...
Page 225: ...COPIER A219 ELECTRICAL COMPONENT LAYOUT 4 2 3 1 5 6 A219S500 wmf...
Page 226: ...10 15 14 13 12 11 9 8 7 18 17 16 A219S501 wmf...
Page 227: ...24 40 23 28 27 26 25 19 20 21 22 29 39 31 32 33 34 35 36 38 37 30 A219S502 wmf...


