• When performing maintenance on the machine, disconnect the power cord from the wall outlet
for safety.
• When moving the machine, make sure to unplug the power cord from the wall outlet and
confirm that line cords and other connecting cables have been removed. Otherwise, the power
cord is damaged, possibly resulting in fire or electric shock.
• Never use a power cord which appears damaged or frayed, or change the plug type on the
power cord.
• Be aware of the power loading when you use extension cords or multiple outlet power boards.
• Do not turn the main power switch off or remove the power cord while power is being supplied to
the machine. Doing so may ruin the flash memory drive or cause other damage.
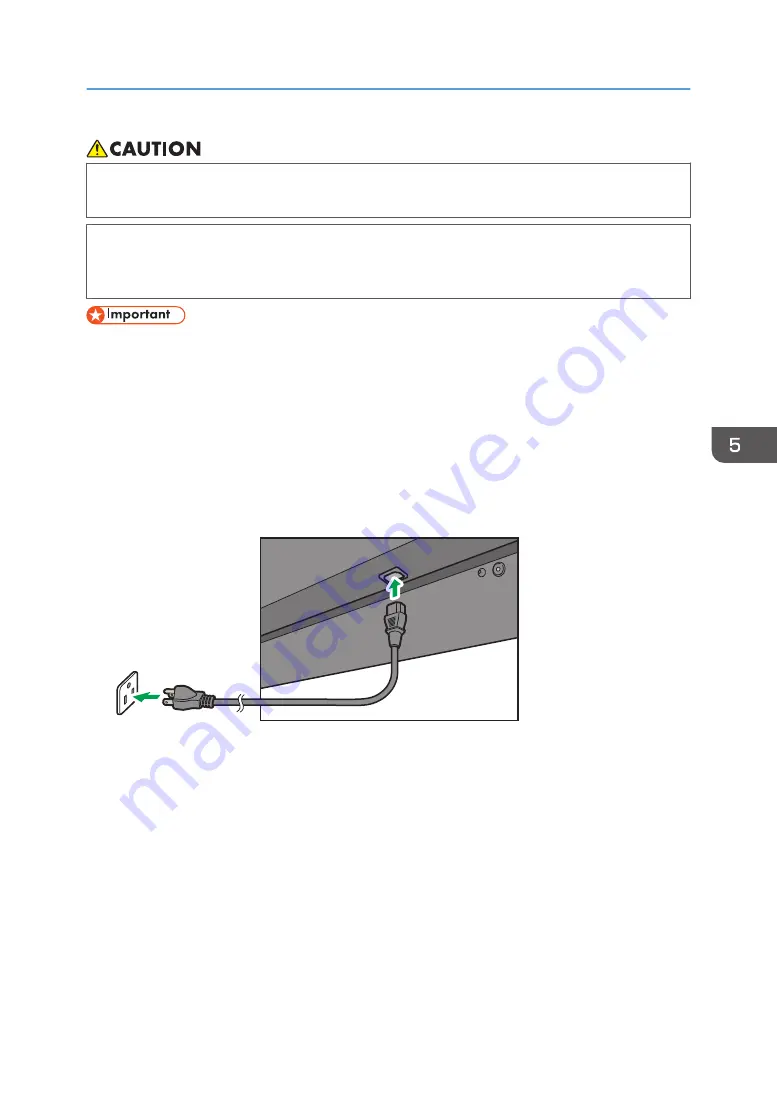
1.
Plug one end of the power cord into the AC In jack on the machine and the other end into
an appropriate power outlet.
If the outlet is switched, turn on the switch.
DYS111
Connecting Power
35
Summary of Contents for D5530
Page 2: ......
Page 4: ...English ...
Page 20: ...1 Safety Information for this Machine 16 ...
Page 26: ...2 Information for This Machine 22 ...
Page 34: ...1 EAK003 2 3 1 50 mm 2 inches or more 2 Back cover 3 Wall 3 Installing the Machine 30 ...
Page 40: ...5 Connection 36 ...
Page 42: ...3 Refit the battery cover 6 Appendix 38 ...
Page 44: ...MEMO 40 ...
Page 46: ...Deutsch ...
Page 62: ...1 Sicherheitshinweise für dieses Gerät 16 ...
Page 68: ...2 Informationen zu diesem Gerät 22 ...
Page 76: ...1 EAK003 2 3 1 Mind 50 mm 2 Hintere Abdeckung 3 Wand 3 Aufstellung des Geräts 30 ...
Page 82: ...5 Verbindung 36 ...
Page 84: ...3 Bringen Sie die Abdeckung wieder am Batteriefach an 6 Anhang 38 ...
Page 86: ...MEMO 40 ...
Page 88: ...Français ...
Page 104: ...1 Consignes de sécurité pour cet appareil 16 ...
Page 110: ...2 Informations sur cet appareil 22 ...
Page 118: ...1 EAK003 2 3 1 50 mm 2 inches ou plus 2 Capot arrière 3 Mur 3 Installation de l appareil 30 ...
Page 124: ...5 Connexion 36 ...
Page 126: ...3 Remettez le couvercle du compartiment des piles en place 6 Annexe 38 ...
Page 128: ...MEMO 40 ...
Page 130: ...Español ...
Page 146: ...1 Información de seguridad sobre esta máquina 16 ...
Page 152: ...2 Información sobre esta máquina 22 ...
Page 162: ...3 Instalación de la máquina 32 ...
Page 168: ...5 Conexión 38 ...
Page 170: ...3 Vuelva a colocar la tapa de las pilas 6 Apéndice 40 ...
Page 172: ...MEMO 42 ...
Page 173: ...MEMO 43 ...
Page 174: ...MEMO 44 ...
Page 176: ...Português Brasil ...
Page 192: ...1 Informações de segurança relativas a este equipamento 16 ...
Page 198: ...2 Informações sobre este equipamento 22 ...
Page 206: ...1 EAK003 2 3 1 50 mm ou mais 2 Tampa traseira 3 Parede 3 Instalar o equipamento 30 ...
Page 212: ...5 Conexão 36 ...
Page 214: ...3 Recoloque a tampa do compartimento de pilhas 6 Apêndice 38 ...
Page 216: ...MEMO 40 Y310 7505A ...
Page 217: ... 2020 2021 Ricoh Co Ltd ...
Page 218: ...Y310 7505A BR PT ES ES FR FR DE DE AU EN GB EN US EN ...


