User’s Manual
36
Appendix
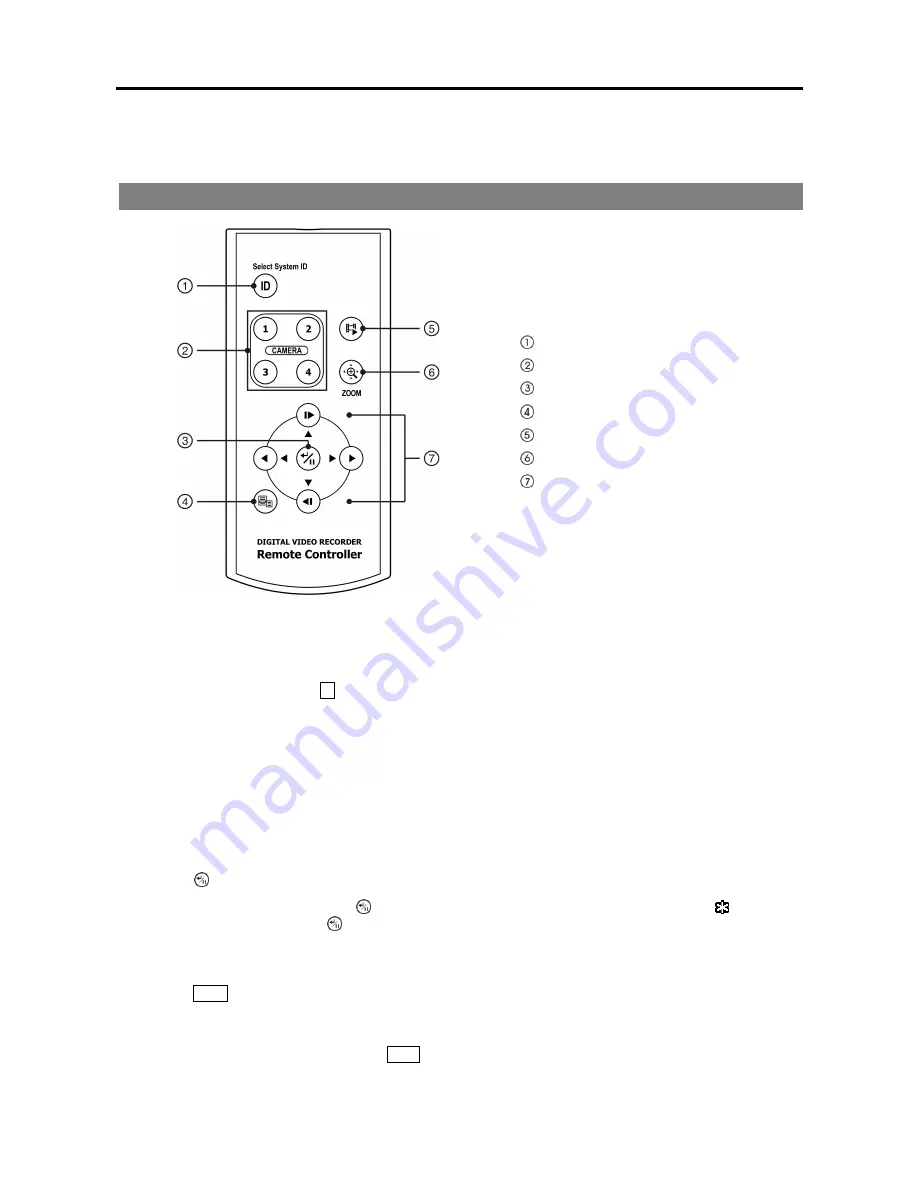
INFRARED REMOTE CONTROL (OPTIONAL)
ID Button
Camera Buttons
Enter/Pause Button
Menu Button
Playback Mode/Clip Copy Button
Zoom Button
Arrow Buttons
ID Button
If a DVR System ID is set to 0, the infrared remote control will control that DVR without any additional operations.
(Refer to the
Information
setup screen in this chapter for further information on setting the System ID.) If the system
ID is 1 to 4, you must to press the
ID
button on the remote control and then press the number button (1 to 4) in order
to control that DVR. If the System ID of two or more DVRs is set to 0, those DVRs will react to the infrared remote
control at the same time.
CAMERA Buttons
Pressing the individual camera buttons will cause the selected camera to display full screen, and pressing the button
again changes the display format to the quad (2x2) mode. Buttons 1 to 4 are also used to enter passwords.
Enter/Pause Button
Pressing the
button selects a highlighted item or completes an entry that you have made during system setup.
In the live monitoring mode, pressing the
button freezes the current screen and the screen displays the icon. When
in the playback mode, pressing the
button pauses playing video.
Menu Button
Pressing the
Menu
button enters the
Setup
screen. You will need to enter the password to access Setup. Pressing the
button again closes the current menu or setup dialog box. In the Playback mode, pressing the button displays the Search
menu.
When in the live mode, pressing and holding the
Menu
button for three seconds or longer displays live channels sequentially.
Summary of Contents for 4 Channel Digital Video Recorder
Page 1: ......
Page 2: ......
Page 6: ...User s Manual iv...
Page 8: ...User s Manual 2...
Page 26: ...User s Manual 20 the latest registered schedule item...
Page 45: ......


