background image

Copyright ©  1998  Rayco - All Rights Reserved

Printed in U.S.A.

71

RG 1672 DXH DIESEL SUPER CUTTER

TM

RAYCO

®

T

ROUBLE

-S

HOOTING

Solution for Faulty Cylinder Piston Seal

The hydraulic cylinder seals should be replaced.

Hydraulic cylinder rebuild kits are available from

RAYCO or your RAYCO dealer.

C.  Problem 

- Over center Valve Dirty or

Misadjusted

Solution

1. Disassemble over - center valve.
2. Clean ball/spring assembly with compressed air

or a clean cloth, and make sure ball seats

without obstruction.

3. Reassemble.
If problem persists, check adjustment.

Symptom

 - Cutting Boom Swings

Sideways Uncontrolled

A. 


Problem 

- Cylinder rod seal

 leaking

If when operated, cylinder loses fluid around rod, rod

seal is leaking.

Solution for Faulty Cylinder Rod Seal

Replace cylinder rod seal, using kit available from

your RAYCO distributor.

B.


Problem 

- Cylinder piston seals

 leaking

To determine if cylinder piston seals are leaking,

perform a hydraulic pressure check of the cylin-

ders circuit. (Refer to chart on preceding page.)

Solution for Faulty Cylinder Piston Seal

The hydraulic cylinder seals should be replaced.

Hydraulic cylinder rebuild kits are available from

RAYCO or your RAYCO dealer.

C.  Problem 

- Dual Pilot Check Valve Dirty

Solution

1. Using a screwdriver and a 7/8" hex socket,

remove ball/spring assembly on side (of  dual

pilot check valve) that exhausts whenever

symptom appears.

2. Clean ball/spring assembly with compressed air

or a clean cloth, and make sure ball seats

without obstruction.

3. Reassemble.

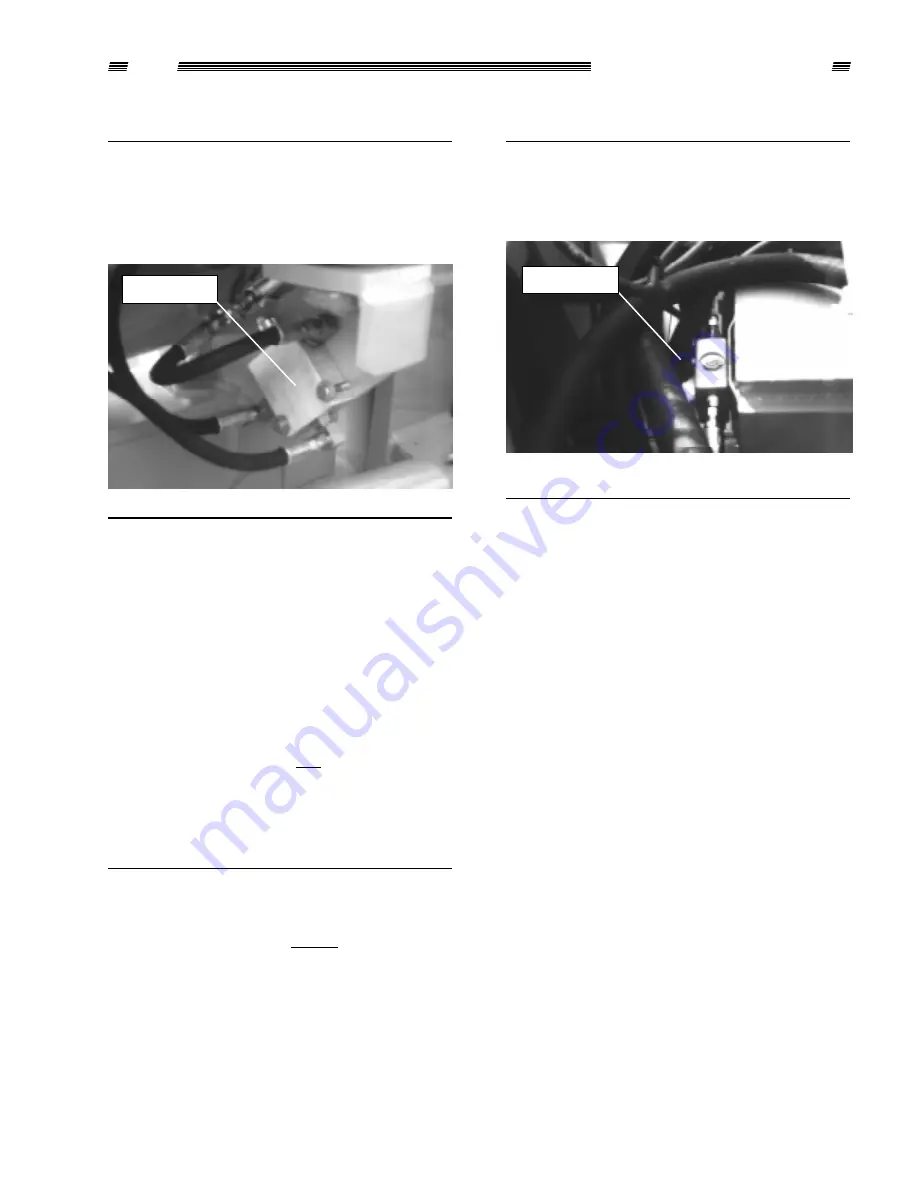
Check

Check

Summary of Contents for SUPER CUTTER RG 1672 DXH DIESEL

Page 1: ...TION MAINTENANCE PARTS MANUAL SUPER CUTTERTM RAYCO RG 1672 DXH DIESEL RAYCO The Stump Cutter People 4255 Lincoln Way East Wooster Ohio 44691 Nationwide Canada Phone Toll Free 800 392 2686 FAX 330 264 3697 Copyright 1998 Rayco All Rights Reserved Printed in U S A Index 760813 3 98 ...

Page 2: ...ormance and service from the machine Read and understand all instructions before attempting to operate this machine This manual should be readily available for reference at all times Additional copies of this manual may be purchased from Rayco This Rayco Stump Cutter was designed and manufactured by Rayco Manufacturing Inc Wooster Ohio Due to continuous improvements Rayco reserves the right to mak...

Page 3: ...l System 72 Symptom Battery Not Getting Recharged 72 Symptom Hydraulic Oil Cooling Fan Will Not Come On 73 Parts 74 Specifications 112 Foreword About This Manual 5 A Description of the Machine 5 Design 5 How it works 6 SerialNumber 6 Safety GeneralHazardInformation 8 Pressure Air 8 FluidPenetration 8 Crushing CuttingPrevention 8 Burn ExplosionPrevention 9 Oils 10 Batteries 10 Starting Fluid 10 Lin...

Page 4: ......

Page 5: ...ddition this section identifies the text and locations of warning labels used on the machine Read and understand the basic precautions listed in the Safety section beforehand and apply them always as you operate transport perform mainte nance and repair the product Operation The Operation section is a reference for the new operatorandarefresherfortheexperiencedone This section includes a discussio...

Page 6: ...D A Description of the Machine Design TheRG 1672 DXH DIESELSUPERCUTTERTM stump cutter is designed for your maximum benefit per dollar spent The machine is constructed for durability and easymaneuvering forthosehardtoreachtreestumps and roots Its 25 diameter x 1 thick cutting wheel with 32replaceablecarbide tippedteethispowerfullydriven by a hydraulic motor through a low maintenance Polychain GT be...

Page 7: ...is machine Additional manuals are available from RAYCO or your RAYCO dealer The meaning of this safety alert symbol is Attention Become Alert Your safety is involved A message either written or pictorial follows to explain the hazard RAYCO cannot anticipate every possible circumstance that might involve a potential hazard The warnings in this publication and on the product are therefore not all in...

Page 8: ...e maximum air pressure used for cleaning pur poses must be less than 30 psi 205 kPa Fluid Penetration Never allow your hand or other part of the body get near a pressurized fluid leak Instead use a board or cardboard when checking for a leak Escaping fluid under pressure especially an invisible pinhole sized leak can harmfully penetrate body tissue or enter mucus membranes causing serious injury a...

Page 9: ...mable fluids Clean them thoroughly with nonflammable solvent before welding or flame cutting on them Remove all flammable materials such as fuel oil and other debris before they accumulate on the machine 3 Dangerous explosion may occur with improper use or care of starting fluid Do not attempt to use starting fluid to help start engine when using heating plug Do not use starting fluid without a di...

Page 10: ...loose or damaged fuel and oil lines tubes and hoses Leaks can cause fires Contact RAYCO or your RAYCO dealer for repair or replacement Check lines tubes and hoses carefully Do not use your bare hand to check for leaks See General Hazard Information Fluid Penetration in this Safety section for more details Tighten all connections sufficiently Replace if any of the following conditions are found 1 E...

Page 11: ...es should be taken to disallow the vehicle and stump cutter to roll or slide uncontrolled resulting in injury or death 13 Check with the local utilities for the locations of buried pipes and cables where applicable before operating the machine 7 Ensure that everyone in the vicinity is aware of the DANGER ZONE associated with this machine See diagram above You and they must avoid the DANGER ZONE at...

Page 12: ...slowly 9 Extreme caution must be exercised when cutting stumps on slopes as machine may shift or slide unpredictably Never attempt to cut on a slope exceeding 15 degrees 10 Wear appropriate safety equipment including protective eyeglasses face shield protective footwear and hearing protection 11 Ensure that everyone in the vicinity is aware of the DANGER ZONE associated with this machine You and t...

Page 13: ...lowered to the ground if further use of machine is intended before relocating 5 Turn the engine start key to the OFF position 6 Remove the key from the engine start switch and put in safekeeping Emergency Shutdown Procedure 1 Disable engine by turning engine keyswitch to OFF position to the left 2 Be sure to allow all moving parts to come to a complete stop A rotating cutting wheel is very DANGERO...

Page 14: ...orting the Machine 1 Retract the telescoping tongue and install the tongue transport pin 2 Center and fully raise cutting boom and install cutting boom lock pin 3 Fully close the cutting wheel cross travel control valve 4 The operator s station mounted on a swing out arm must be swung IN and locked in place during machine transportation 5 Be sure that machine is securely attached to towing vehicle...

Page 15: ...d It must be swung IN during machine transportation Thearmlocksinplace eitherINorOUT Forexample to pull the arm 1 out for machine operation lift the spring loaded locking pin 2 out of the IN position hole 3 and swing out the operator s station away from the cutting wheel until the locking pin springs into the OUT locked position The protective curtain is rolled up and held by the flexiblestrapsfor...

Page 16: ...he hydraulic oil temperature lamp will come on if the oil temperature gets too high NOTICE Should the HYDRAULIC OIL TEMPERATURE lamp ever come on shut off engine immediately and troubleshoot the hydraulic system Always change the hydraulic oil filter at the proper times Do not allow the engine to run with out filter installed Failure to heed either direc tive will result in poor machine performanc...

Page 17: ...FULLY COUNTERCLOCKWISE TO CLOSE OPERATION A rotating cutting wheel is very DANGEROUS Stand at controls and ensure that cutting wheel comes to a complete stop before doing anything else 6 Engine SPEED Control The engine SPEED control operates similarly to the CUTTING WHEEL Drive control To increase engine speed move the engine speed control lever DOWN until desired speed is obtained To decrease the...

Page 18: ...The electric cable receptacle is a quick connect station to enable operating brakes and tail lights in conjunction with those of the towing vehicle Other Machine Components 1 Telescoping Tongue Lock Pin 931160 1 2 3 Lock pin 1 must be removed prior to operation to allow the tongue to extend and retract It may be stored in hole 2 when not in use The lock pin must then be reinserted as shown prior t...

Page 19: ...id pinching them Secure hitch lever with hitch safety pin 8 7 Raise parking jackstand foot by cranking jackstand handle counterclockwise then remove lock pin 9 and pivot jackstand 10 away from ground as shown Reinsert lock pin 9 to hold in raised position 8 Secure safety chains 11 to towing vehicle Set the length of each chain and crisscross them to optimize their purpose of catching the trailer t...

Page 20: ...l in its entirety before proceeding NOTICE Do not operate the starter for more than 20 sec onds at a time To do so may overheat the starter If the key switch is released before the engine starts wait until the starter and the engine stops turning before trying again This will prevent pos sible damage to the starter and or flywheel If the engine does not start the first time wait at least 1 minute ...

Page 21: ...ltage for jump starting Use of welder or higher voltage will damage electrical system When starting from another machine make sure the machines do not touch each other This can pre vent damage to engine bearings and electrical circuits 1 On stalled machine turn the start switch to OFF 2 Move boost machine near enough to stalled machine for cables to reach but DO NOT ALLOW MACHINES TO TOUCH 3 Stop ...

Page 22: ... allowing explosive vapors to disperse 6 Connect jumper cables 1 Connect red positive jumper cable to positive terminal of starter solenoid of stalled machine where the battery red positive cable is already connected Pull back rubber boot to gain access Do not allow jumper cable clamp to touch the other solenoid terminal Uncontrolled starting of engine would occur which could cause severe injury o...

Page 23: ... if the boom has been swung hard into the stump or side of hole Whenever the tires of the machine raise off the ground while operating lower the machine back to the ground smoothly DO NOT DROP OR CATCH IT SUDDENLY WITH THE HYDRAULICS Damage to the machine can result OPERATION Only the portion of cutting wheel within the 80 area shown above should engage stump Never undercut the stump or use the bo...

Page 24: ...eel to one side then lower it approximately 1 into the nearside roots that are buried at the foot of the stump Swing the cutting wheel across the roots back and forth lowering cuttingwheelapproximately1 beforeeachsweep until the roots are sufficiently removed Raise cutting wheel until center of cutting wheel is just above top of stump 3 Cut stump proper With the cutting wheel off to one side advan...

Page 25: ...ssible to use cutter wheel to push chips off to the side On larger stumps when cutting from one side eventually a tire may tend to roll into the hole This maybepreventedbymovingthemachinetoanother side of the stump to continue removal or by filling the hole with chips before continuing 5 Continue with final roots removal Cut the remaining roots as described in STEP 2 until satisfactorily removed 7...

Page 26: ... of destination andlower itintothegroundtoraiseone tire slightly Then using cutting wheel cross travel lever pull machine sideways dragging the other tire This maneuver should be used only where conditions allow In colder weather the machine may be sluggish at first Operating all machine controls one at a time will cause the hydraulic oil to warm up quickly Operate machine lightly until hydraulic ...

Page 27: ...ife and performance from hydrau lic system components and hydrostatic transmis sions The hydraulic reservoir is filled at the factory with AN aw 68 It has an SUS viscosity of 344 3 100 F and 54 2 210 F A reputable supplier RAYCO or your RAYCO dealer can help you make the best selection of an alternate hydraulic oil for your machine Any engine oil of proper viscosity that meets one of these API ser...

Page 28: ...cating the machine Use only a high quality multipurpose grease which contains 3 to 5 molybdenum disulfide Use NLGI NO 2 orNO 0gradeforextremelylowtemperatures Before lubricating make sure all grease fittings and the nozzle of the grease gun is clean Fluids Refill Capacities Approximate Drive Belts Before beginning to check or adjust belt shutdown the machine ensure that all moving parts have come ...

Page 29: ...on Manual shipped with this machine If the machine will be stored for a long period of time a diesel fuel conditioner should be added to the fuel tank Check your machine for any worn or broken parts at thistime Byorderingandinstallingreplacementparts now you can avoid unnecessary delays when you remove the machine from storage Removing the Machine from Storage Remove all coverings After prolonged ...

Page 30: ...e Level 40 Check Specific Gravity of Electrolyte 40 Swing Out Arm 40 Telescoping Tongue Inside Tube Lubricate 40 Hitch Apply Oil 41 Swing Pivot Inspect 41 Intervals Every 250 Service Hours or 1 Year Hydraulic Oil Filter Change 42 Every 500 Service Hours or 1 Year Engine Oil Filter Change 42 Engine Timing Toothed Belt Check 42 Engine Belt Drives Check and Adjust 42 Hydraulic Cylinders Pump V Belt 4...

Page 31: ...ld be kept and a note should also be made on a regularly viewed calendar of when the next in terval that requires scheduled maintenance is to occur based on adding the amount of time for that next interval to the time when performing that maintenance as suits the occasion Then as you frequently compare the actual service hours to the record you will be properly informed to the maintenance requirem...

Page 32: ...as soon as feasible Read all of the instructions on the following pages before beginning to change cutting teeth As Required Fuel Tank Fill Do not smoke or allow any hot objects nearby when refueling Remove the fuel cap slowly Carefully fill tank and replacecap Useonlypremiumdieselfuel Filltankall the way until fuel begins entering fill neck This will reduce water condensation See System Fluids Sp...

Page 33: ...ange cutting wheel teeth 1 Clean all dirt from the cutting wheel 1 and teeth 2 2 Remove the socket head bolts 3 from the teeth 2 The 1 2 hex key provided with the machine may be used 3 Check the cutting wheel for cracks Replace the wheel if it is cracked NOTICE The following three pages represent the exact location required for positioning each tooth When followed exactly optimum cutting wheel per...

Page 34: ...IESEL SUPER CUTTER TM RAYCO 34 MAINTENANCE INTERVALS TOOTH POCKET POSITIONS 32 TOOTH PATTERN TOOTH SET REQUIRES 14 LEFTS 14 RIGHTS 4 STRAIGHT RAYCO BRAND SQUARE SHANK TEETH N 0003 STRAIGHT TOOTH NEARSIDE STRAIGHT TOOTH FARSIDE STRAIGHT TOOTH NEARSIDE STRAIGHT TOOTH FARSIDE ...

Page 35: ...L SUPER CUTTER TM RAYCO MAINTENANCE INTERVALS TOOTH POCKET POSITIONS 32 TOOTH PATTERN TOOTH SET REQUIRES 14 TAPPED 14 C BORED 2 TAPPED STRAIGHT 2 C BORED STRAIGHT RAYCO SUPERTEETH N 0001 STRAIGHT TOOTH NEARSIDE STRAIGHT TOOTH NEARSIDE STRAIGHT TOOTH FARSIDE STRAIGHT TOOTH FARSIDE ...

Page 36: ...ght and a right tooth is determined by which direction the tip of the tooth points The left and right sides of the cutting wheel correspond to the left and right sides of the machine itself For a review of the machine orientation see the Foreword section Sharpening of Teeth Do not allow any tooth to wear too much before sharpening Discard any tooth that has lost more than 1 8 of original bite The ...

Page 37: ...fully visible After cleaning or replacing filter cartridge reset service gauge by pressing in tab on end Replace safety cartridge if needed 2 Discharge the dust ejector valve 2 Forfurtherdetailsapplicabletotheservicegauge filter cartridge safety cartridge and dust ejector valve see the Combustion Air Cleaner section of the Deutz Engine Operation Manual Fuel Tank Fill Fill the fuel tank at the end ...

Page 38: ...ontrol of machine Re fill the hydraulic oil tank 1 Clean all surrounding debris and dirt off of tank fill neck area Hydraulic fluid must be kept completely clean 2 Remove the breather cap 3 Fill tank until oil level appears midway between HIGH and LOW in window of sight gauge 4 Replace the breather cap Cutting Wheel Check Teeth Check cutting wheel for missing broken or worn teeth Change any such t...

Page 39: ...plugs joints and fittings Correct any leaks 5 Be sure covers and guards are firmly in place Inspect for damage 6 Inspect tires and rims for damage and inflation Maintain inflation indicated on tire Replace worn tires 7 Inspect for loose or missing fasteners Tighten or replace 8 Inspect belts and Poly Chain occasionally for wear Replace if frayed or cracked 9 Clean out all chips debris in the Poly ...

Page 40: ...e Fuel Filter Change Follow directions found in the Deutz Engine Operation Manual Engine Check for Leakages Engine Valve Clearances Check and Adjust Follow the directions found in the Adjustments section of the Deutz Engine Operation Manual Engine Mounting Check Ensure that the torque values remain as shown in the Specification Data Section in the Deutz Engine Operation Manual Engine Belt Drives C...

Page 41: ...e Swing Cylinders Pivots Lubricate Lubricate the four total grease fittings on the two pivots of both right shown and left cylinder Every 50 Service Hours Swing Pivot Bearings Lubricate MAINTENANCE INTERVALS Lubricate Lubricate the two fittings on the cutting boom swing pivot housing Lift Pivot Lubricate Lubricate Lubricate LUBRICATE Lubricate the fittings on the lift pivot both sides ...

Page 42: ... the hydraulic motor bracket slide bolt 1 and both motor pivot shaft clamp bolts 8 enough to allow the hydraulic motor 5 to pivot freely 2 Loosen lock nut 2 on adjusting screw 3 MAINTENANCE INTERVALS Cutting Wheel Poly Chain Belt Check Tension The cutting wheel is driven by a low maintenance Poly Chain GT belt To prolong belt life proper tension must be maintained A loose belt will cause excessive...

Page 43: ...djusting nut 4 clockwise viewed from ground pivoting the hydraulic motor away from the cutting wheel 4 Check the tension once again and continue tightening the belt and re checking as neces sary until properly tensioned 5 Retighten the lock nut 2 the hydraulic motor bracket slide bolt 1 and both motor pivot shaft clamp bolts 8 6 Remount belt guard cover 6 and bolts 7 Tighten all bolts When the bel...

Page 44: ...d be 1 4 to 1 2 above metal plates just touching bottom of plastic fill neck Add distilled water as needed 4 Replace both caps Check Specific Gravity of Electrolyte Follow the directions found in the Accessories section of the Deutz Engine Operation Manual MAINTENANCE INTERVALS Swing Out Arm Lubricate one fitting on the pivot sleeve of operator station swing out arm Telescoping Tongue Inside Tube ...

Page 45: ...built to last a long period of time with very little maintenance No adjusting or fine tuning is required to maintain the pivots Routine lubrication of these pivots and it s bearings should assure you long life of these parts In the event that a bearing needs replaced or any other maintenance needs to be performed on the swing pivot please contact your RAYCO representative or the factory Hitch Appl...

Page 46: ...lter Change NOTICE Keep insides of all hydraulic components clean as they are installed Always keep the hydraulic oil clean Severe ma chine damage will likely occur if oil becomes dirty The machine must not be operated without the filter in place or severe damage to the major hy draulic components will likely occur A 10 micron filter is used on this machine It is located in the oil suction line to...

Page 47: ...ection of the Deutz Engine Operation Manual MAINTENANCE INTERVALS Drain Water Condensation From Fuel Tank 1 Have ready a 1 2 pipe plug RAYCO part 738311 wrapped with Teflon tape 2 Provide a wide pan to catch all splashing drainage elevated to be as close as possible to bottom of tank 3 While wearing liquid proof gloves and goggles unscrew pipe plug at bottom of tank 4 As fluid begins to drain into...

Page 48: ... the oil to drain into the container 5 Clean and wrap plug threads with Teflon tape and reinstall the plug 6 Loosen hose fittings on cylinders and drain as much fluid as feasible 7 Replace and tighten fittings Dispose of drained oil according to local environment protection regulations Start Up Procedure NOTICE Prior to filling with fluid make certain all system components reservoir hoses valves f...

Page 49: ... movement The linkage of the CWD pump should be left disconnected and the HC controls left in neutral position until after initial Diagram Action Step Comments 1 Check All Fittings on hose and tube connections Make sure all fittings are tight to prevent fluid leakage and keep air from entering the system 2 Fill Reservoir with the proper fluid see System Fluid Specifications It should be passed thr...

Page 50: ...ely 40 80 PSI when the CUTTING WHEEL drive control is actuated This occurs because the shuttle valve located in the motor valve block has shifted and activated the motor charge pressure valve The motor charge pressure relief valve has a lower pressure relief setting The result is diversion of excess charge pump flow to the motor case where it is used for system cooling 16 Stop Prime Mover and remo...

Page 51: ...Air Cleaner section of the Deutz Engine Operation Manual Every 750 Service Hours or 1 Yr Engine Oil Filter Change NOTICE Engine oil filter change is required at every 750 service hours or 1 year when using oil with a quality grade of API CD SE If oil quality grade is API CC SE engine oil filter change is required more frequently instead every 500 service hours or 1 year Follow directions found in ...

Page 52: ...tions found in the Belt Drives section of the Deutz Engine Operation Manual MAINTENANCE INTERVALS Every 3 Months or 3 000 Miles Trailer Wheel Brakes Adjust Detailed directions may be found in the Trailer Running Gear Operation Maintenance Service manual which was provided with the machine Trailer Wheel Nuts bolts Tighten Detailed directions may be found in the Trailer Running Gear Operation Mainte...

Page 53: ...or 12 000 Miles Trailer Wheel Bearings Clean Repack Remove Hub 1 Elevate the side of the machine where the wheel is being inspected A common hydraulic floor jack may be used Position lifting arm of such jack directly under nearside end of machine chassis cross member Support the raised side of machine with a solid wooden block or standard jack stand positioned directly under nearside end of machin...

Page 54: ...ating the bearing from roller to roller 4 Continue this process until you have the entire bearing completely filled with grease 5 Before re installing apply a light coat of grease on the bearing cup Bearing Inspection Wash all grease and oil from the bearing race rollers cone using a suitable solvent Gasoline should not be used as a cleaning agent because of fire and explosion danger Dry the beari...

Page 55: ...must be followed 1 After placing the hub bearings washers and castle nut back on the axle spindle in reverse order as detailed in the previous section on hub removal rotate the hub assembly slowly while tightening the castle nut to approximately 50 ft Ib 12 wrench or pliers with full hand force 2 Then loosen the castle nut to remove the torque DO NOT ROTATE THE HUB 3 Finger tighten the castle nut ...

Page 56: ...CO 56 Every 3000 Hours Engine Injectors Check Consult your local Deutz Engine dealer for procedure MAINTENANCE INTERVALS Every 2 Years Engine Combustion Air Cleaner Safety Cartridge Replace Detailed directions may be found in the Combustion Air Cleaner section of the Deutz Engine Operation Manual ...

Page 57: ...Copyright 1998 Rayco All Rights Reserved Printed in U S A 57 RG 1672 DXH DIESEL SUPER CUTTER TM RAYCO NOTES ...

Page 58: ... This tilts the pump swashplate resulting in pump piston reciprocation The resulting fluid flow is directed to the motor through the high pressure line The motor receives the flow and its pistons reciprocate causing the motor shaft to rotate In NEUTRAL the pump swashplate is centered not tilted Because the pump pistons do not reciprocate there is no flow from the pump to the motor Consequently the...

Page 59: ...cutting wheel motor When the circuit is primed chargepumpflow dumps across the charge pump relief valve to the pump housing After cooling and flushing the mainpump thefluidflows out of the main pump case through the heat exchanger and returns to the reservoir The charge pump relief valve maintains a minimum charge pressure level Centeringspringsholdthe variable displacement pumpinaneutralposition ...

Page 60: ...ylinder barrel When subjected to pump flow the pistons extend from the cylinder barrel As the pistons slide down the incline of the fixed swashplate the motor cylinder barrel turns The barrel in turn rotates the output shaft The high pressure flow overcomes the resistance on the motor output shaft Flow ratios between pump and motor displacements determine motor output shaft speeds The motor with i...

Page 61: ...tertherod endportofthetelescopingtongue cylinder while simultaneously the spool opens a passage that allows fluid from the cylinder body end port to exhaust through the control valve body back HC Hydraulic Cylinders Circuits All cutting boom motion is accomplished by controlled pressure applied within hydraulic cylinders That pressure is created by the HC pump 8 which is driven by the engine throu...

Page 62: ...m swing motion This can eliminate stalling of the machine due to too much side pressure against a stump by requiring of the operator a greater degree of lever movement for a given change of boom motion speed 2 Pilot check valves are located in the cutting boom motion control circuit to reduce the risk of uncontrolled falling or drifting of the boom Such might otherwise occur when the engine is tur...

Page 63: ...ion for when testing circuit pressures After the Pressure Gauge Installation are the Fault Logic Diagrams Match the transmission symptomswiththeproblemstatementsandfollow the action steps shown in the box diagrams Afterthefault logicdiagramsare DiagramAction Step Comments explaining the action steps shown in the preceding diagrams Where applicable the comment number of the statement appears in the...

Page 64: ...Copyright 1998 Rayco All Rights Reserved Printed in U S A RG 1672 DXH DIESEL SUPER CUTTER TM RAYCO 64 Pressure Gauge Installation TROUBLE SHOOTING ...

Page 65: ...Copyright 1998 Rayco All Rights Reserved Printed in U S A 65 RG 1672 DXH DIESEL SUPER CUTTER TM RAYCO Symptom Neutral Difficult or Impossible to Find Symptom System Operating Hot TROUBLE SHOOTING ...

Page 66: ...Copyright 1998 Rayco All Rights Reserved Printed in U S A RG 1672 DXH DIESEL SUPER CUTTER TM RAYCO 66 Symptom System Response Sluggish TROUBLE SHOOTING ...

Page 67: ...Copyright 1998 Rayco All Rights Reserved Printed in U S A 67 RG 1672 DXH DIESEL SUPER CUTTER TM RAYCO Symptom System Will Not Operate TROUBLE SHOOTING ...

Page 68: ...or a obstructed air flow b improper plumbing inlet to outlet c obstructed fluid flow 8 Inspect Heat Exchanger By Pass Valve for a improper pressure adjustment b stuck or broken valve 9 Inspect Rotary By Pass Valve for a galled or stuck valve spool 10 Inspect Inlet Filter for a plugged or clogged filter element b obstructed inlet or outlet c open inlet to charge pump 11 Check System Pressure Proper...

Page 69: ...ety General Hazard In formation section Improperly tightened fit tings can result in dangerous leaks Whenever changing fittings the engine must be turned OFF and the internal pressures relieved to avoid dangerous high pressure leaks at loosened fittings A liquid filled pressure gauge capable of withstanding up to 3000 PSI should be installed by inserting a T fitting into the high pressure port see...

Page 70: ...find out if the problem is in the valve This may be accomplished by moving the valve hoses to a different valve which is known to be functioning properly Switch one at a time to avoid mix up hoses between the suspected defective hydraulic component or control valve and a known good control valve and repeat the test If switching hoses to another valve produces satisfactory pressure readings then th...

Page 71: ...cylinder loses fluid around rod rod seal is leaking Solution for Faulty Cylinder Rod Seal Replace cylinder rod seal using kit available from your RAYCO distributor B Problem Cylinder piston seals leaking To determine if cylinder piston seals are leaking perform a hydraulic pressure check of the cylin ders circuit Refer to chart on preceding page Solution for Faulty Cylinder Piston Seal The hydraul...

Page 72: ...ice manual which was provided with the machine Symptom Battery not getting recharged A Problem ALTERNATOR lamp is burned out Alternator will not charge when lamp is burned out Solution To test lamp turn engine start switch to the start indent If the ALTERNATOR lamp does not come on even though other lamps do then replace ALTERNATOR lamp B Problem Blower V belt is too loose or broken Thealternatori...

Page 73: ...OOTING Symptom Hydraulic Oil Cooling Fan Will Not Come On Problem Circuit Breaker Has Been Tripped Solution Reset Circuit Breaker 1 Shut down machine 2 Be sure fan blade is free to rotate Clear away any foreign material 3 Reset breaker by inserting screwdriver through screen and pushing and releasing reset button ...

Page 74: ...YCO 74 Parts For parts information when servicing machine refer to the pages that follow Order replacement parts by contacting your RAYCO dealer or direct from RAYCO by calling toll free 800 392 2686 Nationwide Canada MASTER PARTS INDEX 1 2 3 4 5 8 10 6 7 9 LOOSE PARTS NOT SHOWN 11 12 13 14 15 16 ...

Page 75: ...MBLY 1 82 5 CUTTING WHEEL DRIVE SYSTEM 1 84 6 ENGINE SYSTEM 1 86 7 OPERATOR S STATION 1 92 8 CHIP CONTAINMENT SYSTEM 1 96 9 HYDRAULIC SYSTEM 1 98 10 ELECTRICAL SYSTEM 1 104 11 730071 OPERATOR FACE SHIELD ASSEMBLES W HEAD GEAR 1 12 730072 OPERATOR HEAD GEAR FOR FACE SHIELD 1 13 718008 ALLEN WRENCH 1 2 HEX 1 14 760813 OPERATION MAINTENANCE PARTS MANUAL 1 15 ENGINE MANUAL 1 16 TRAILER RUNNING GEAR MA...

Page 76: ...Copyright 1998 Rayco All Rights Reserved Printed in U S A RG 1672 DXH DIESEL SUPER CUTTER TM RAYCO 76 PARTS 13 11 17 16 20 23 15 19 18 22 1 4 2 3 1 4 13 12 24 10 9 6 8 7 5 14 21 20 25 ...

Page 77: ...MPS 1 750451 10 732026 DECAL GREASE MACHINE 1 750451 11 732021 DECAL CAUTION KEEP CLEAR 3 750451 12 732011 DECAL DANGER KEEP HANDS OUT 2 750451 13 732018 DECAL DANGER ROTATING 2 750451 14 2 4737 DECAL CUTTER WHEEL DRIVE AND THROTTLE 1 750451 15 732005 DECAL WARNING FOR YOUR 1 750451 16 732006 DECAL DANGER WHEN REFUELING 1 750451 17 732002 DECAL DIESEL FUEL 1 750451 18 2 3081 DECAL REMOVE COVER DAI...

Page 78: ...Copyright 1998 Rayco All Rights Reserved Printed in U S A RG 1672 DXH DIESEL SUPER CUTTER TM RAYCO 78 PARTS 1 2 3 4 5 6 7 8 9 ...

Page 79: ...Copyright 1998 Rayco All Rights Reserved Printed in U S A 79 RG 1672 DXH DIESEL SUPER CUTTER TM RAYCO PARTS 10 11 12 13 14 25 ...

Page 80: ...eserved Printed in U S A RG 1672 DXH DIESEL SUPER CUTTER TM RAYCO 80 PARTS REMOVE COVER DAILY TO CHECK COOLER FOR DEBRIS CHECK ENGINE OIL LEVEL DAILY CHECK OIL LEVEL WHILE ENGINE IS STOPPED AND IN A LEVEL POSITION 20 21 15 16 17 18 19 ...

Page 81: ...Copyright 1998 Rayco All Rights Reserved Printed in U S A 81 RG 1672 DXH DIESEL SUPER CUTTER TM RAYCO PARTS 22 23 24 R G 1 6 7 2 D X H R G 1 6 7 2 D X H ...

Page 82: ...Copyright 1998 Rayco All Rights Reserved Printed in U S A RG 1672 DXH DIESEL SUPER CUTTER TM RAYCO 82 PARTS CHASSI S BOOM ASSEM BLY ...

Page 83: ...7 750383 SOCKET HEAD CAP SCREW 3 8 16 X 3 4 4 8 4605 TRAVEL PIN 1 9 4433 HINGE PIN 1 10 722302 HEX HEAD BOLT 3 8 16 X 3 4 4 11 726302 LOCK WASHER 3 8 4 12 730011 GREASE ZERK 1 4 STRAIGHT 2 13 4434 HINGE PIN CAP 2 14 722502 HEX HEAD BOLT 1 2 13 X 3 4 1 15 4690 PRELOAD NUT 1 16 4405 LOCK PLATE 1 17 722114 WHIZ BOLT 3 8 16 X 3 4 1 18 750448 SPHERICAL PLANE BEARING 2 19 4404 KING PIN 1 20 750449 FLAT ...

Page 84: ...Copyright 1998 Rayco All Rights Reserved Printed in U S A RG 1672 DXH DIESEL SUPER CUTTER TM RAYCO 84 PARTS INNER TONGU E ASSEM BLY ...

Page 85: ...4 X 2 GRIP 1 4 726501 PLAIN WASHER 1 2 8 5 722505 HEX HEAD BOLT 1 2 13 X 1 3 4 4 6 726502 LOCKWASHER 1 2 4 7 724501 HEX NUT 1 2 13 4 8 3501 LOCK PIN 3 4 1 9 728007 RETAINING PIN 3 4 1 10 730036 CHAIN 9 FT 1 11 730028 GRAB HOOK INCLUDES CLEVIS PIN COTTER PIN 2 12 3499 HITCH DROP PIN TYPE WHEN USED REPLACES 2 2630 728028 1 13 5466 HITCH PINTLE 1 14 1876 HITCH DROP TYPE ASSEMBLY PARTS INNER TONGUE AS...

Page 86: ...Copyright 1998 Rayco All Rights Reserved Printed in U S A RG 1672 DXH DIESEL SUPER CUTTER TM RAYCO 86 PARTS WHEEL ASSEM BLY ...

Page 87: ...46 10 710720 WHEEL AND TIRE ASSEMBLY 2 11 LUG NUT 12 760146 12 760146 AXLE 1 13 730103 ROMEX CONNECTOR 2 14 MOUNTING SCREW 4 730103 15 730100 GROMMET 9 16 X 1 2 16 710752 DUST CAP 2 760146 17 728004 COTTER PIN 3 16 X 1 1 2 2 760146 18 724906 CASTLE NUT 1 2 760146 19 726903 WASHER 2 760146 20 710747 BEARING INNER RACE 1 1 4 2 760146 21 710748 BEARING OUTER RACE 1 1 4 2 760146 22 710750 WHEEL HUB W ...

Page 88: ...Copyright 1998 Rayco All Rights Reserved Printed in U S A RG 1672 DXH DIESEL SUPER CUTTER TM RAYCO 88 PARTS CUTTING WHEEL DRIVE SYSTEM 21 ...

Page 89: ...UT 1 2 1 29 722516 HEX HEAD CAP SCREW 1 2 13 X 4 1 2 1 30 724503 LOCK NUT STOVER 1 2 13 1 31 722512 HEX BOLT 1 2 13 X 2 3 4 4 32 726502 LOCK WASHER 1 2 4 33 2072 PIVOT BLOCK 2 34 4742 MOTOR MOUNT SHIM 2 35 724702 HEX NUT 5 8 13 22 36 726702 LOCK WASHER 5 8 1 37 726601 FLAT WASHER 5 8 1 38 2900 YOLK 1 39 728035 COTTER PIN 1 8 X 1 1 40 728019 CLEVIS PIN 1 2 X 1 1 2 1 41 722504 HEX BOLT 1 2 13 X 1 1 ...

Page 90: ...Copyright 1998 Rayco All Rights Reserved Printed in U S A RG 1672 DXH DIESEL SUPER CUTTER TM RAYCO 90 P ARTS ENGINE SYSTEM SHEET 1 OF 3 ...

Page 91: ...T 3 8 16 x 1 1 9 726302 LOCK WASHER 3 8 2 10 726301 FLAT WASHER 3 8 1 11 2325 FRONT LH ENGINE MOUNT 1 2326 FRONT RH ENGINE MOUNT 1 12 2038 REAR LH ENGINE MOUNT 1 4705 REAR LH ENGINE MOUNT 1 13 750480 HEX BOLT 1 2 13 X 3 1 4 4 14 712705 ENGINE ISOLATOR PADS QTY 1 TOP BOTTOM 4 15 2279 FLAT WASHER 2 16 724503 LOCK NUT 1 2 5 17 722848 HEX BOLT 14MM X 2 X 40MM 4 18 722602 LOCK WASHER 9 16 8 19 722846 H...

Page 92: ...Copyright 1998 Rayco All Rights Reserved Printed in U S A RG 1672 DXH DIESEL SUPER CUTTER TM RAYCO 92 P ARTS ENGINE SYSTEM SHEET 2 OF 3 ...

Page 93: ...8 ENGINE SPEED CONTROL PIVOT 1 15 728000 COTTER PIN 1 16 X 3 4 1 16 5227 COVER 1 17 726201 PLAIN WASHER 5 16 2 18 726202 LOCKWASHER 5 16 1 19 750388 HEX HEAD BOLT M8 X 1 25 X 20MM 1 20 726101 PLAIN WASHER 1 4 5 21 726102 LOCKWASHER 1 4 5 22 722830 HEX HEAD BOLT M6 X 1 X 16MM 5 23 BOLT AND WASHER SUPPLIED WITH ENGINE 1 24 716711 FLYWHEEL COUPLING KIT COUPLING AND PUMP PLATE 1 25 PUMP MOUNTING PLATE...

Page 94: ...Copyright 1998 Rayco All Rights Reserved Printed in U S A RG 1672 DXH DIESEL SUPER CUTTER TM RAYCO 94 P ARTS ENGINE SYSTEM SHEET 3 OF 3 ...

Page 95: ...LATE 1 5 722332 CARRIAGE BOLT 3 8 16 X 1 1 4 4 6 726301 FLAT WASHER 3 8 5 7 726302 LOCK WASHER 3 8 7 8 724301 HEX NUT 3 8 16 3 9 716003 SHEAVE 1 10 716004 HUB 9 16 BORE INCLUDES 2 MOUNTING SCREWS 1 11 716010 V BELT 1 12 2150 BELT GUARD BRACKET 1 13 2511 01 SPACER 1 14 5233 BELT GUARD 1 15 722834 HEX HEAD BOLT M8 X 1 25 X 140MM 1 16 722725 SOCKET BUTTON HEAD BOLT 3 8 16 X 3 4 3 17 2324 HYDRAULIC CI...

Page 96: ...Copyright 1998 Rayco All Rights Reserved Printed in U S A RG 1672 DXH DIESEL SUPER CUTTER TM RAYCO 96 P ARTS 2 12 13 14 11 OPERATOR S STATION SHEET 1 OF 2 SWING OUT ARM ASSEMBLY SPRING LOCK PIN DETAIL ...

Page 97: ...K PIN 1 3 4712 MAIN COVER 1 4 4475 INSTRUMENT COVER 1 5 3255 3 BANK VALVE COVER 1 6 722110 WHIZ BOLT 1 4 20 X 3 4 12 7 4037 FRONT AND TOP PANEL 1 8 750400 WHIZ BOLT 5 16 18 X 1 2 10 9 4650 LOCK PLATE 1 10 760169 RETAINING RING 1 4659 11 730075 ROLL PIN 1 8 X 1 1 4659 12 630012 SPRING 1 13 4900 11 FLAT WASHER 640 X 1 125 X 10 GA 1 14 4038 GUSSET 1 OPERATOR S STATION SHEET 1 0F 2 ...

Page 98: ...Copyright 1998 Rayco All Rights Reserved Printed in U S A RG 1672 DXH DIESEL SUPER CUTTER TM RAYCO 98 P ARTS OPERATOR S STATION SHEET 2 OF 2 SWING OUT ARM ASSEMBLY ...

Page 99: ...2 7 726101 FLAT WASHER 1 4 USS 2 8 724101 HEX NUT 1 4 20 2 9 730038 TARP STRAP 2 10 750314 CUTTER WHEEL DRIVE LEVER 1 11 750313 THROTTLE LEVER 1 12 4474 CURTAIN BRACKET 1 13 4699 CONTROL COVER WELDMENT 1 14 4700 CABLE MOUNT NOT PICTURED 1 15 750315 SWIVEL KIT NOT PICTURED 2 16 722109 HEX BOLT 1 4 20 X 3 2 17 3254 SPACER 5 8 2 18 4891 SPACER 1 1 4 2 19 726102 LOCK WASHER 1 4 4 20 724101 HEX NUT 1 4...

Page 100: ...Copyright 1998 Rayco All Rights Reserved Printed in U S A RG 1672 DXH DIESEL SUPER CUTTER TM RAYCO 100 P ARTS CHIP CONTAINMENT SYSTEM ...

Page 101: ...3 4 2 6 4596 MAIN CHIP GUARD 1 7 728025 CLEVIS PIN 2 8 728003 COTTER PIN 2 9 1341 CURTAIN 2 10 1345 CURTAIN BRACKET 2 11 722114 WHIZ BOLT 3 8 16 X 3 4 6 12 4439W DECK PLATE LH 1 13 4441W DECK PLATE RH 1 14 4584 CURTAIN LH 1 15 4585 CURTAIN RH 1 16 4583 CURTAIN FRONT 1 17 2062 CURTAIN BRACKET LH 1 18 2063 CURTAIN BRACKET RH 1 19 750399 WHIZ BOLT 3 8 16 X 1 10 20 722725 HEX CAP BUTTON SOCKET SCREW 3...

Page 102: ...Copyright 1998 Rayco All Rights Reserved Printed in U S A RG 1672 DXH DIESEL SUPER CUTTER TM RAYCO 102 P ARTS HYDRAULIC SYSTEM SHEET 1OF 3 99 ...

Page 103: ...Copyright 1998 Rayco All Rights Reserved Printed in U S A 103 RG 1672 DXH DIESEL SUPER CUTTER TM RAYCO P ARTS HYDRAULIC SYSTEM SHEET 2 OF 3 ...

Page 104: ...Copyright 1998 Rayco All Rights Reserved Printed in U S A RG 1672 DXH DIESEL SUPER CUTTER TM RAYCO 104 P ARTS HYDRAULIC SYSTEM SHEET 3 OF 3 ...

Page 105: ...01 16 90 DEGREE O RING ELBOW MF X MOR 1 750992 34 6801 8 90 DEGREE O RING ELBOW MF X MOR 3 750992 35 6500 4 SWIVEL ELBOW MF X FS 2 750992 36 2404 8 12 MALE CONNECTOR MF X MP 1 750992 37 6801 4 90 DEGREE ELBOW MF X MOR 7 750992 38 6400 4 6 CONNECTOR MF X MOR 6 750992 39 6602 4 SWIVEL RUN TEE MF X FS X MF 2 750992 40 2605 4 4 4 MALE RUN TEE MF X MP X MF 2 750992 41 6801 4 8 90 DEGREE MF X MOR 3 7509...

Page 106: ...BUTTON HEAD CAP SCREW 6 92 STRAINER 1 93 GASKET 1 94 722110 WHIZ BOLT 1 4 20 X 3 4 8 95 1856 TANK STRAP 1 96 738983 OIL LEVEL SIGHT GAUGE 1 97 RUBBER GASKET 2 98 OIL LEVEL SIGHT GAUGE BODY 1 99 O RING 2 100 MOUNTING SCREW 2 101 750399 WHIZ BOLT 3 8 16 X 1 10 102 4590 INNER TONGUE 1 103 2335 PIN 2 104 728004 COTTER PIN 3 16 X 1 1 2 2 105 6365 MAIN FRAME 1 106 728008 HAIR PIN 1 107 2897 CLEVIS PIN 1...

Page 107: ...Copyright 1998 Rayco All Rights Reserved Printed in U S A 107 RG 1672 DXH DIESEL SUPER CUTTER TM RAYCO NOTES ...

Page 108: ...ARTS ELECTRICAL SYSTEM SHEET 1 OF 2 SELF POWERED CIRCUIT 54 SEE BELOW To identify the wiring harness you need locate the engine identification number Engine 1011 will use 5 harness and engine 1011F will use 54 harness If you have any other questions please contact your RAYCO representative or the factory ...

Page 109: ...Copyright 1998 Rayco All Rights Reserved Printed in U S A 109 RG 1672 DXH DIESEL SUPER CUTTER TM RAYCO PARTS ELECTRICAL SYSTEM SHEET 2 OF 2 TRUCK POWERED CIRCUIT ...

Page 110: ... ASSEMBLY 1 28 OPTIONAL EMERGENCY SHUTDOWN SWITCH 1 29 EMERGENCY LIGHT RELAY 1 30 736102 TRAILER CONTACT 6 CONTACT FEMALE 2 31 736096 COILED CABLE 6 WIRES 1 32 1951 JUNCTION BOX ASSEMBLY 1 33 4765 LIGHTING BRAKE WIRING HARNESS RIGHT SIDE 1 34 4766 LIGHTING BRAKE WIRING HARNESS LEFT SIDE 1 35 1859 AMBER MARKER WIRING HARNESS 1 36 730026 WIRE CLAMP 3 8 1 37 726302 LOCKWASHER 3 8 2 38 724301 HEX NUT ...

Page 111: ...Copyright 1998 Rayco All Rights Reserved Printed in U S A 111 RG 1672 DXH DIESEL SUPER CUTTER TM RAYCO NOTES ...

Page 112: ...rcontrolconsole mounted on swing away arm with protective polycarbonate window full length rubber shield and fully covered valve bank Warninglights high temperature low oil pressure alternator fan belt failure high hyd oil temperature HighwayLighting DOTapproved Brakingsystem Electric ENGINE Model Deutz BF4L1011F turbo charged air cooled diesel Number of cylinders 4 in line Bore 3 6 91 mm Stroke 4...

Page 113: ...e 1 2 5 cm I D 4 000 psi 28 MPa operating 16 000psi 110MPa surge Cross travelcylinders 2 3 7 6 cm bore x 8 20 3 cm stroke 1 3 2 cm dia rod Telescoping trailer tongue cylinder 2 6 4 cm bore x 60 152 cm stroke 1 3 8 cm dia rod Liftcylinder 3 7 6 cm bore x 10 30 5 cm stroke 1 3 2 cm dia rod CUTTING WHEEL Wheeldiameter 25 64 cm Wheelthickness 1 2 54 cm Cutting wheel bearings 2 3 16 5 5 cm pillow block...

Page 114: ...rts Those parts that are accepted as being defective will either be replaced or repaired without charge at the option of Rayco This warranty covers parts only and not labor charges The dealer from whom the machine was purchased shall provide the labor for the 180 day warranty period provided the equipment is brought to his premises for repair Parts and equipment are warranted only to the extent of...

Reviews: