Supplied By www.heating spares.co Tel. 0161 620 6677
31
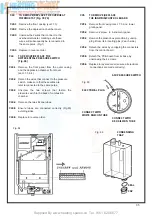
7.8.8
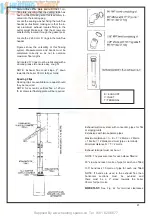
Disconnect unions for two heating (right side of
boiler) water pipelines (Fig.59).
7.8.9
Unscrew the ring that fasten the heat exchanger
to the combustion chamber.(Fig.59).
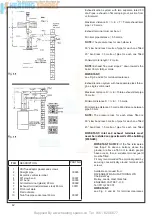
7.9.5
Remove burner (sect. 7.15).
Remove top insulation pieces at sides .
Remove 2 screws securing combustion chamber
to rear of boiler.
Lower chamber carefully remove all insulation
panels.
7.9.6
Replace in reverse order.
7.9.2
Remove fan (sect. 7.6).
7.9.3
Remove condensing heat exchanger
(sect.
7.6.5)
7.9.4
Remove the fl ue hood (sect 7.7).
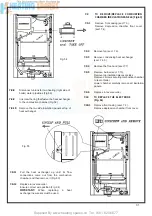
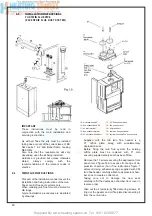
Fig. 54
Fig. 55
7.9
TO REMOVE/REPLACE COMBUSTION
CHAMBER INSULATION PANELS (Fig.63)
7.9.1
Remove front casing (sect 7.3) .
Remove depression chamber front cover
(sect 7.4).
7.10
TO REPLACE THE ELECTRODE
(Fig.
61)
7.10.1
Remove front casing (sect. 7.3).
Remove depression chamber front cover .
7.8.11
Pull the heat exchanger up until its fl ow
connections come out from the combustion
chamber and then remove it (Fig. 60).
7.8.12
Replace in reverse order.
Ensure correct wire position (Fig. 94).
IMPORTANT:
When replacing a heat
exchanger new seals must be used.
7.8.10
Remove the two side insulation panels at top of
heat exchanger.
Summary of Contents for HE Primary AAA
Page 16: ...Supplied By www heating spares co Tel 0161 620 6677 17 Fig 18...
Page 31: ...Supplied By www heating spares co Tel 0161 620 6677 Fig 58 32 Fig 56 Fig 57...
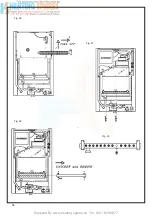
Page 33: ...Supplied By www heating spares co Tel 0161 620 6677 34 Fig 60 Fig 61 Fig 62 Fig 63...
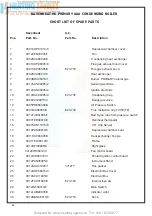
Page 42: ...Supplied By www heating spares co Tel 0161 620 6677 section 10 EXPLODED PARTS DIAGRAM 43...

