background image


DRAFT 

Operator’s Manual 


© Copyright 2014 - Rail-Ability Limited 

Page 

41

 of 

64


Conversion 

12.5.15 System Information 


Figure 28 - System Information Page 

 
Having  accessed  the  “System  Information”  option  from  the  main  menu,  the  screen  will  display  as 
shown above. Use the F4 key for “ESC” to return to the main menu page. 


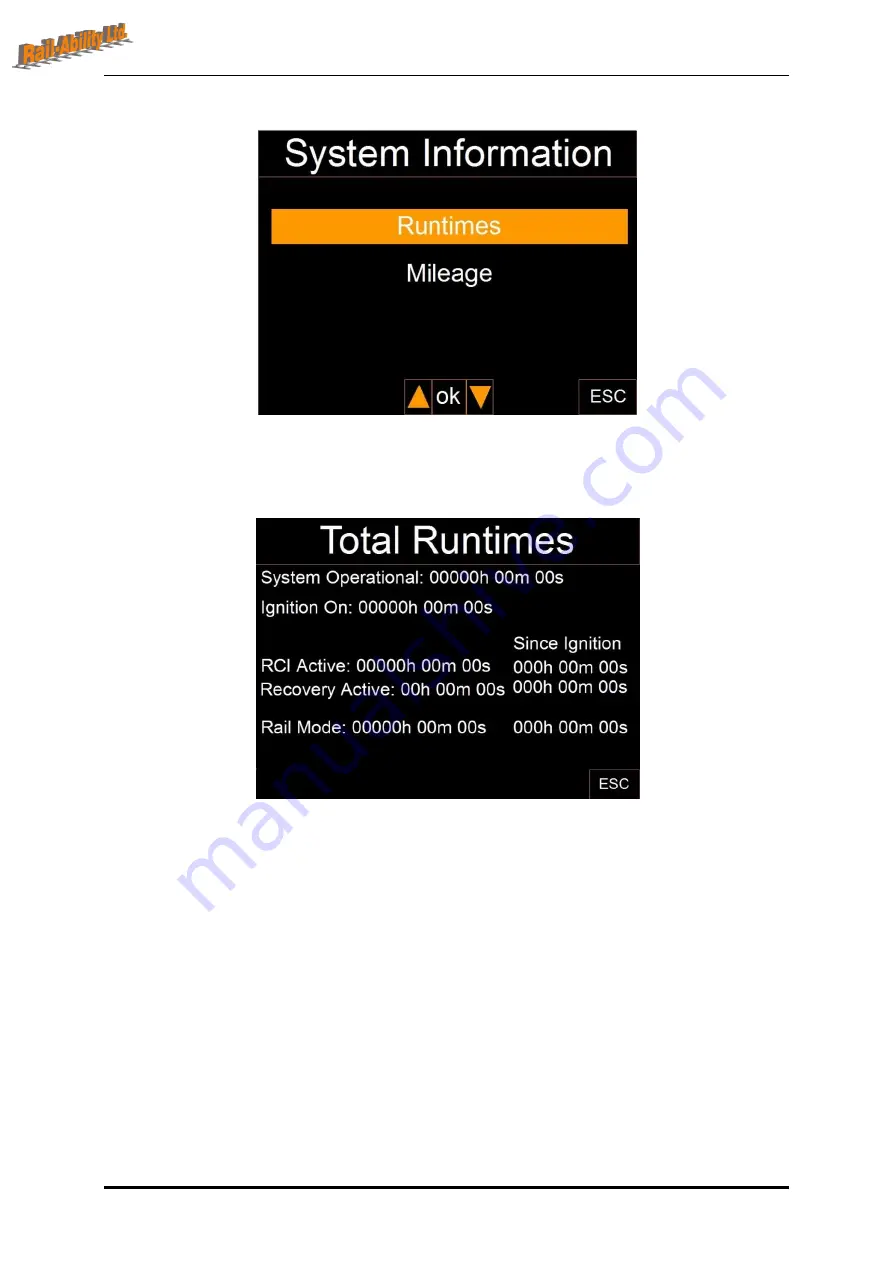
Figure 29 - Runtimes Page 

 
The “Runtimes” option of the “System Information” menu will display the page above. The times are 
updated constantly, and apart from the “since ignition” values are retained in the memory of the 
system even after shutdown. 
 
The “RCI Active” values are in reference to the Prolec system components, the “Recovery Active” 
values are increased only with the operation of the recovery pumps, and “Rail Mode” time is 
incremented only when both rail axles are considered fully deployed by the system. 
 

Summary of Contents for RA400

Page 1: ...Operator s Manual Copyright 2014 Rail Ability Limited Page 1 of 64 Conversion Part no RAMAX400 001 Issue 1 November 2014 Original Instructions English DRAFT Operator s Manual RA400 Rail Max Tracked Excavator ...

Page 2: ... Track 14 7 3 Travelling on the Rail 14 8 Boom Safety 16 8 1 Requirements 16 8 2 General 16 8 3 Residual Risks 17 8 4 Before Operating 18 8 5 During Operation 18 8 5 1 Safe Working Distances 19 8 5 2 Load Handling 19 9 On Off Tracking the Machine 21 9 1 General 21 9 2 Access Points 21 10 Emergency Operations 22 10 1 Recovery Options 22 10 1 1 Machine Engine 22 10 1 2 Battery Driven Pump 22 10 1 3 ...

Page 3: ... 45 14 3 Engine Oil Level 45 14 4 Hydraulic Oil Level 45 14 5 Batteries 45 14 6 Rail Wheels and Profiles 46 14 7 Fuel Leaks 46 14 8 Completion 46 15 Function Tests 47 15 1 Requirements 47 15 2 General 47 15 3 From the Machine Cab 47 15 3 1 Emergency Stop 47 15 3 2 Horn 47 15 3 3 Crawler Drive Braking 47 15 3 4 Rail Gear Deployment 48 15 3 5 Rail Drive and Rail Braking 48 15 4 Completion 49 16 Work...

Page 4: ...utton 27 Figure 7 In Cab Auxiliary Controls 28 Figure 8 Left hand lever 29 Figure 9 Right hand lever 29 Figure 10 Screen Surround 30 Figure 11 Boot Screen Page 31 Figure 12 Main Screen Page 32 Figure 13 Speedometer 32 Figure 14 Rail Axle Selection Page 33 Figure 15 Front Rear Axle Selection Page 34 Figure 16 Front Rear Axle Control Page 34 Figure 17 Axles Down Display 35 Figure 18 Main Menu Page 3...

Page 5: ...HIS MACHINE ONLY TRAINED AND AUTHORISED PERSONNEL SHALL BE PERMITTED TO OPERATE THIS MACHINE THIS MACHINE IS VERY COMPLEX AND POTENTIALLY DANGEROUS IT IS IMPORTANT THAT BEFORE ANY USE OF THE MACHINE OCCURS EXCEPT TRANSPORTATION AND ATTACHMENT HANDLING THE FOLLOWING ACTIVITIES HAVE ALL BEEN PERFORMED AND CARRIED OUT IN THE ORDER STATED 1 Pre Operation Actions 2 Routine Maintenance as determined by ...

Page 6: ...k and or rail wheels to enable operators and personnel to undertake maintenance work underneath overhead lines and structures forming part of the rail infrastructure The Rail Max complies with the provisions of the following EC Council Directives Electromagnetic Compatibility EMC 2004 108 EC Noise Emission in the Environment by Equipment for use Outdoors 2000 14 EC 3 Limitations The use of this ma...

Page 7: ...st Edition XXXXX HOST MACHINE MAINTENANCE INFORMATION Excavator Publication No 9803 6580 5 JX235 JZ255 for machines with serial numbers in the range 1234500 to 1235499 Engine Manuals Isuzu 4HK1X Tier III Engine Service Manual part number 0297 9912 3rd edition 03 03 and the Engine Parts Manual part number 0312 0836 1st edition 01 03 Prolec RCI Prolec Liftwatch Rail Rated Capacity Indicator Operator...

Page 8: ...ty alert symbol used to indicate the presence of a potentially hazardous situation which if not avoided could result in death or serious injury Yellow with safety alert symbol used to indicate the presence of a potentially hazardous situation which if not avoided may cause minor or moderate injury Yellow without safety alert symbol used to indicate the presence of a potentially hazardous situation...

Page 9: ...perly trained to safely operate the machine Always obey national traffic regulations while driving the machine on roads Be aware of the machine s overall length width and height Avoid hazardous situations The lack of maintenance may cause damage or hurt people Know and understand the safety rules before going on to the next items Prior to use Always perform Pre Operation Actions Always perform Fun...

Page 10: ...nt electrical line sway or sag Keep away from the machine if it contacts energised power lines Personnel on the ground or in the platform must NOT touch or operate the machine until energised power lines are shut off Do not attempt to assist someone in direct or indirect contact with the power line before the power has been disabled as you run the risk of being electrocuted yourself Warn others to...

Page 11: ...n driving Use a banksman or machine controller when required Limit travel speed according to conditions slope location of personnel and any other factors which may cause collision If a hook protrudes outside the edge of the machine it must be removed before travelling Take care while travelling on rail especially when the boom is elevated Beware of slippery and limited traction conditions on rail ...

Page 12: ... alert the operator driver when required Boom Be aware of limited sight distance and blind spots when operating the boom Use a banksman or machine controller when required Be aware of boom position and tail swing when slewing Do not lower the boom unless the area below is clear of personnel and obstructions 6 7 Crushing Hazards Keep hands and limbs away from moving parts of the machinery Maintain ...

Page 13: ...y Improper contact with components under any cover will cause serious injury Only trained maintenance personnel should access compartments Access by the operator is only advised when performing a pre operation inspection All compartments must remain closed and secured during operation Always operate the machine in a well ventilated area to avoid carbon monoxide poisoning 6 11Lifting Hazard Use the...

Page 14: ...ways observe minimum clearance from overhead wires Ensure a relevant C Form is obtained Never use in 3rd and 4th rail areas Never use on track without a possession Never use on track under live OLE Never use on track when trains are running Never On Off Track in areas with close proximity hazards such as in station platforms under on bridges in tunnels or in areas with low overhead structures or l...

Page 15: ... IS SLEWED SO THAT THE UPPER STRUCTURE IS PARALLEL TO THE LOWER STRUCTURE AND THAT THE CAB DOOR IS SHUT TO ENSURE THIS IS MAINTAINED IT IS ALSO ESSENTIAL THAT THE ARM IS POSITIONED LOWER OR EQUAL TO THE HEIGHT OF THE CAB THIS IS TO ENSURE OVERHEAD STRUCTURES ARE NOT STRUCK THE PROLEC HEIGHT LIMITER FITTED TO THE MACHINE CAN THEN BE SET AND ACTIVATED TO MAINTAIN THIS POSITION 2 EXTRA CARE AND OBSER...

Page 16: ...itioned on the track Use the boom in accordance with the use and maintenance manual making sure that the load and radius are within the maximum limits shown on the load chart the boom is used progressively avoiding sudden load movements swinging or dragging of the load is avoided the load is lifted before rotating When using implements set up an exclusion zone The machine is not left unless the lo...

Page 17: ...loads or pump oil flow not pertinent to the boom class if it is used for improper tasks side oblique or reversal pull if it is used in poor sites corrosive environment too high or too low temperature foundry see Workplace Assessment if the load exceeds the rated capacity indicated on the relevant plates Wrong manoeuvring the boom can fall break or overturn if the operator performs a wrong manoeuvr...

Page 18: ...ll the inputs and then continuously monitors the operation and the efficiency of the limiting device 8 4 Before Operating WARNING Before boom use check that safety and protection devices shown above and detailed below are fitted and active Check valve for boom rams Check valve for dipper ram Check valve for cab ram Rotation limiting device Check valves for rotation control flow regulators Lifting ...

Page 19: ...ow indicates the minimum safety working distances concerning the various parts of the body and each figure illustrate circumstances which may turn out to be dangerous if you fail to respect the minimum safe distances Part of body Minimum safe working distance mm Figure Part of body Minimum safe working distance mm Figure Whole body 500 Foot 120 Head 300 Hand wrist fist 100 Leg 180 Toe 50 Arm 120 F...

Page 20: ...ation In cases where the load is too close the boom must be operated from the opposite side Do not operate with sudden movements Activate the controls with slow and progressive movements and rotate slowly and with care paying attention to the stability of the machine With vertical lift rotate slowly in order to avoid side skidding Only move the machine when the boom is in transport position The ma...

Page 21: ...ed out in accordance with railway regulations Work must be carried out in accordance to rulebook GE RT 8000 and all safety precautions must be followed at all times When working on electrically operated routes be sure to observe official regulations Always observe minimum clearance from overhead wires Never install TAS or on track the machine without a possession All staff must be fully trained an...

Page 22: ... ride latches Utilise the Battery Powered Pump 10 1 3 Manual Over ride Latches In the event of an emergency loss of power or RCI system failure an over ride is fitted to this machine to enable the booms to be slewed retracted and lowered to their stowed positions This is used in conjunction with various power sources and control mechanisms as detailed above The over ride key is located in the Engi...

Page 23: ...k into service Figure 3 Engine Bay Over ride Button Location 10 2Battery Driven Pump The battery driven hydraulic pump is activated via the in cab onscreen display auxiliary hydraulics function menu The electric pump will not run if the main pumps are operating or if the batteries are discharged below 21 volts 10 3On Rail Recovery 10 3 1 Towing Refer to the manuals detailed in section 4 and adhere...

Page 24: ... that must be followed The Off Tracking area must be inspected for its suitability as normal An area where there are no obstructions should be selected For example there should be no conductor rail present no high ballast shoulders and no obvious hazards Emergency Off Tracking must not be carried out on a cant Emergency Off Tracking must not be undertaken with attachments other than a bucket 10 4 ...

Page 25: ...s are raised up to the maximum height for travel If the machine tips or tilts forward severely onto the track while climbing off the rail head and the weight of the machine is exerted excessively onto the track components severe damage to the infrastructure may result Grounding out the machine while the machine is travelling off rail may result in severe damage to the machine and or infrastructure...

Page 26: ...ponents 1 Quick Hitch 2 Boom 3 Top Deck Access Steps 4 Hydraulic Oil Filler 5 Top Deck Handrails 6 Fuel Filler 7 Counterweight 8 Engine 9 Rear Tow Coupling 10 Rear Rail Gear 11 Batteries 12 Draw Bar 13 Cab 14 Cab Access Step 15 Tracks 16 Track Sweepers 17 Front Rail Gear 18 Front Tow Coupling 1 2 3 4 18 11 12 13 5 7 8 9 6 10 17 16 15 14 ...

Page 27: ...S 1 The machine engine should not be running when grabs attachments hydraulics are connected and disconnected 2 For all other functions refer to the JCB JZ235 operator hand book Figure 5 In Cab Controls 12 2Emergency Stop Disables all rail control functions and stops machine movements see Fig 6 Figure 6 In Cab Dashboard Emergency Stop Button Bucket Grab Diverter Activation Red Light Grab active Al...

Page 28: ...ce 5 Right hand lever 6 Side and Rear blind spot Camera Interface 7 Left hand lever Figure 7 In Cab Auxiliary Controls The extra tilt rotator extend functions are operated using the 4 auxiliary rollers on top of the left and right hand levers see Figures 8 and 9 For other auxiliary functions refer to the steel wrist operator hand book The Prolec RCI instructions are given in the Prolec lift watch ...

Page 29: ... ROTATOR 6 Axle Lock Toggle Front Green Button 7 AUX 1 TILT ROTATOR Front Roller 8 Rail Axle Lock Toggle 9 Bucket Grab Diverter Toggle Figure 8 Left hand lever 1 Rotate Roller TILT ROTATOR 2 Spare 3 Low flow auxiliary 4 Low flow auxiliary 5 Auto idle 6 Bucket Grab divert Toggle Front Green Button 7 AUX 2 TILT ROTATOR Front Roller Figure 9 Right hand lever 2 1 3 4 5 1 2 3 4 5 6 6 7 7 8 9 ...

Page 30: ...iled from here whilst within the unit housing shown above are shown without the surround for clarity 12 5 2 Screen Icons Brief descriptions of the function of each icon displayed on the screen are given in the table below Icon Name Function Hare Speed The hare speed icon will be displayed to indicate the fast travel state of the machine Tortoise Speed The tortoise speed icon will be displayed to i...

Page 31: ...ystem is prepared for their movement Horn Operational This icon is shown at the front screen and main menu pages only indicating the horn is not muted Horn Muted This icon is shown at the front and main menu pages only indicating the horn has been muted 12 5 3 Initial Screen Pages Once the screen is powered with 8 32V DC there are two initial screen pages that will always be displayed one as the s...

Page 32: ...e parking brake with a 2 second delay from the button press to the actuation of the brake system The F4 key will toggle the system s axle lock the main menu of the display is accessed on this screen by pressing the F3 button and the rail axle control pages are accessed using the F2 button The horn icon shows if the horn is muted or not a red cross is added when muted 12 5 4 Travel Control Tortoise...

Page 33: ...ction is activated by the F2 button and will return the system to the main screen page when utilised To allow the machine to travel in rail mode or return to road travel mode the rail axles must be deployed or retracted respectively As each axle can only be operated independently select the front or rear axle use the left arrow to select the front and the right arrow to select the rear Once the re...

Page 34: ...em is ready and primed for their movement up or down To raise or lower the axles press the rail axle control button to select the axle you wish to operate then operate the dozer up down lever forwards to lower the rail axle or backwards to raise it To raise lower the other axle press the rail axle control switch into the alternative position then operate the blade lever in the same way NOTE TO ENA...

Page 35: ...direction of travel required to travel the machine under normal conditions This is reversed each time the machine is slewed 180 o If the left hand lever is pushed the system will ignore it 12 5 10 Main Menu Figure 18 Main Menu Page Having pressed the F3 function key on the main screen the main menu will be displayed as shown above There are 4 possible selections to make at this screen and it is po...

Page 36: ...and these instructions so that in the event of a machine failure you the machine can be out in a safe position Slew the machine so that the arm is parallel to and clear of any adjacent line with the counterweight facing the vehicle that is to be used for towing Lower the boom so that the highest point is no higher than the top of the cab Connect the failed machine and recovery vehicle together wit...

Page 37: ... LIMITER FITTED TO THE MACHINE CAN THEN BE SET AND ACTIVATED TO MAINTAIN THIS POSITION Failure to comply with these requirements may result in severe damage to the machine and or the rail infrastructure 12 5 13 I O Status Figure 20 I O Status Selection Page Upon selecting the I O Status option from the main menu a similar menu system is used to select Inputs or Outputs for their respective status ...

Page 38: ...ot be required to be re entered unless the system is shutdown at vehicle ignition off for example Figure 23 Force Values Page Having entered the correct pass code different from the Gauge Locks page code hold the ok button to activate the required outputs using the up and down arrows to navigate through the options and F4 to return to the I O Status menu page Use the F1 F2 and F3 keys to access mo...

Page 39: ...y the page shown above At this screen it is possible to change the brightness of the screen view the information about the software version of the display screen or view the hardware information Figure 25 Brightness Page Using the left and right arrow keys it is possible to decrease and increase the screen brightness respectively Similarly using the F1 and F2 keys will change the brightness to 100...

Page 40: ...g system and Application information give information as to the firmware and operating software versions used by the screen in the system These are displayed for reference only Figure 27 Hardware Info Page Accessing the Hardware Info option of the main menu will show the page above on the screen this is simply for reference to give hardware information Using the ok button will also return the scre...

Page 41: ...age Figure 29 Runtimes Page The Runtimes option of the System Information menu will display the page above The times are updated constantly and apart from the since ignition values are retained in the memory of the system even after shutdown The RCI Active values are in reference to the Prolec system components the Recovery Active values are increased only with the operation of the recovery pumps ...

Page 42: ...t to 0 by the operator from the main screen page or if it reaches a reading over 1000 miles The From Ignition travel distances are the only other distances besides the Trip meter distance that can be reset and are only reset when ignition is powered off The obviously larger recorded distances such as the odometer reading and forward reverse travel distances are only given as whole integers Smaller...

Page 43: ... work shift The inspection is designed to discover if anything is apparently wrong with a machine before the operator performs the function tests The pre operation inspection also serves to determine if routine maintenance procedures are required Only routine maintenance items specified in this manual may be performed by the operator If damage or any unauthorised variation from factory delivered c...

Page 44: ...lts pins and other fasteners Lubrication points Tow bar Fire extinguisher Rail wheel hubs treads flanges and rail sweepers Ladders steps and hand rails Guards and covers Check the entire machine for Cracks in welds or structural components Dents or damage to machine Excessive wear rust corrosion or oxidation Ensure that all structural and other critical components are present and all associated fa...

Page 45: ...amage engine components Check the oil level with the engine off Refer to the OEM manuals detailed in section 4 14 4Hydraulic Oil Level Maintaining the hydraulic oil at the proper level is essential to machine operation Improper hydraulic oil levels can damage hydraulic components Daily checks allow the inspector to identify changes in oil level that might indicate the presence of hydraulic system ...

Page 46: ...heck condition of rail wheel treads and flanges for pitting scoring bruising flat spots or other damage 3 Check that no cracks flats or scoring are visible Refer to Service Manual listed in section 4 for further checks and limits 14 7Fuel Leaks Failure to detect and correct fuel leaks will result in an unsafe condition An explosion or fire resulting from a fuel leak may cause death or serious inju...

Page 47: ...tting the machine into service If in doubt contact Rail Ability Ltd Refer to the sections below and carry out each of the items in turn 15 3From the Machine Cab 1 Ensure the gear shift lever is in the neutral position 2 Turn the ignition key in the cab to position two 3 Wait for the display to show the immobiliser PIN code entry interface 4 Enter the correct immobiliser PIN code 5 Enter the 8 digi...

Page 48: ...tton to select the rear axle then operate the dozer up down lever forwards to lower the rail axle or backwards to raise it Move the front rail gear raise lower lever down o Result The front rail gear will lower onto the rails and lift the machine off the ground o Result The display will indicate when the front rail gear is fully deployed Green rail wheel 17 Repeat for the rear rail gear using the ...

Page 49: ...DRAFT Operator s Manual Copyright 2014 Rail Ability Limited Page 49 of 64 Conversion 15 4Completion If the machine is to be used carry out the Workplace Assessment detailed in this manual ...

Page 50: ...the machine to overturn Hazardous locations OHLE power cables Overhead and high voltage conductors Obstructions including Building walls Balconies Eaves Scaffoldings Tree branches Any items that may lift the machine Other machines Inadequate surface support to withstand all load forces imposed by the machine Wind and weather conditions The presence of unauthorised personnel Any possible unsafe con...

Page 51: ...DRAFT Operator s Manual Copyright 2014 Rail Ability Limited Page 51 of 64 Conversion 16 4Completion If the machine is to be used carry out the Operating Instructions detailed in this manual ...

Page 52: ...his operator s manual 2 Perform Pre operation Actions 3 Perform Function Tests 4 Carry out a Workplace Assessment These Operating Instructions detail each aspect of machine operation 17 3Emergency Stop Ensure that all personnel either operating or working alongside this machine are aware of the locations and function of the emergency stop button The emergency stop button is located in the machine ...

Page 53: ...te the road lighting systems automatically The machine is now in road mode and can be driven using the cab controls Follow the Off Tracking procedure described in this manual and the relevant Rail Ability manual 17 7Work Lights The work lights on the booms can be switched on and off by using the pushbutton in the cab To switch the work lights ON push the button in the cab To switch the work lights...

Page 54: ... reach limits given or the load indicated on the above mentioned charts If the limits are exceeded the limiting device will be activated 17 9 2 Lifting Moment Limiting Device A characteristic which permits the classification of booms is their lifting capacity or maximum lifting moment The moment is defined by the value obtained from the weight of the load to be lifted kg by its distance metres fro...

Page 55: ... to only just lift the rear tracks slightly clear of the sleeper ends 6 Manoeuvre the machine to align the front rail axle with the track 7 Deploy the rear rail axle then deploy the front rail axle in stages to keep the machine relatively level as it raises NOTE DO NOT ATTEMPT TO MANOEUVRE THE MACHINE WITH THE CRAWLER TRACKS WHEN THE RAIL GEAR IS SEMI FULLY DEPLOYED WARNINGS 1 WHEN ON TRACKING CAR...

Page 56: ...TLY SET TO GIVE ADEQUATE TRACK GAUGE CLEARANCE 150MM OF CLEARANCE FROM THE UNDERSIDE OF THE TRACK PADS TO THE RAIL HEAD IS REQUIRED TO CLEAR INFRASTRUCTURE DO NOT OVER TIGHTEN THE TRACKS Note The rail lights will automatically illuminate the drive travel Joystick will become active and the speedometer will recalibrate for rail mode ...

Page 57: ...ction If the slope of the transport machine bed exceeds the maximum slope rating the machine must not be loaded and a suitable transport machine must be obtained After the machine is loaded 1 Ensure that the rail gear remains raised after loading Only the tracks must be contacting the deck of the transport machine 2 Ensure that the machine slew brake is applied 3 Never leave the machine engine run...

Page 58: ...ition remove the key and lock the cab doors before transporting Inspect the entire machine for loose or unsecured items Use chains of ample load capacity Use a minimum of 2 chains per side Adjust the position to prevent damage to the chains and machine Never chain over the boom cab or dipper Only chain to the dedicated identified chaining down eyes ...

Page 59: ...ment weight See the serial plate on the machine for the attachment weight or the Specification section in this manual Do not demount removable counterweights or the attachment when on a slope Never demount the attachment with the booms out of the lowered to ground position Always fully stow the attachment before disengaging the quick hitch Always recheck the quick hitch Always recheck the attachme...

Page 60: ...g 1 A0617 Danger overhead live wires 9 A0623 VAB instruction label 1 A2236 No access under live O L E 1 A2380 Data panel 2 A3973 Engineering Acceptance Certificate 2 A4281 Maintain 3 points of contact 3 For other decals fitted which are marked 817 refer to the OEM Manuals referred to in section 4 Use the illustrations on the following pages to verify that all decals are legible and in place ...

Page 61: ...yright 2014 Rail Ability Limited Page 61 of 64 Conversion Figure 31 Base Machine Front Nearside Isometric View 28161 SWL Plate SWL Plate 28164 Inside A4281 A3973 A4281 Inside 28171 Inside A2380 POV Number 28161 A0617 A0617 A0617 ...

Page 62: ...l Copyright 2014 Rail Ability Limited Page 62 of 64 Conversion Figure 32 Base Machine Rear Offside Isometric View Tail Swing Marker A0617 Tail Swing Marker 28161 A2380 POV Number 28161 A0617 A3973 A0617 A0617 A0617 SWL Plate ...

Page 63: ...DRAFT Operator s Manual Copyright 2014 Rail Ability Limited Page 63 of 64 Conversion Figure 33 Base Machine Front View A0623 A2236 A4281 A0617 ...

Page 64: ... Machine deck height road 2 150 m Machine deck height rail 2 300 m Power supply Power Source 24 volt D C Batteries 2 x 115 Ah Controls Proportional 24 Volt DC outlet at dipper Standard Maximum hydraulic pressure 405 bar Hydraulic tank 120 litres Fuel tank 290 litres Weights Overall weight 40 000 kg Maximum weight with auxiliary counter weight 45 000 kg Environmental data and limits Sound power lev...

Reviews: