


Upgrading Print
System Software
1-17
Introduction
6
Disk 6 is the printer’s internal hard disk. Press the Select
key. The following message displays:
INSTALL TO DISK
INSERT DISK
7
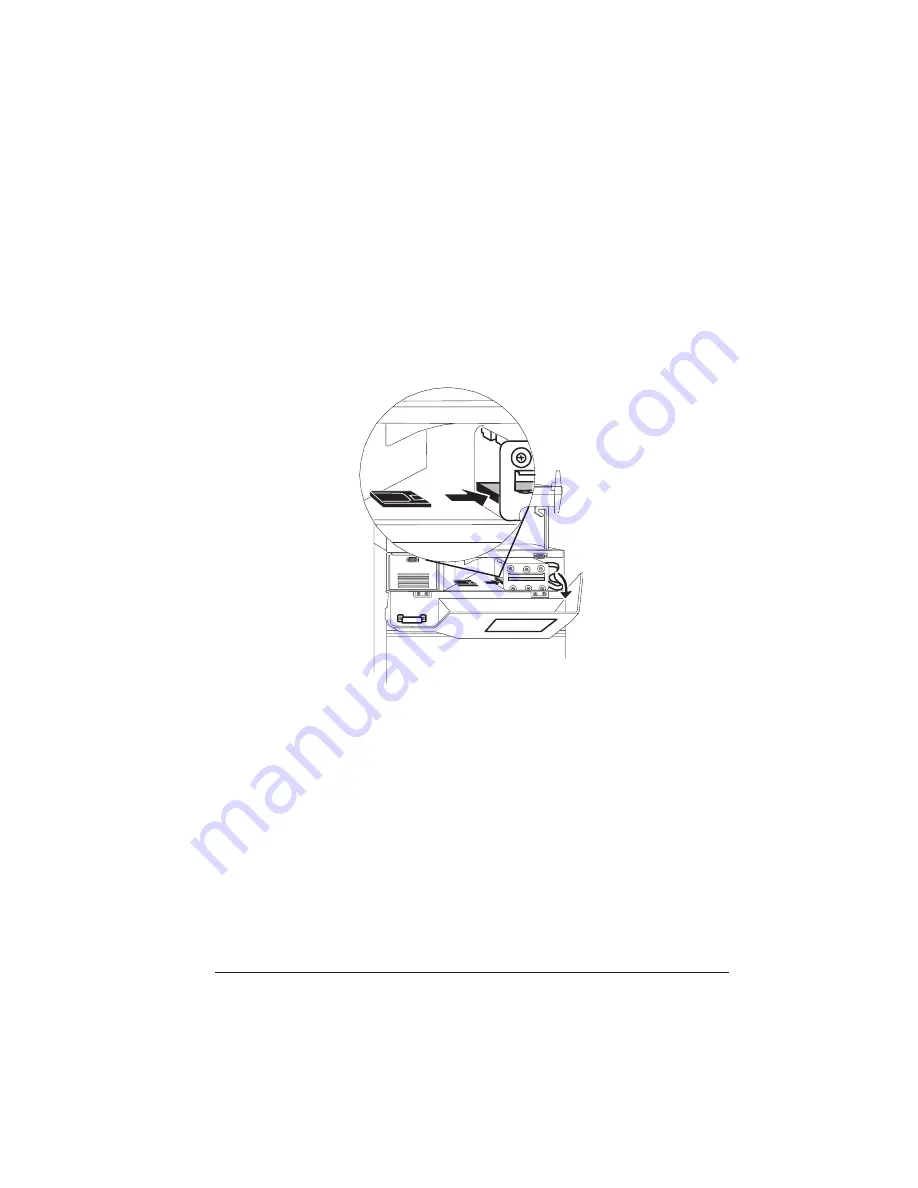
Pull the control panel assembly away from the front of the
printer. The floppy disk drive is located inside the printer as
shown below.
8
Insert the first disk into the floppy disk drive, and then press
the Select key.
The message window reads
INSTALL TO DISK/INSTALL-
ING
; then
INSTALL TO DISK/DSK 6:
before switching back to
INSTALL TO DISK/INSERT DISK
when it is ready for the next
disk. Each disk takes several minutes to load. This process con-
tinues until all the disks have been loaded.
9
Press the Select key after inserting each disk.
10 Remove the last disk and close the control panel assembly.
You have now completed installing the new system software and
are ready to boot the system.
Summary of Contents for 2025
Page 1: ...QMS 3825 3225 2025 Print System Administrator s Guide 1800367 001B...
Page 32: ......
Page 36: ......
Page 60: ......
Page 140: ......
Page 141: ...A QMS Customer Support In This Appendix Sources of customer support QMS world wide offices...
Page 146: ......


