


EN
Refer to the following chapters for the minimum value of patient physiological signals. Operation of
the device below the minimum value may result in inaccurate results.
1.2 General Information
This device is defibrillator protected, the time of defibrillation recovery is 5 seconds. Note that no
precautions specific to the device is required during defibrillation, and defibrillation discharge has no
effect on the monitor. The equipment uses the gray silicone airway, in case of the effect to the
equipment when defibrillation device was used on the patient.
General instruction
The device is applied to Blood Pressure (BP) measurement and monitoring for adult, pediatric, and
neonatal. It stores 300 records of common user and 350 records of ambulatory Blood Pressure data.
Every record includes the detailed measurement time, systolic blood pressure, diastolic blood pressure,
mean blood pressure, pulse rate, error message and record number, etc.
This device has friendly operation interface, and adopts 2.4 inch color LCD. It integrates data review
function and display function which includes BIG FONT single record data review, data list, BP data
trends chart, the current time, date, power and so on.
User can power on/off the monitor, start manual measurement, set system parameters, and so on, with
five keys in the front panel. (Please refer to "Button Functions" part for detail.)
The monitor does not have an alarm system, but it will prompt when the power is low, the
measurement is wrong, or the measure data exceeds the set limits. When the power is low or the
measurement is wrong, the prompt is audible and visual, the device will buzz intermittently and the red
light will flash to prompt the user to replace batteries or prompt the reason of the failed measurement;
when the measure data exceeds the set limits, the prompt is audible, the font color of measurement
results will change to red. Users can open and close the prompt according to needs.
The cuff socket is located on the top of the device and the USB socket at the bottom of the device. The
stored data can be transferred to the computer with the USB interface, and then various operations can
be performed by using the PC software. (Please refer to "Software Functions" part for details.)
Note
In the common user mode, the monitor will periodically turn off backlight if there is no operation, and
automatically shuts down if there is no operation for two minutes. When the backlight turns off in the
ambulatory blood pressure mode, the blue indicator intermittently flashes to prompt the device in
running state.
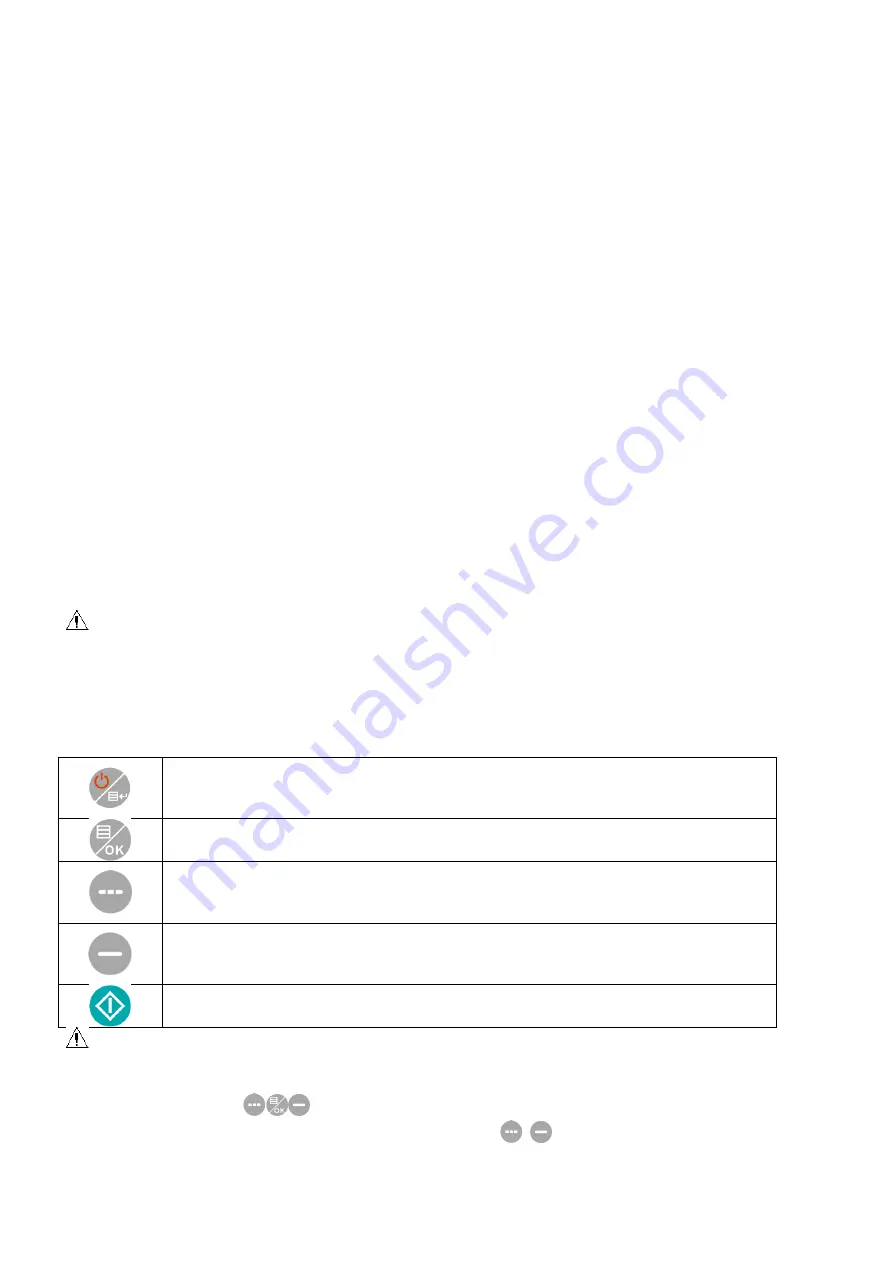
1.3 Button Function
The Blood Pressure Monitor is completely operated with the buttons. They are:
Press the button for a long time, then the system will start. When turning on and off the
monitor, the red and the blue light both flash once to prompt that the on or off
operation is successful. Press it for a short time to return the boot-strap interface.
The middle bottom of the screen indicates the function of this key. Whatever menus the
system is in, press the button and the system immediately executes a certain function.
The text in the left bottom of the screen indicates the function of this key.
Such as: The button is the prompt switch in the boot-strap interface, up key in the
"SYSTEM MENU", and left key in the "TREND" chart.
The text in the right bottom of the screen indicates the function of this key.
Such as: the button is the data review key of current user in the boot-strap interface and
down key in the "SYSTEM MENU" and right key in the "TREND" chart.
Start/Stop button. If measuring, press this key to cancel the current measurement.
Note
After connecting the USB cable, all of the buttons are disabled. If the BP measurement is in progress,
this measurement is will be automatically canceled.
During measurement,
three buttons are all disabled.
The rectangular mark in the screen moving with the operation of
,
buttons is called “cursor”.
Operation can be performed in any position at which the cursor can stay. When the item is not selected,
the cursor is yellow; when selected, the cursor becomes red.
1.4 Interfaces
For the convenience of operation, different kinds of interfaces are in different parts of the device.