background image

2

3

2

3

Quick Start Guide

PreSonus StudioLive

 16.0.2

Basic O

per
ation

So
ft

w

a

re

:

Univ

ersal C

on

tro

l, C

aptur

e,

and Studio O

ne Ar

tist

Resour

ce

s

English

English

Deutsch

Français

Español

Español

Français

Deutsch

Quick Star

t:

Le

vel S

etting

Basic O

per

ation

So

ft

w

a

re

:

Univ

ersal C

on

tr

ol

, C

aptur

e,

and Studio O

ne Ar

tist

Resour

ce

s

O

ver

view

Q

uick Star

t:

Le

vel S
etting

Introduction

1.1

Overview

1

0

Getting Started

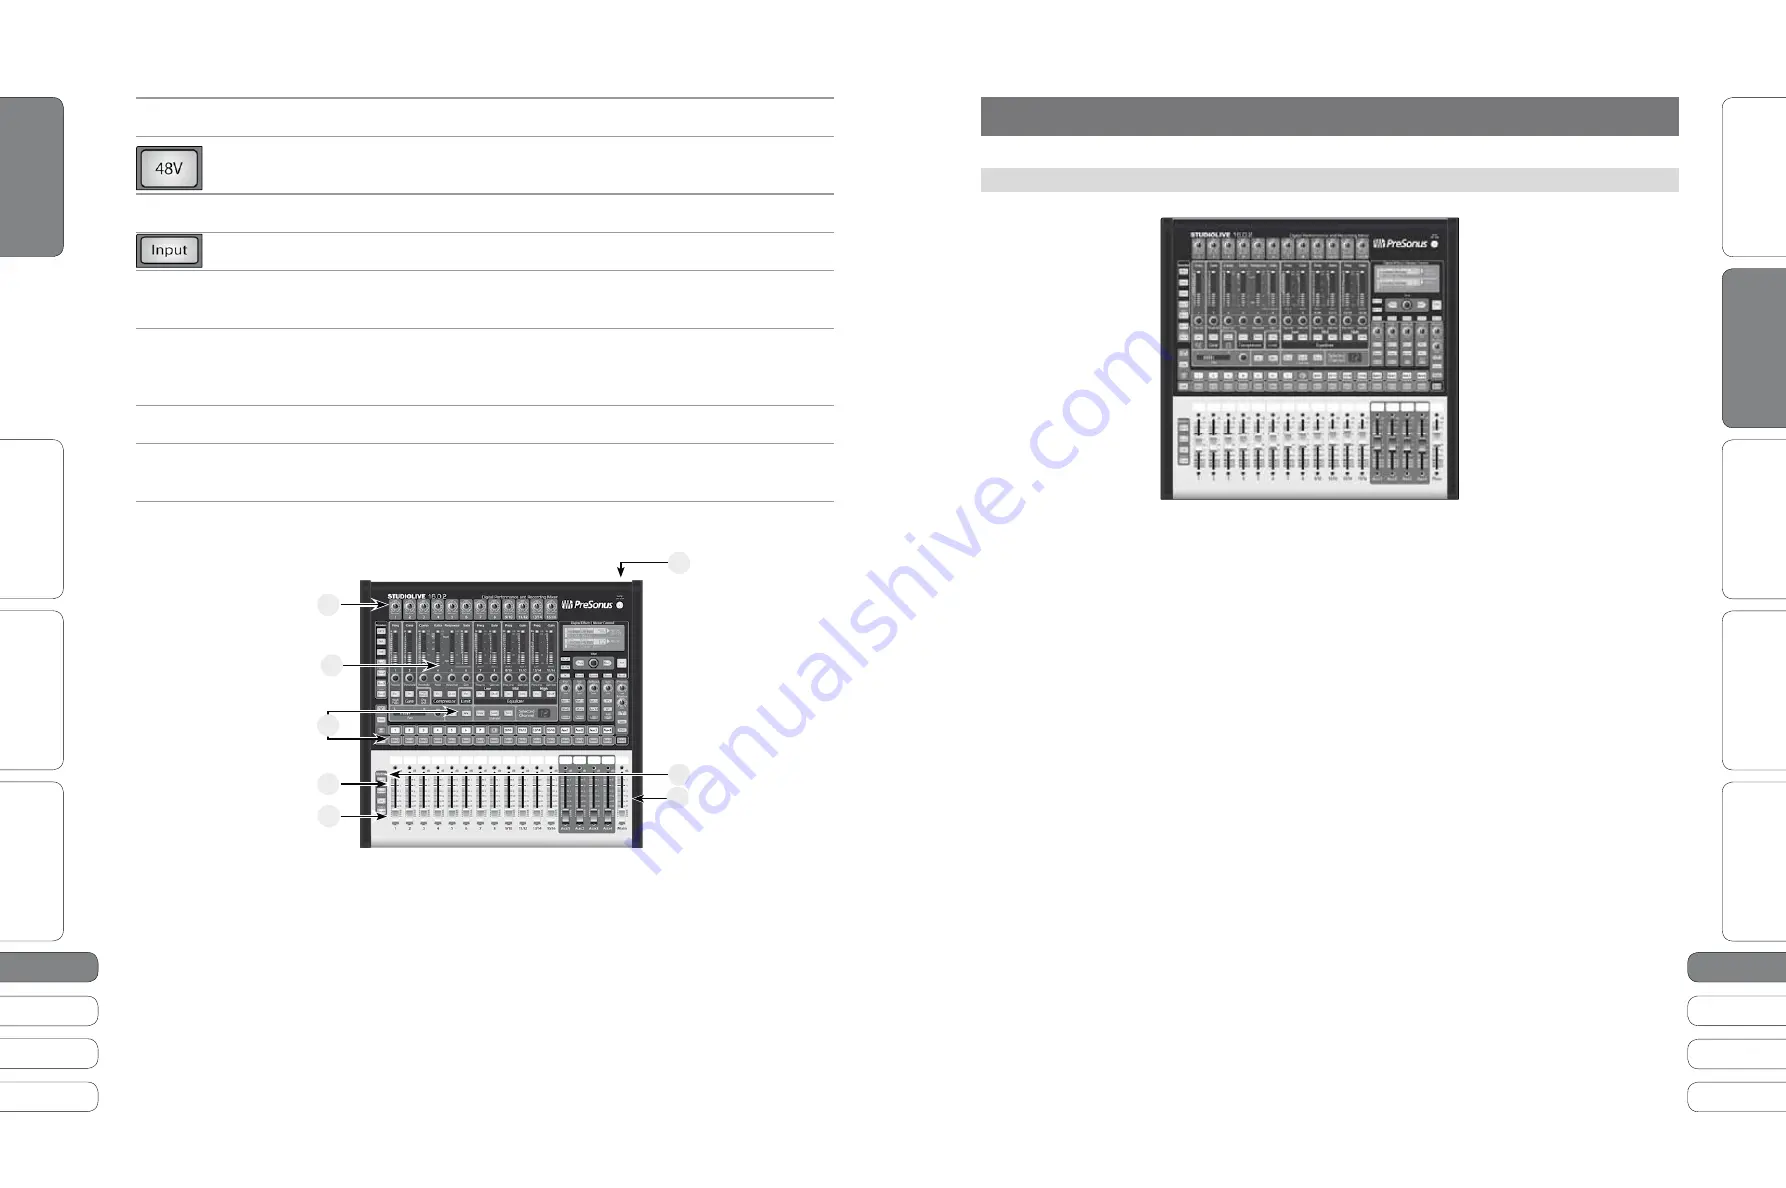
5.  Plug your StudioLive into a power outlet and turn it on.

6.  If your microphone requires phantom power, press the Select button on Channel 1 

of your StudioLive and engage the 48V button.

7.  Turn on your amplifier or powered monitors.

8.  Press the Input button in the Meter section.

9.  Speak or sing into your microphone at about the same volume 

as you will do during the upcoming performance.

10.  Turn the trim knob on Channel 1 clockwise while watching the first meter in the Fat 

Channel. Adjust the Channel 1 trim knob until a little more than half of the green 
LEDs are lighting up. The red LED at the top of the meter should never light up!

11.  Move the Channel 1 fader up until it reaches “U” (unity gain).

12.  Bring up the Main fader until you can comfortably listen 

to your microphone through your speakers.

13.  With Channel 1 selected, you can use the Fat Channel 

to add dynamics processing and EQ.

10

4

13

11

8

5

12

6

Power User Tip :

 Using Sip (Solo In Place) To Dial In Your Mix

Most engineers start with the drums and work from the bottom up. To begin, bring all your faders 
down and raise your main fader to unity gain. Press and hold the SIP button in the Solo section until 
it illuminates red. Press the Solo button, and then the Multimode button on your kick-drum mic 
channel. Notice that all the other channels on your StudioLive have been muted. Bring up the fader 
on the kick-drum channel and press the channel’s Select button. The Fat Channel will display the 
dynamics processing, EQ, output routing, and pan settings for the kick drum. Using the encoders 
and meters in the Fat Channel, set up the compressor and EQ for this channel. Once you are satisfied, 
bring the fader back down, and press the Solo button again. Next, press the Multimode button on 
the snare-mic channel and repeat this procedure. In this way continue with each drum mic and then 
move on to the other instruments that are connected to your StudioLive. When you have finished with 
all the instruments, press the SIP button again and slowly bring up your faders to set up your mix.

1.0 Overview

1.1 

Introduction

Thank you for purchasing the PreSonus StudioLive™ 16.0.2. PreSonus Audio 
Electronics has designed the StudioLive™ utilizing high-grade components to ensure 
optimum performance that will last a lifetime. Loaded with 12 high-headroom, 
XMAX microphone preamplifiers; a built-in 16x16 FireWire recording and playback 
engine; MIDI I/O; Fat Channel processing with 3-band EQs, compressors, limiters, and 
downward expanders; DSP effects; 4 aux buses; extensive LED metering; mixer save/
recall; channel-strip save/recall/copy/paste; talkback; and more, StudioLive breaks 
new boundaries for music performance and production. All you need is a computer 
with a FireWire connection, a few microphones and cables, speakers, and your 
instruments, and you are ready to record in the studio or in front of a live audience!

We encourage you to contact us at 225-216-7887 with any questions or 
comments you may have regarding your PreSonus StudioLive. PreSonus 
Audio Electronics is committed to constant product improvement, and we 
value your suggestions highly. We believe the best way to achieve our goal of 
constant product improvement is by listening to the real experts, our valued 
customers. We appreciate the support you have shown us through the purchase 
of this product. We are confident that you will enjoy your StudioLive!

A Quick Note About This Quick Start Guide: 

This Quick Start Guide is written to help 

you get acquainted with your StudioLive. Complete information is in the User Manual 
located on your StudioLive Driver disc. We suggest that you use both the Quick Start 
Guide and the User Manual to familiarize yourself with the features, applications, 
and correct connection procedures for your StudioLive before trying to connect it to 
your computer. This will help you avoid problems during installation and setup. 

Throughout this Quick Start Guide you will find Power User tips. These tips provide 
innovative mixing tricks that are unique to the StudioLive. In addition to the Power User 
tips, you will find an assortment of audio tutorials at the back of the User Manual. These 
tutorials cover everything from microphone placement to equalizer and compression 
suggestions and are included to help you get the most from your StudioLive mixer. 

Summary of Contents for StudioLive 16.0.2

Page 1: ...StudioLive 16 0 2 Quick Start Guide www presonus com English Fran ais Espa ol Deutsch...

Page 2: ...e presence of uninsulated dangerous voltage within the product s enclosure that may be of sufficient magnitude to constitute a risk of electric shock to humans CAUTION TO REDUCETHE RISK OF ELECTRIC SH...

Page 3: ...allow your inputs to clip Watch the level meters when the LEDs near the Clip mark the top LED will illuminate indicating that the analog to digital converters are in danger of being overdriven Overdr...

Page 4: ...n to the other instruments that are connected to your StudioLive When you have finished with all the instruments press the SIP button again and slowly bring up your faders to set up your mix 1 0 Overv...

Page 5: ...put Talkback Mic Input You can use either a dynamic or a condenser microphone with phantom power Mono Output carries a mono summed version of the stereo signal from the main bus Mono Output Trim contr...

Page 6: ...Sections assign effects to Auxes and Mains and route the Effects buses through the Fat Channel Talkback Section assigns the Talkback mic input to Aux 1 2 or Aux 3 4 Solo Section includes AFL PFL and S...

Page 7: ...function of the Fat Channel is to provide dynamics processing and filtering for every input and output on the StudioLive The rotary encoders work in conjunction with the meters directly above them to...

Page 8: ...oad a preset to any channel on the StudioLive first press the Select button for the desired channel From the Fat Channel press the Load button You will notice that LCD now displays the Channel Preset...

Page 9: ...annels that is moving encoder 1 will set the send level for channel 1 to the selected Aux The meters will display the send level of each of the input channels The encoders for the stereo channels set...

Page 10: ...e the Value encoder to scroll to an empty position in the GEQ preset library Press the Next button again to give your preset a name Once you are satisfied with your changes press the Store button EQ O...

Page 11: ...pre fader Power User Tip By summing the Main Mix and the Solo bus you can raise the volume of the channel you re tweaking without affecting the mix the audience is hearing To do this enable both the...

Page 12: ...a computer Because of this it very important that the sample rate be selected and locked in prior to beginning any recording or performance 3 2 2 FireWire Sends and Returns For complete information se...

Page 13: ...d presets are contained in dedicated folders in VSL To view a specific set of presets simply click on its tab t SCENE Displays stored Scenes t FAT CH Displays stored Fat Channel presets t FX Displays...

Page 14: ...0 2 User Manual To load a Scene or preset from the Browser window you simply select it and drag it over the mixer or channel you wish to load it on Scenes and presets can be dragged from either the On...

Page 15: ...ual Scene Recalling Menu As discussed in Section 5 1 the StudioLive allows you to decide which group of parameters you would like to recall with a Scene The Scene Recalling menu on the Setup tab corre...

Page 16: ...on the StudioLive mixer and in Capture for this purpose If an input channel is not clipping on your StudioLive mixer you can be sure that there it will not clip in Capture Activating Recording in Cap...

Page 17: ...has included a copy of Studio One Artist with your StudioLive for just this purpose Both Studio One Artist and Studio One Pro can open Capture Session files All markers edits track names etc will be p...

Page 18: ...e separate entries for each available item Uncheck any item you don t wish to install then click on the Install Packets button at the bottom left of the menu to install the selected content t When fin...

Page 19: ...drag an effect or group of effects from one channel to another drag in customized effects chains and instantly load your favorite virtual instrument patch without ever scrolling through a menu Opening...

Page 20: ...io One Artist Information The Studio One Artist Advanced Quick Start Guide can be found in your 16 0 2 User Manual Complete information about Studio One can be found in the Studio One User Guide The S...

Page 21: ...uslyTopSecretrecipefor Jambalaya Ingredients t 5 lbs link andouille sausage t 3 lbs boneless chicken t 2 lbs ground beef t 3 lbs onions yellow or purple t 2 stalks of celery t 1 lb bell peppers green...

Page 22: ...orrect the interference by one or more of the following measures t Reorient or relocate the receiving antenna t Increase the separation between the equipment and the receiver t Connect the equipment i...

Reviews: