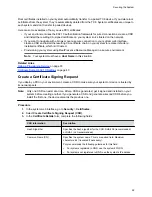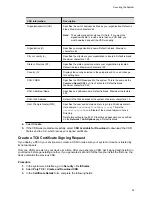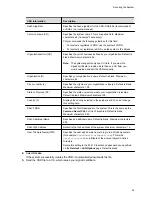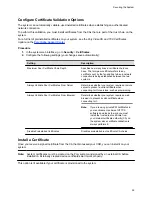
Enable the System to Use a Web Proxy
By default, your system configuration doesn’t use web proxies.
Procedure
1.
In the system web interface, go to
Network
>
LAN Network
>
Web Proxy Settings
.
2.
Select
Enable Web Proxy
.
Set Up Automatic Web Proxy Configuration
With automatic web proxy configuration, your system obtains a URL for downloading a proxy auto-
configuration (PAC) file through DHCP option 252.
Procedure
1.
In the system web interface, go to
Network
>
LAN Network
>
Web Proxy Settings
.
2.
Select
Automatic Configuration
.
3.
Select
Enable WPAD
.
This option enables the web proxy auto-discovery protocol (WPAD), which helps your system
automatically download the PAC file on your network using DHCP option 252.
4.
Enter the
Proxy User Name
and
Proxy Password
.
5.
Select
Save
.
Your system automatically downloads and reads the PAC file specifying the proxy rules. The system also
automatically downloads subsequent files before the current file expires.
Set Up Semi-Automatic Web Proxy Configuration
With semiautomatic web proxy configuration, you must specify the URL your system uses to download a
proxy auto-configuration (PAC) file.
Procedure
1.
In the system web interface, go to
Network
>
LAN Network
>
Web Proxy Settings
.
2.
Select
Automatic Configuration
.
3.
If checked, clear the
Enable WPAD
check box.
4.
Enter the
Proxy User Name
and
Proxy Password
.
5.
Enter the
PAC URL
from which your system downloads the PAC file.
6.
Select
Save
.
Your system automatically downloads and reads the PAC file specifying the proxy rules. The system also
automatically downloads subsequent files before the current file expires.
Manually Update the PAC File on the System
Even if you set up your system for automatic or semi-automatic web proxy configuration, you can still
manually download a new PAC file from the server.
The PAC file may update on the server much sooner than its expiration date. In this situation, you don’t
have to wait for the system to automatically download the latest version.
Securing the System
61

