


Flex-View Event Presentation Switching Solution
User Manual
8 U3 Event Controller
www.pixelhue.com
118
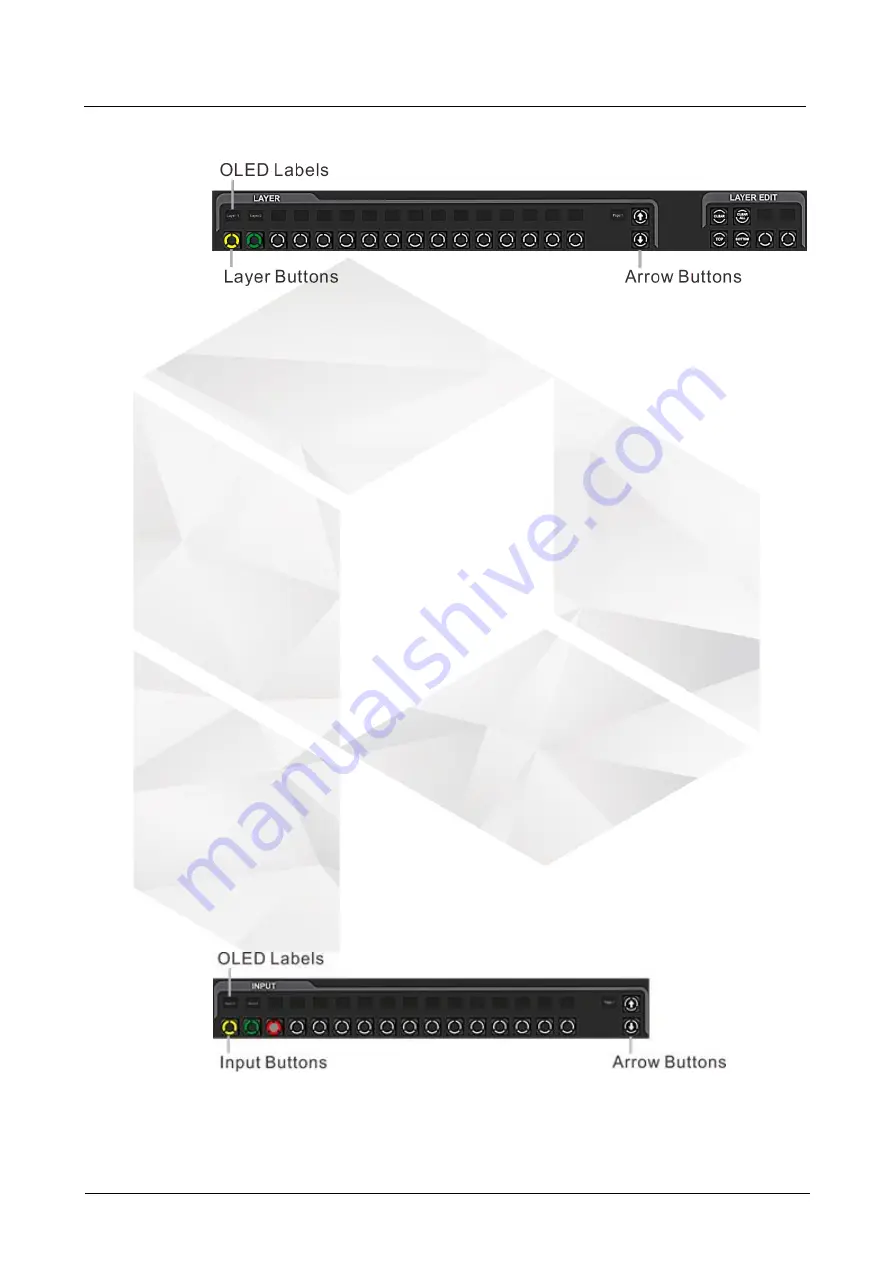
8.4.1.2 LAYER Buttons
In this area,
16 layer buttons with multi-page functionality allow you to add layers and view
layer statuses. The number of layers that can be added depends on the type of
the connected seamless switcher.
The OLED labels above the buttons display the layer names that can be changed
on the secondary screen.
The arrow (up and down) buttons allow you to jump to the next page or previous
page.
The OLED label next to the arrow buttons displays the current page number (16
layers per page).
CLEAR: Press the button to clear the selected layer. The layer whose status LED
is green can be cleared.
CLEAR ALL: Hold down the button to clear all the layers.
TOP: Press the button to bring the selected layer to front.
BOTTOM: Press the button to send the selected layer to back.
Blank button 1+OLED label: Press the button to set the layer capacity. The
options include SL, DL and 4K. After the settings, the OLED label above the
button displays the layer capacity.
Blank button 2+OLED label: Press the button to make the selected layer fill the
output areas the layer crosses. After the settings, the OLED label above the
button displays the button function name.
Status LEDs:
Green: The layer is selected.
Yellow: The layer is added.
Off: The layer is not added. (Press any of the non-lit buttons to add a new layer.)
8.4.1.3 INPUT Buttons
In this area,
16 input source buttons with multi-page functionality are provided. The number
of input sources that can be added depends on the type of the connected
seamless switcher.


