197
Printin
g
from
the
C
ame
ra
9
7
Press the
{
button.
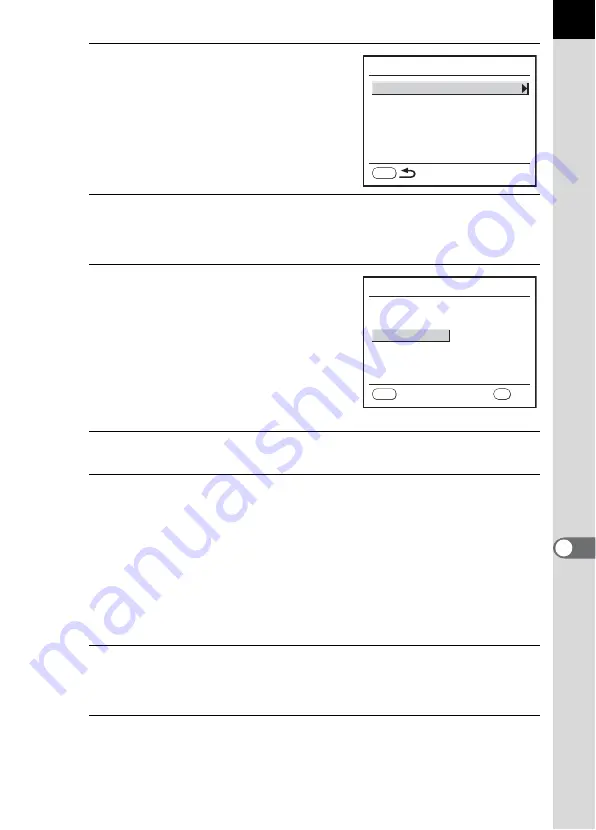
The screen for changing print settings
appears.
8
Select [Paper Size] and press the four-way controller (
5
).
The [Paper Size] screen appears.
9
Use the four-way controller
(
2345
) to choose the paper
size.
You can only choose a size that is
supported by your printer.
When [
_
Setting] is selected, images are
printed according to the printer settings.
10
Press the
4
button.
11
Repeat Steps 8 to 10 to set [Paper Type], [Quality] and
[Border Status].
The print settings change screen appears after each item has been set.
When [
_
Setting] is selected for these print settings, images are printed
according to the printer settings.
[Paper Type] with more
E
s supports higher quality paper.
[Quality] with more
E
s indicates higher print quality.
12
Press the
3
button.
The camera returns to the print settings confirmation screen in Step 6.
13
Press the
4
button.
The image is printed according to the settings.
Press the
3
button to cancel printing.
P i c t B r i d g e
P a p e r S i z e
P a p e r Ty p e
Q u a l i t y
B o r d e r S t a t u s
_
S e t t i n g
_
S e t t i n g
_
S e t t i n g
_
S e t t i n g
MENU
P a p e r S i z e
C a r d
8
″
× 1 0
″
A 4
A 3
L e t t e r
11
″
× 1 7
″
2 L
P o s t c a r d
4
″
× 6
″
L
1 0 0 × 1 5 0
MENU
_
S e t t i n g
O K
OK
C a n c e l
Summary of Contents for 19541
Page 36: ...Memo 34 ...
Page 56: ...Memo 54 ...
Page 182: ...Memo 180 ...
Page 202: ...Memo 200 ...
Page 220: ...Memo 218 ...
Page 224: ...Memo 222 ...
Page 267: ...Memo ...


