


18
Gem6K Hardware Installation Guide
GV6K-H20n: Connecting Single Phase AC Power
Single Phase 208/240VAC Operations:
1.
Connect power system’s safety earth to drive’s protective conductor terminal,
marked with the
symbol. Do not fuse the protective conductor terminal.
2.
Connect 208/240VAC, 1
∅
, 50/60 Hz power to drive’s L1 and L2 terminals.
3.
Reinstall the clear plastic terminal cover after you make connections.
NOTE: Default current settings are for three phase operation. For single phase, you must
modify the current settings in
Step 4 – Configuring the Drive on the next page.
Connections are illustrated in the next drawing.
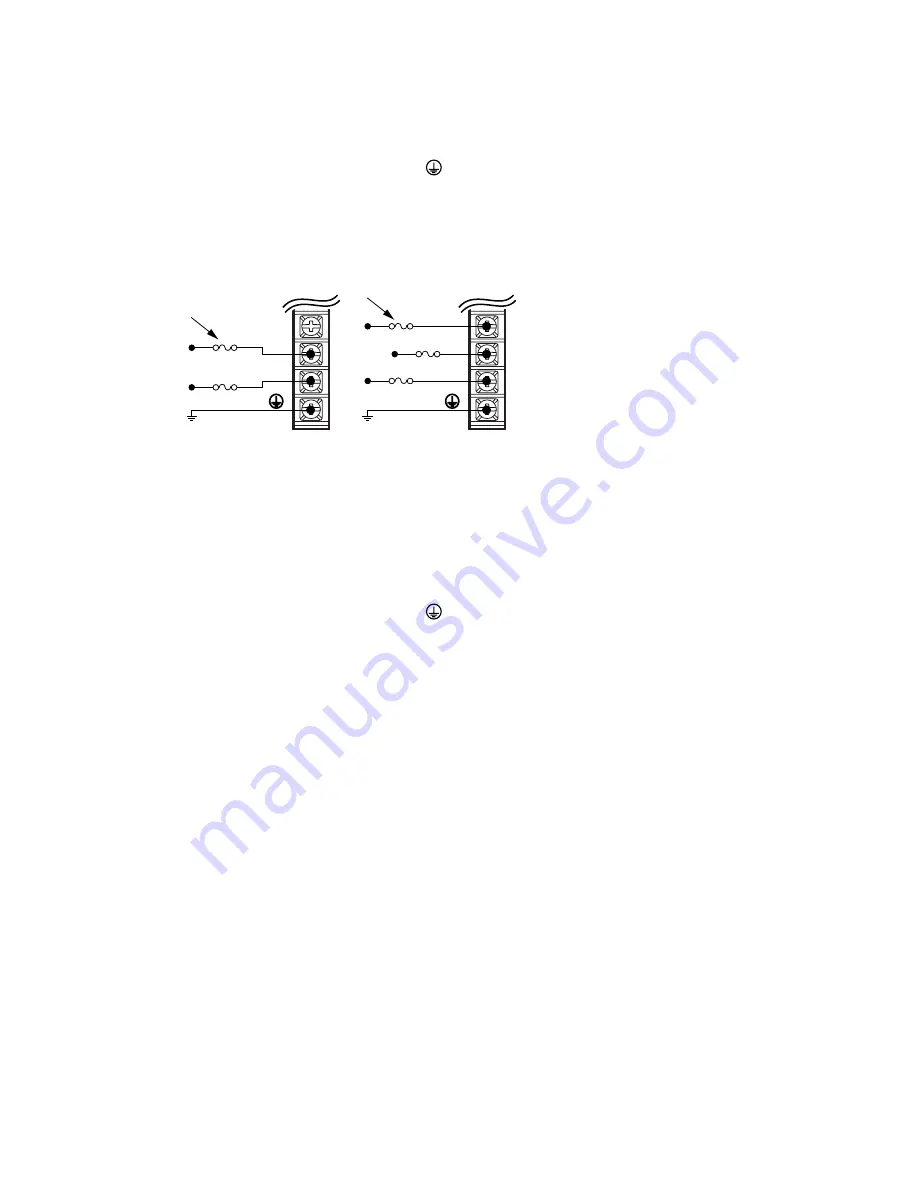
GV6K-H20n at 208/
240VAC 1-phase
165 – 264VAC,
1-phase
Fuses
L3
L2
L1
GV6K-H20n/H40N at
208/240VAC 3-phase
165VAC –
264VAC,
3-phase
L3
L2
L1
Fuses
GV6K-H20n:
Drive terminals: #8
(M4).
Mating terminals:
spade fork, 0.325"
maximum width.
Tightening torque: 20 in-lbs nominal,
24 in-lbs max.
GV6K-H40:
#10 (M5).
ring terminal,
0.25" I.D., 0.50" O.D.
20 in-lbs nominal,
24 in-lbs max.
Power Connections – GV6K-H20n/H40n
GV6K-H20n/H40n: Connecting Three Phase AC Power
Connections are illustrated in the drawing above.
Three Phase 208/240VAC Operations:
1.
Connect power system’s safety earth to drive’s protective conductor terminal,
marked with the
symbol. Do not fuse the protective conductor terminal.
2.
Connect 208/240VAC, 3
∅
, 50/60 Hz power to drive’s L1, L2 and L3 terminals.
3.
Reinstall the clear plastic terminal cover after you make connections.
Applying Power
1.
Verify that the load is not connected to the motor, and that the motor is clamped
securely in place.
2.
Verify that a cable is not attached to the DRIVE I/O connector.
3.
Apply power to the drive (both +24VDC and AC). After the power-up sequence, the
LEDs should display the following state:
Left LED
Right LED
Indicated State:
red
off
Drive ready, not enabled
Proceed to
Step 4 – Configuring the Drive
.


