3. Printer
31
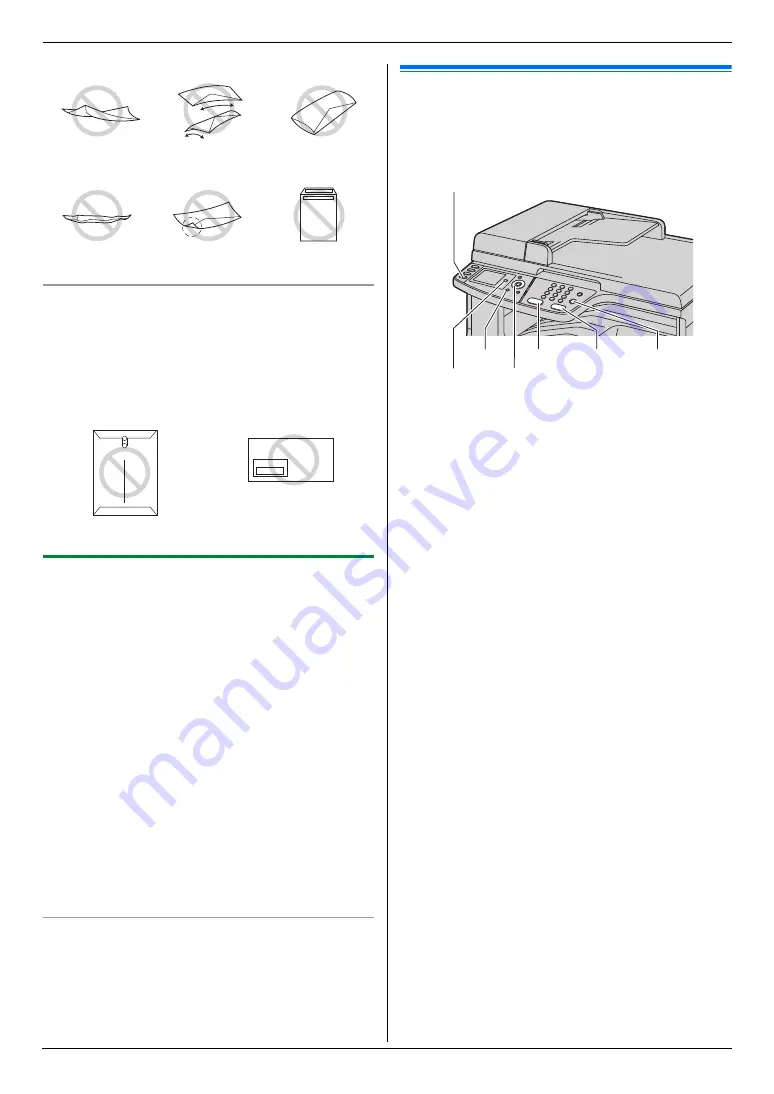
Do not attempt to print on any of the following types
of envelopes (these may cause damage to the unit):
L
Envelopes with clasps, snaps or tie strings
L
Envelopes with transparent windows
L
Envelopes that use encapsulated types of adhesive
that do not require moistening but rely on pressure to
seal them
3.1.2 Duplex printing (optional)
Connecting the optional automatic duplex unit allows
duplex printing (page 84). For example, to print from
WordPad, proceed as follows.
1
Open the document you want to print.
2
Select
[
Print...
]
from the
[
File
]
menu.
3
Select the unit’s name as the active printer.
L
For Windows 2000 users, go to step 5.
4
For Windows 98/Windows Me:
[
Properties
]
For Windows XP/Windows Vista:
[
Preferences
]
5
Click the
[
Basic
]
tab.
6
Select the desired duplex layout.
i
[
OK
]
L
Select
[
None
]
to deactivate this feature.
L
You can also change the duplex margin.
7
Click
[
]
or
[
OK
]
.
Booklet feature
You can print the document, then fold in half to create
booklets. The documents will be reduced to fit the
recording paper.
To use this feature, select the
[
Booklet
]
icon for the
[
Layout Print
]
after step 5 on “3.1.2 Duplex printing
3.2 Direct printing from an SD
card
You can directly print a file stored on an SD card without
using your computer.
1
Insert the SD card in the SD card slot of the unit
(page 81).
L
An SD card is not supplied.
2
{
}
3
Press
{V}
or
{^}
repeatedly to select
“
SD Card
”
.
i
{
Set
}
L
The printable files stored on the SD card will be
displayed.
4
Press
{V}
or
{^}
repeatedly to select the desired file.
i
{
Set
}
L
To select a file inside a folder, press
{V}
or
{^}
,
and then press
{
Set
}
. Repeat this until the
desired file is selected.
L
To select the desired file in thumbnail display
mode, press
{
<
}
or
{
>
}
, and then press
{
Set
}
.
L
You can select up to 40 files. To select multiple
files, repeat this step.
L
If you press
{
Stop
}
, you will return to step 3, and
the selection will be canceled.
L
If you press
{
Back
}
, you will return to step 3, and
the selection will be maintained.
5
If necessary, change the direct print settings (page
32).
6
{
Black
}
/
{
Color
}
Note:
L
To switch between the file name display and
thumbnail display, press
{*}
. You can change the
default display mode (feature #673 on page 75).
L
The file formats that can be printed are as follows:
–
TIFF
–
JPEG
–
PDF (files scanned from the unit, files scanned
from the computer using Quick Image
Navigator/Multi-Function Viewer, or received fax
documents saved to an SD card)
Twisted
Curled
Bent-edged
Waved
Dog-eared
Self adhesive
Clasp
Transparent window
{
Set
}{
V}{^}{
<
}{
>
}
{
Black
}
{
Advance
}
{
Back
}
{
}
{
Color
} {
Stop
}
Summary of Contents for DP-MC210
Page 127: ...127 Notes ...
Page 128: ...PNQX1419ZA CM0808DY0 CD ...


