Network Firmware Update Tool (LAN)
Page 4
2. Installation
2.1 Installing the Network Firmware Update Tool
1.
Start Microsoft Windows.
For Windows NT 4.0 / 2000 / XP, logon to the computer/network with an account that can add or
change configurations (i.e. Administrator).
2.
Run \xFirmware\Tools\NwFirmup\Setup\Setup.exe from the setup disk or folder.
3.
Enter the installation password.
Please ask your Sales Company to obtain the password.
4.
Follow the instruction on your screen to install the program.
5.
The completion message is displayed when install is completed.
Check “Yes, I want to …” and click [Finish] to restart your PC.
2.2 Setting up the Network Firmware Update Tool
1.
Click the Start button on the Taskbar, point to Programs, Panasonic, Panasonic Network
Firmware Update then click Network Firmware Update Configuration.
2.
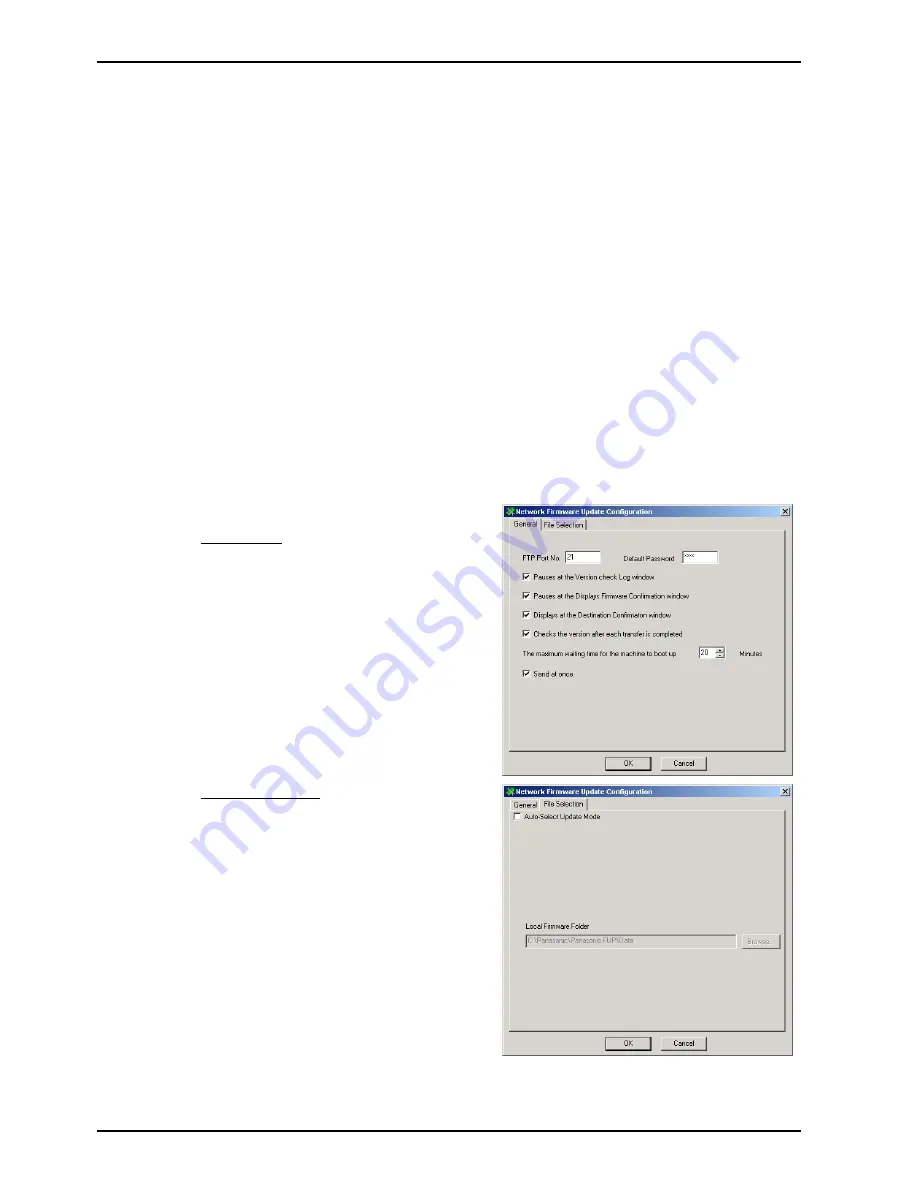
The Configuration dialog box appears.
General Tab
Please change the settings if necessary.
File Selection Tab
Auto-Select Update Mode
When you select this mode, the tool acquires
the type of firmware and version from the
device(s) of the specified address, and
updates the device to the latest version from
the “Local Firmware Folder”.
However, this mode cannot change the type of
firmware, so you must use the manual mode
when changing from the standard firmware to
the option firmware.
3.
Click [OK] to finish the setup.
Summary of Contents for DP-180/190
Page 48: ...48 UF 9000 JAN 2004 Ver 1 0 DP 180 190 20 Remove the LCD Module 127 ...
Page 72: ...72 UF 9000 JAN 2004 Ver 1 0 DP 180 190 3 3 Preventive Maintenance Points ...
Page 123: ...123 UF 9000 JAN 2004 Ver 1 0 DP 180 190 Sensor and Switch Location ...
Page 264: ...264 UF 9000 JAN 2004 Ver 1 0 DP 180 190 memo ...
Page 266: ...266 JAN 2004 Ver 1 0 UF 9000 DP 180 190 memo ...
Page 295: ...memo ...
Page 296: ...DZZSM00249 ...


