


43
RQT8365
§
Only when you have selected “480p” in “TV Type” (
➡
23).
[HDD]
[RAM]
[-R]
[-R]DL]
[-RW‹V›]
[+R]
[+R]DL]
[+RW]
[SD]
(You cannot delete items on finalized discs.)
≥
A title or a picture cannot be restored once it is deleted.
Make
certain before proceeding.
≥
You cannot delete while recording or copying.
≥
[HDD]
[RAM] [SD]
If you delete a recorded title (or a still picture), the
space deleted becomes available for recording.
≥
[-RW‹V›]
[+RW]
Disc space increases only when the last recorded
title is deleted.
≥
[-R]
[-R]DL]
[+R]
[+R]DL]
Available space does not increase after
deletion.
Preparation
≥
Press [DRIVE SELECT] to select the HDD, DVD or SD drive.
≥
[RAM] [SD]
Release protection (
➡
56).
1
While stopped
Press [FUNCTIONS].
2
Press [
3
,
4
] to select “Delete” and
press [ENTER].
[HDD]
[RAM]
To switch to the other view
Press the “B” button to select “Picture”.
Press the “A” button to select “Video”.
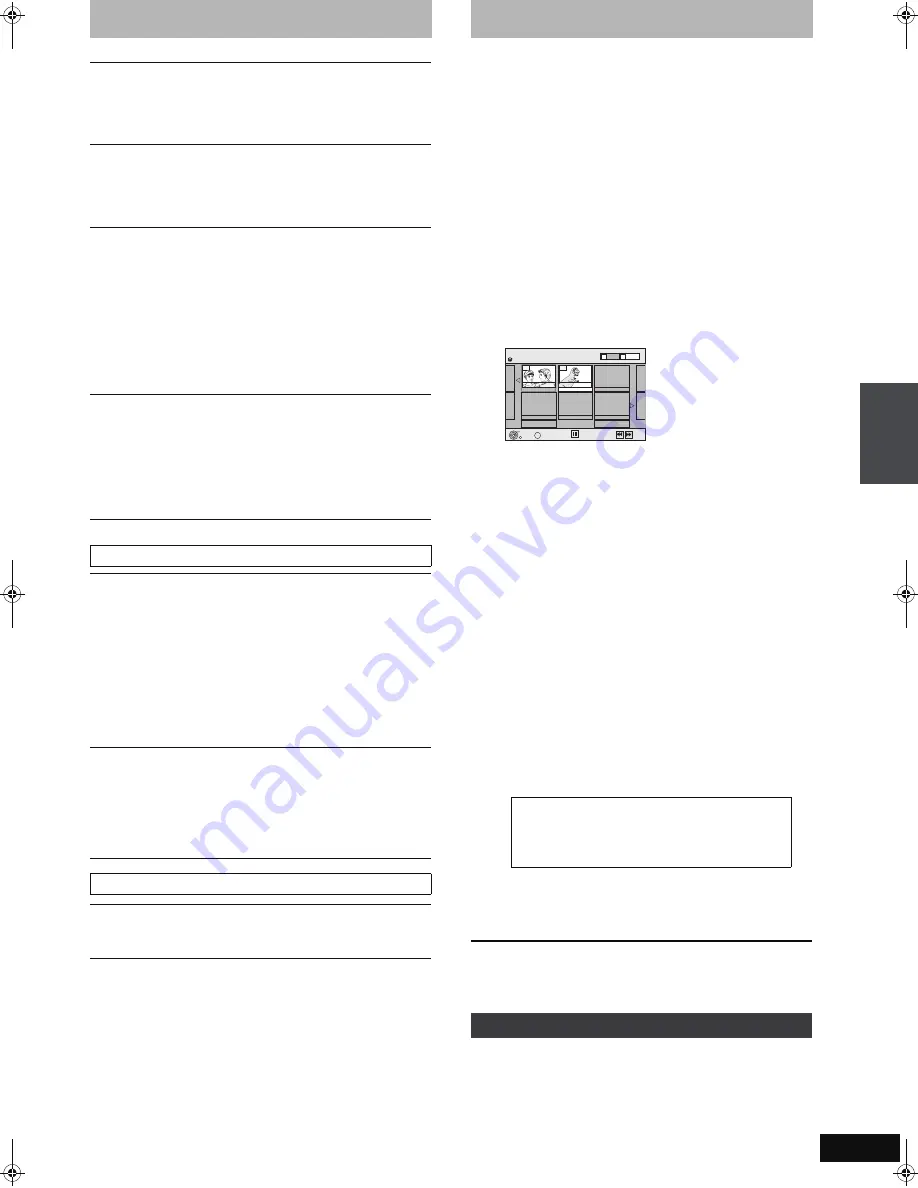
3
Deleting a title:
Press [
3
,
4
,
2
,
1
] to select the title to be
deleted and press [ENTER].
Deleting an album:
Press [
3
,
4
,
2
,
1
] to select the album to be
deleted and press [DELETE].
Deleting a still picture:
1 Press [
3
,
4
,
2
,
1
] to select the album
which contains the still pictures to be
deleted and press [ENTER].
2 Press [
3
,
4
,
2
,
1
] to select the still
pictures to be deleted and press [ENTER].
You can confirm the titles or still pictures etc. that you have
selected using the sub menu.
≥
Refer to sub menu operations for the “Title View” (
➡
44, step
5).
≥
Refer to sub menu operations for the “Picture View” or
“Album View” (
➡
48, step 4).
4
Press [
2
] to select “Delete” and press
[ENTER].
The title, album or the picture is deleted.
To return to the previous screen
Press [RETURN].
To exit the screen
Press [RETURN] several times.
1
While playing
Press [DELETE].
You cannot delete a picture during a slideshow.
2
Press [
2
,
1
] to select “Delete” and
press [ENTER].
The title or the still picture is deleted.
DNR
[HDD]
[RAM] [-R]
[-R]DL]
[-RW‹V›]
[+R]
[+R]DL]
[+RW]
[DVD-V] [DVD-A]
[-RW‹VR›]
[VCD]
and
DivX
Reduces mosaic-like distortion and picture degradation.
On
↔
Off
Progressive
§
(
➡
77
)
Select “On” to enable progressive output.
≥
Select “Off” if the picture is stretched horizontally.
≥
When progressive output is on, closed captions cannot be
displayed.
Transfer
§
[When “Progressive” (
➡
above) is set to “On”.]
Select the method of conversion for progressive output to suit
the type of material being played (
➡
76, Film and video).
≥
Auto1 (normal):
Automatically detects the film and video content,
and appropriately converts it.
≥
Auto2:
In addition to “Auto1”, automatically detects film
contents with different frame rates and
appropriately converts it.
≥
Video:
Select when using “Auto1” and “Auto2”, and the
content is distorted.
Line-in NR
(Only when IN1, IN2 or IN3 is selected)
Reduces video tape noise while copying.
Depending on the video tape, jittering may occur.
≥
Automatic:
Noise reduction only works on picture input from
a video tape.
≥
On:
Noise reduction works for any video input.
≥
Off:
Noise reduction is off. Select when you want to
record input as is.
Audio menu–Change the sound effect
V. Surround Sound
[HDD]
[RAM] [-R] [-R]DL]
[-RW‹V›]
[+R] [+R]DL]
[+RW] [DVD-V] [DVD-A]
[-RW‹VR›]
(Dolby Digital with 2 channels or more only)
≥
Emphasis
≥
Natural
≥
Off
Enjoy a surround-like effect if you are using two front speakers
only.
≥
Turn V. Surround Sound off if it causes distortion. (Check the
surround function on the connected equipment.)
≥
V. Surround Sound does not work for SAP recordings.
Dialog Enhancer
[HDD]
[RAM] [-RW‹V›]
[+R]
[+RW]
[DVD-V] [DVD-A]
[-RW‹VR›]
and
DivX
(Dolby Digital with 3 channels or more only, including a center
channel)
The volume of the center channel is raised to make dialog
easier to hear.
On
↔
Off
Other menu–Change the display position
Position
1 (Standard)–5: The higher the setting the lower the on-screen
menu moves.
To show other pages
Press [
:
,
9
] to show other pages.
Multiple editing
Select with [
3
,
4
,
2
,
1
] and press [
;
]. (Repeat.)
A check mark appears. Press [
;
] again to cancel.
Deleting titles or pictures during play
Select
Previous
02/02
Next
10 10/27 Mon
007
008
8 10/27 Mon
- - -
- - -
- - -
- - -
DELETE Navigator
Title View
HDD
Delete
SUB MENU
S
Picture
Video
Page
B
A
Previous
Next
Delete Navigator to delete titles
P
layi
ng back
Usin
g
o
n
-scr
e
e
n
m
e
n
u
s/De
le
te
Na
vig
a
to
r
to
d
e
le
te
title
s
EH55English.book Page 43 Thursday, April 6, 2006 9:28 PM


