


41
RQT8365
[CD]
(Go to step 4)
When the DivX or MP3 Menu is displayed, perform steps 1–4
in “To select file type” on page 39 and select “Pictures” in step
4 to change the playback mode.
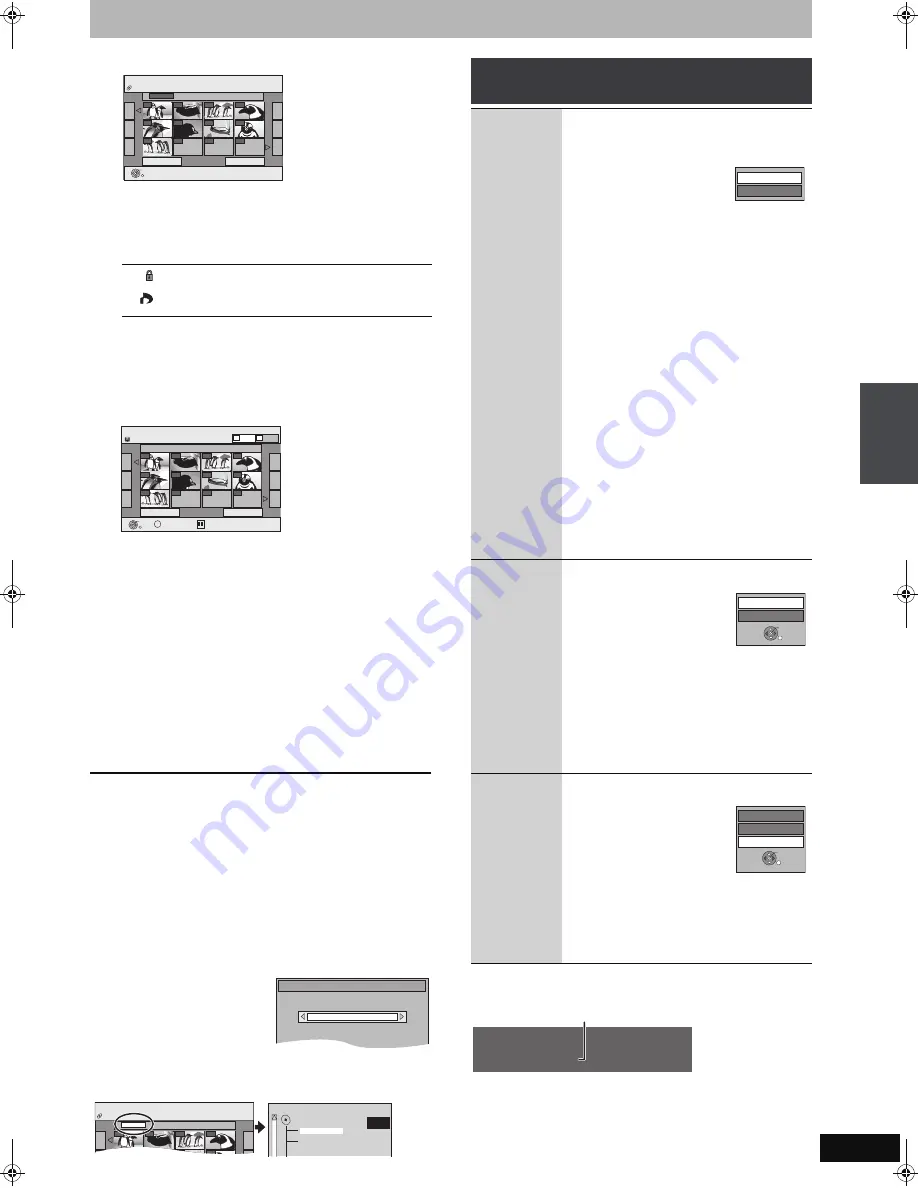
Direct Navigator screen icons
To show other pages
Press [
3
,
4
,
2
,
1
] to select “Previous” or “Next” and press [ENTER].
≥
You can also press [
:
,
9
] to show other pages.
To select the still pictures in another folder
➡
below
3
Press [
3
,
4
,
2
,
1
] to select the
album and press [ENTER].
You can also select album with the numbered buttons.
4
Press [
3
,
4
,
2
,
1
] to select the still
picture and press [ENTER].
You can also select still pictures with the numbered buttons.
≥
Press [
2
,
1
] to display the previous or next still picture.
≥
Useful functions during still picture play (
➡
right).
To return to the Album View or Picture View screen
Press [RETURN].
To exit the screen
Press [DIRECT NAVIGATOR].
∫
To select the still pictures in another folder
(
➡
76, Structure of folders displayed by this unit)
[RAM]
[SD]
To switch to another higher folder
(Only if there is a multiple number of higher folders recognizable)
1
While the Album View is displayed
Press [SUB MENU].
2
Press [
3
,
4
] to select “Select Root folder” and press
[ENTER].
3
Press [
2
,
1
] to select the
higher folder and press
[ENTER].
[CD]
1
While the Picture View screen is displayed
Press [
3
,
4
,
2
,
1
] to select “Folder” and press [ENTER].
2
Press [
3
,
4
] to select the folder and press [ENTER].
∫
To show the picture properties
Press [STATUS] twice.
To exit the picture properties screen
Press [STATUS].
Picture protected.
Picture in which the number of prints is set (DPOF)
(
➡
48, 76).
e.g.,
5:
[0]
➡
[0]
➡
[5]
115: [1]
➡
[1]
➡
[5]
15:
[0]
➡
[1]
➡
[5]
e.g.,
[HDD]
[RAM]
[SD]
5:
[0]
➡
[0]
➡
[0]
➡
[5]
115: [0]
➡
[1]
➡
[1]
➡
[5]
15:
[0]
➡
[0]
➡
[1]
➡
[5]
1115: [1]
➡
[1]
➡
[1]
➡
[5]
e.g.,
[CD]
5:
[0]
➡
[0]
➡
[5]
115: [1]
➡
[1]
➡
[5]
15:
[0]
➡
[1]
➡
[5]
Previous
Page 01/01
Next
001
Folder
100__DVD
002
003
004
005
006
007
00
8
009
---
---
Pictures Menu
Picture View
Play
CD (JPEG)
---
Picture View screen
Select
Previous
Page 001/001
Next
0001
Photo: 3/10/2005
0002
0003
0004
0005
0006
0007
000
8
0009
----
----
----
DIRECT NAVIGATOR
Picture View
Play
SUB MENU
S
Picture
HDD
Video
A
B
Album Name
e.g., HDD
Select folder to access.
Press ENTER to confirm.
Select Root folder
\DCIM
001
Folder
100__DVD
002
003
004
0005
0006
0007
008
Pictures Menu
Picture View
CD (JPEG)
F 1/3
021216_0026
103_DVD
104_DVD
Useful functions during still picture
play
Start
Slideshow
Slideshow
settings
[HDD]
[RAM]
[SD]
[CD]
You can display still pictures one by one at a
constant interval.
[HDD]
[RAM]
[SD]
While the Album View screen is displayed
Press [
3
,
4
,
2
,
1
] to select
the album and press
[
1
] (PLAY).
You can also start slideshow
with the following steps.
While the Album View screen is displayed
1 Press [
3
,
4
,
2
,
1
] to select the desired
album and press [SUB MENU].
2 Press [
3
,
4
] to select “Start Slideshow” and
press [ENTER].
[CD]
While the Picture View screen is displayed
1 Press [
3
,
4
,
2
,
1
] to select the “Folder”
and press [SUB MENU].
2 Press [
3
,
4
] to select “Start Slideshow”
and press [ENTER].
≥
To change the display interval
1
Press [
3
,
4
] to select “Slideshow settings”
in step 2 and press [ENTER].
2
Press [
3
,
4
] to select “Display Interval” and
press [
2
,
1
] to select the desired interval
(0–30 seconds) and press [ENTER].
≥
Repeat Play
1
Press [
3
,
4
] to select “Slideshow settings”
in step 2 and press [ENTER].
2
Press [
3
,
4
] to select “Repeat Play” and
press [
2
,
1
] to select “On” or “Off” and
press [ENTER].
Rotate
[HDD]
[RAM]
[SD]
[CD]
While playing
1 Press [SUB MENU].
2 Press [
3
,
4
] to select
“Rotate Right” or “Rotate
Left” and press [ENTER].
≥
Rotation information will not
be stored.
–
[CD]
Still pictures
–When disc or album is protected
–When played on other equipment
–When copying pictures
≥
If you remove the SD card while the Picture
View screen is displayed, picture rotation
information may not be properly stored. Make
sure that you do not remove the SD card until
the screen has closed.
Zoom in
Zoom out
[HDD]
[RAM]
[SD]
[CD]
While playing
1 Press [SUB MENU].
2 Press [
3
,
4
] to select
“Zoom in” and press
[ENTER].
≥
To return the picture to its
original size, press [
3
,
4
] to
select “Zoom out” in step 2 and press
[ENTER].
≥
When zooming in, the picture may be cut off.
≥
The enlargement information will not be stored.
≥
The “Zoom in/Zoom out” function is only available
for still pictures smaller than 640
k
480 pixels.
Start Slideshow
Slideshow settings
Rotate Left
Rotate Right
ENTER
Zoom in
Rotate Left
Rotate Right
ENTER
11 / 10 6:53 PM
Folder - Picture # : 102 - 0001
Date: 11 / 12 / 2005 No. : 3 / 9
Shooting date
P
layi
n
g
back
Playin
g DivX discs,
MP3 discs a
n
d
sti
ll p
ict
u
res
(JPEG/TIFF
)
EH55English.book Page 41 Thursday, April 6, 2006 9:28 PM


