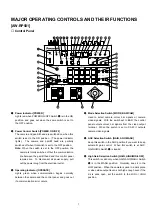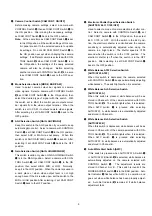
13
T A L L Y
D C 1 2 V I N
AUX CONTROL IN
1
2
3
4
5
P R E V I E W I N
O U T
G / L O U T
PREVIEW MONITOR OUT
C O N T R O L
C O N T R O L O U T
P A N / T I L T
C A M E R A
T D M U L T I P O R T H U B
G / L I N
#9
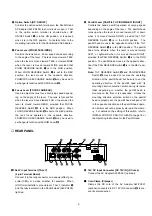
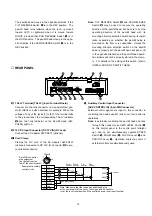
TALLY Terminal [TALLY] (6-pin Terminal Board)
Connect it to the tally connector on a special effect gen-
erator (SEG) or a video switcher, for example. When the
voltage of any of the jacks [1] to [5] of the terminal falls
to the ground level, the corresponding TALLY Indicator
@1
and the Tally Indicator on the Pan/tilt Head (AW-
PH300) light red.
$0
12V DC Input Connector [DC 12V IN] (DC Jack)
Connect the AC Adapter AW-PS301 (optional).
$11
Cord Clamp
Clamps the DC cord of the AC Adapter AW-PS301
(optional) connected to DC 12V IN Connector
$0
to pre-
vent its disconnection.
$2
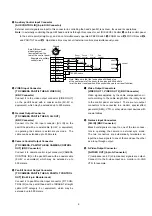
Auxiliary Control Input Connector
[AUX CONTROL IN] (8-pin DIN Connector)
External control signals are input to this connector in
controlling the head’s pan/tilt, lens zoom, focus and iris
operations.
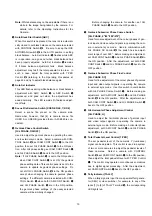
Note: In externally controlling the pan/tilt head and lens
through this connector, set IRIS LEVEL Control
@6
on this control panel to the centre point (straight
up), and do not simultaneously operate SPEED
Switch
@9
, ZOOM Lever
#6
, FOCUS Lever
#7
, and
PAN/TILT Lever
#8
. Operation errors may occur if
external controls are simultaneously used.
■
REAR PANEL
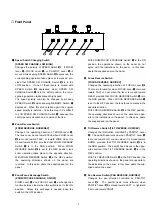
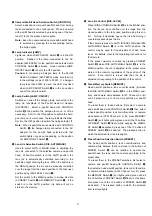
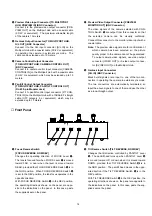
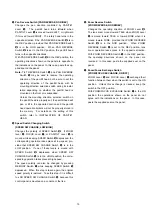
The pan/tilt head moves in the opposite direction if the
TILT REVERSE Switch
%3
is in the REV position. The
pan/tilt head turns leftward when the lever is moved
toward LEFT, or rightward when it is moved toward
RIGHT, provided that PAN REVERSE Switch
%4
is in
the NOR position. The pan/tilt head moves in the oppo-
site direction if the PAN REVERSE Switch
%4
is in the
REV position.
Note: TILT REVERSE Switch
%3
and PAN REVERSE
Switch
%4
may be used to reverse the operating
direction of the pan/tilt head, but be sure to set the
operating direction of the pan/tilt head with its
mounting direction selection switch during its instal-
lation depending on whether the pan/tilt head is
mounted on the floor or is suspended. Unless the
mounting direction selection switch on the pan/tilt
head is properly set, the pan/tilt head will pan or tilt
in the opposite direction and the pan/tilt head opera-
tion limiters will not be properly stored in the memo-
ry. For details on the setting of this switch, refer to
INSTALLATION OF PAN/TILT HEAD.
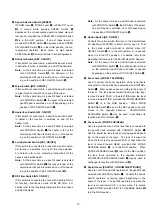
1 +5V
2 ZOOM
3 FOCUS
4 TILT
5 PAN
6 GND
7 SPEED
8 IRIS
Ground GND
1
2
3
4
6
7
Ground
5
8
Example of auxillary
control circuit
Note: Make sure that the lens and pan/tilt head stop
at the center point of the zoom, focus, pan and tilt controls
(or at the lever reset position if the controls have a lever reset function).
Iris control
Zoom
control
Pan
control
Tilt
control
Focus
control
SPEED switch
100
Ω
10K
Ω
10K
Ω
10K
Ω
10K
Ω
6.8K
Ω
20K
Ω
6.8K
Ω
100
Ω
100
Ω
100
Ω
8-pin DIN connector
pin assignment
(as viewed from the
rear of the control panel)


