OWC Jupiter Mini-SAS
SySteM Setup
2.3 DRIVE INSTALLATION & REMOVAL
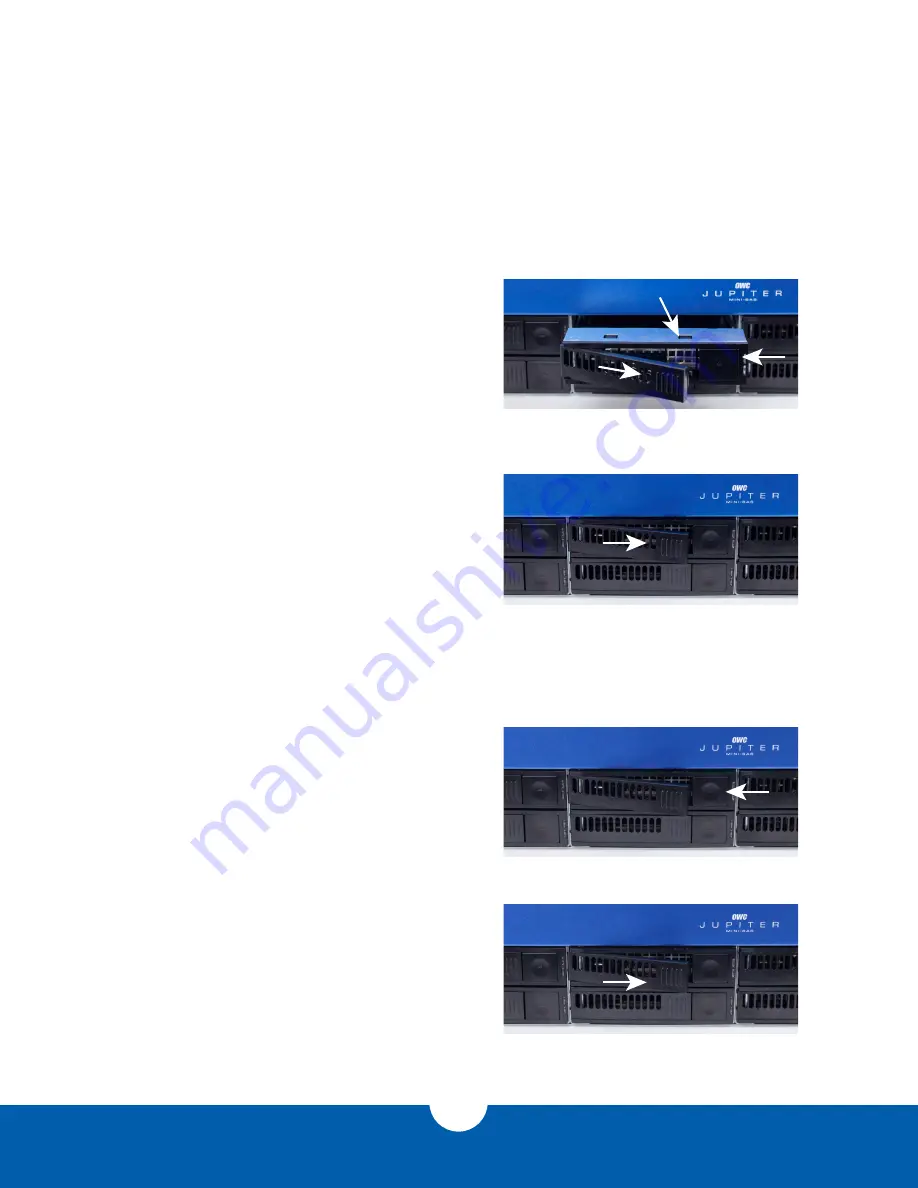
The Jupiter expander Rack 835 solution comes with drives already installed into the individual trays to provide
quicker setup time. Use the following instructions to install and remove drives from the Jupiter drive bays.
2.3.1 Drive Installation
1. If not already done, release the drive tray
handle by pushing the square eject button.
2. Insert the drive into the desired bay of the
Jupiter unit making sure the drive rests on the
side guide rails within the bay.
3. Push the drive in using the front frame of the
tray or the release button as seen in
Figure
2.3.1a
until it is seated into the backplane
connector. Do noT push the drive in using
the handle.
4. once the drive is seated into the backplane,
push the handle in until it latches to secure
the drive into the drive bay as shown in
Figure
2.3.1b
.
2.3.2 Drive Removal
1. Release the handle on the drive tray by
pushing the square eject button as seen in
Figure 2.3.1c
.
2. Use the handle to pull the drive out of the
drive bay as shown in
Figure 2.3.1d
.
11
Figure 2.3.1b
Figure 2.3.1a
Push here
Push here
DO NOT
Push here
Push here
Figure 2.3.1c
Push here
Figure 2.3.1d
Pull here


