12
freddamento e porta la ventilazio-
ne alla velocità minima.
In deumidificazione il climatizzato-
re funziona in modo intermittente.
VENTILAZIONE
Tasto (2).
Questa funzione crea un flusso
d'aria costante senza variare la
temperatura ambiente.
VELOCITA’ DI VENTILAZIONE
Tasto (3).
Le velocità sono due, quella mas-
sima assicura il massimo rendimen-
to e un grande ricambio dell’aria,
q u e l l a m i n i m a l a m a g g i o r
silenziosità.
SELEZIONE DELLA TEMPERATU-
RA
Tasto (4).
Il display (6) visualizza la tempera-
tura impostata.
Per variarla agire sul tasto (4).
Le temperature consigliate sono
comprese tra i 22-25
°
C.
AUTOMATICO NOTTURNO
Tasto (5).
La temperatura ambientale è con-
trollata automaticamente. Durante
l’attivazione di questo modo il corri-
spondente led é acceso.
Questa funzione deve essere abbi-
nata a uno degli altri seguenti modi:
Raffreddamento, Deumidificazione.
Il ventilatore rimane impostato sem-
pre alla minima velocità per ottene-
re il massimo comfort acustico.
PROGRAMMAZIONE
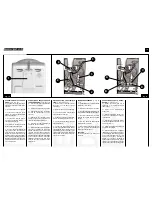
Il climatizzatore può essere attivato
in modo automatico dal programma-
tore giornaliero (fig. 1-2).
Per fruire di questa funzione si deve
impostare l'orario esatto, poi il pro-
gramma di funzionamento agli orari
voluti.
automatiquement le refroidissement et
amène la ventilation à la vitesse
minimale.
En mode de déshumidification, le
climatiseur fonctionne de manière
intermittente.
VENTILATION
Touche (2).
Cette fonction génère un flux d’air
constant sans modifier la température
ambiante.
VITESSE DE VENTILATION
Touche (3).
Il existe deux vitesses. La vitesse
maximale assure le rendement
maximum et un important changement
d’air. La vitesse minimale garantit
davantage de silence.
SELECTION DE LA TEMPERATURE
Touche (4).
L’écran (6) affiche la température
programmée.
Pour la modifier, appuyer sur la touche
(4).
Les températures conseillées sont
comprises entre 22
°
C et 25
°
C.
AUTOMATIQUE NOCTURNE
Touche (5).
La température ambiante est contrôlée
automatiquement. Lorsque cette
fonction est enclenchée, le voyant
correspondant est allumé.
Cette fonction doit être combinée avec
l’un des autres modes suivants:
refroidissement ou déshumidification.
En nocturne, le ventilateur fonctionne
toujours en vitesse minimale afin
d’assurer un confort acoustique total.
PROGRAMMATION
Le climatiseur peut être activé
automatiquement par le
programmateur journalier (fig. 1-2).
Pour bénéficier de cette fonction,
programmez l’heure exacte et le
programme de fonctionnement à
l’heure souhaitée.
VENTILATION
Key (2).
This function creates a constant flow
of air without changing room
temperature.
VENTILATION SPEED
Key (3).
There are two speeds: maximum
speed to ensure maximum efficiency
and a good change of air while
minimum speed is much quieter.
SELECTING THE TEMPERATURE
Key (4).
The temperature set is shown on the
display (6).
Use key (4) to change the temperature.
Recommended temperature is
between 22 and 25
°
C.
AUTOMATIC NIGHT-TIME
Key (5).
Room temperature is controlled
automatically. When this mode is in use
the relative LED is on.
This function must be associated with
either the Cooling or Dehumidification
mode. The fan remains set at minimum
speed for less noise.
PROGRAMMING
The air conditioner can be started
automatically with the daily
programmer (fig. 1-2).
To use this function the exact time must
be set first followed by the times at
which you want it to work.
wird die Funktion Kühlung automatisch
ausgeschlossen und der Ventilator
läuft mit der Mindestgeschwindigkeit.
Beim Entfeuchten läuft die
Klimaanlage intermittierend.
VENTILATOR
Taste (2).
Diese Funktion erzeugt einen
konstanten Luftstrom ohne die
Raumtemperatur zu beeinflussen.
VENTILATORGESCHWINDIGKEIT
Taste (3).
Es sind zwei Geschwindigkeiten
möglich. Die Höchstgeschwindigkeit
gewährleistet die maximale Leistung
und einen großen Luftaustausch, die
Mindestgeschwindigkeit gewährleistet
dagegen einen geräuscharmen
Betrieb.
TEMPERATUREINSTELLUNG
Taste (4).
Auf dem Display (6) wird die
eingestellte Temperatur angezeigt.
Zum Ändern der Temperatur ist die
Taste (4) zu verwenden.
Es wird eine Temperatur zwischen 22
und 25
°
C empfohlen.
NACHTAUTOMATIK
Taste (5).
Die Raumtemperatur wird automatisch
unter Kontrolle gehalten. Bei der
Aktivierung dieser Betriebsweise
schaltet sich die entsprechende Led
ein.
Diese Funktion muss mit einer der
folgenden anderen Betriebsweisen
kombiniert werden: Kühlung oder
Entfeuchtung.
Der Ventilator läuft immer mit
Mindestgeschwindigkeit, um einen
geräuscharmen Betrieb zu
gewährleisten.
PROGRAMMIERUNG
Das Klimagerät kann über den Tages-
Programmierer automatisch in Betrieb
gesetzt werden (Abb. 1-2).
Um diese Funktion zu nützen, ist die
genaue Zeit vorzugeben, dann das
Betriebsprogramm zu den
gewünschten Uhrzeiten.
lleva la ventilación a la velocidad
mínima.
En deshumidificación el climatizador
funciona de modo intermitente.
VENTILACIÓN
Tecla (2).
Esta función crea un flujo de aire
constante sin variar la temperatura
ambiente.
VELOCIDAD DE VENTILACIÓN
Tecla (3).
Hay dos velocidades: la máxima
asegura el máximo rendimiento y gran
recambio de aire, la mínima garantiza
un funcionamiento silencioso.
SELECCIÓN DE LA TEMPERATURA
Tecla (4).
El display (6) visualiza la temperatura
programada.
Para modificar la temperatura utilicen
la tecla (4).
Las temperaturas aconsejadas están
comprendidas entre 22-25
°
C.
AUTOMÁTICO NOCTURNO
Tecla (5).
La temperatura ambiente está
controlada automáticamente. Durante
la activación de este modo, el
correspondiente led está encendido.
Esta función debe combinarse con uno
de los siguientes modos:
Refrigeración, Deshumidificación.
El ventilador permanece programado
siempre a la mínima velocidad para
obtener el máximo silencio.
PROGRAMACION
El climatizador puede ser activarse de
modo automático por el programador
diario (fig. 1-2).
Para utilizar esta función hay que
programar el horario exacto, y a
continuación el programa de
funcionamiento a los horarios
deseados.
Als deze functie ingesteld wordt, wordt
de koelfunctie automatisch
uitgeschakeld en wordt de ventilatie
ingesteld op de minimum snelheid.
Op de ontvochtigingsstand
functioneert de airconditioner
intermitterend.
VENTILATIE
Toets (2).
Deze functie creëert een constante
luchtstroom zonder dat de
omgevingstemperatuur verandert.
VENTILATIESNELHEID
Toets (3).
Er zijn twee snelheden; de maximum
snelheid verzekert maximaal
rendement en een grote
luchtverversing; de minimum snelheid
verzekert de grootst mogelijke
geruisloosheid.
INSTELLING VAN DE
TEMPERATUUR
Toets (4).
Het display (6) toont de temperatuur
die ingesteld is.
Om de temperatuur te veranderen
moet u op de toets (4) drukken.
De geadviseerde temperaturen liggen
tussen de 22-25
°
C.
AUTOMATISCHE NACHTFUNCTIE
Toets (5)
De omgevingstemperatuur wordt
automatisch geregeld. Als deze stand
ingeschakeld is dan brandt de
betreffende led.
Deze functie moet gecombineerd
worden met één van de andere
volgende standen: koelen,
ontvochtigen.
De ventilator blijft altijd ingesteld op de
minimum snelheid om maximaal
geluidscomfort te leveren.
PROGRAMMERING
De airconditioner kan door de
dagprogrammakiezer op de
automatische stand in werking worden
gesteld (fig. 1-2).
Om van deze functie gebruik te maken
moet u de juiste tijd instellen en daarna
het werkingsprogramma op de
gewenste tijden kiezen.
Summary of Contents for NovEcos Split 11
Page 27: ...27...
Page 28: ...COD 273107B Edizione 1G...


