


98
Chapter 4 Use the PLC applications to control your workflow
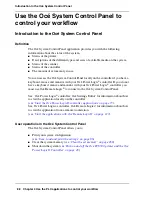
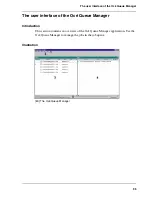
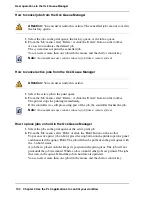
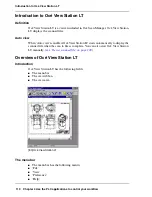
The user interface of the Océ Queue Manager
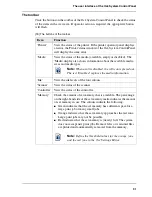
The status bar
The status bar at the bottom of the Océ Queue Manager displays the following.
■
The system status (connected or disconnected).
■
The system name ('Localhost' if you work on the Océ Power Logic
®
controller).
■
The job status (for example 'Printing').
■
The user mode ('Key Operator', 'Repro Operator', 'System Administrator',
'Service Operator' or 'Anonymous').
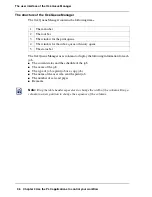
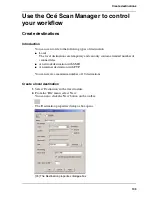
The window for the print queue
The print queue window in the left-hand pane contains two sections.
■
The top section above the separation line shows the job that is printed.
■
The bottom section under the separation line shows the jobs that wait to be
printed. The window displays the jobs in the order in which the jobs are received.
The window for the inbox queue or history queue
The inbox queue in the right-hand pane contains the jobs that were sent to the inbox
on the controller. You can print the jobs, delete the jobs and view the properties of
the jobs. The print jobs are sent to the inbox when the setting Key Operator -
System - Job management - Print jobs in the Océ Settings Editor is set to inbox or
when 'Send to inbox' is enabled in the driver.
The history queue in the right-hand pane contains the jobs that have been printed.
You can print the jobs, delete the jobs and view the properties of the jobs. Use the
setting Key Operator - System - Job management - History queue - Print job
lifetime in the Océ Settings Editor to define how long the jobs must remain in the
history queue.
Summary of Contents for TCS500
Page 1: ...Océ TCS500 Océ User manual User manual ...
Page 4: ...4 Trademarks ...
Page 11: ...11 Chapter 1 Introduction ...
Page 21: ...21 Chapter 2 Get to know the Océ TCS500 colour printing system hardware ...
Page 47: ...47 Chapter 3 Prepare the Océ TCS500 for use ...
Page 70: ...70 Chapter 3 Prepare the Océ TCS500 for use Configure the network settings of the Océ TCS500 ...
Page 71: ...71 Chapter 4 Use the PLC applications to control your workflow ...
Page 77: ...77 The user interface of the Océ Settings Editor 51 51 The settings area ...
Page 124: ...124 Chapter 4 Use the PLC applications to control your workflow Change the password ...
Page 125: ...125 Chapter 5 Use the Océ TCS500 for scan to file jobs ...
Page 144: ...144 Chapter 5 Use the Océ TCS500 for scan to file jobs Remove strip ...
Page 145: ...145 Chapter 6 Use the Océ TCS500 for print jobs ...
Page 159: ...159 Chapter 7 Use the Océ TCS500 for copy jobs ...
Page 187: ...187 Chapter 8 Ensure the best output quality ...
Page 217: ...217 Chapter 9 Optional Document Management applications for your Océ TCS500 ...
Page 223: ...223 Chapter 10 License management with Océ License Logic ...
Page 235: ...235 Chapter 11 Maintain the Océ TCS500 ...
Page 258: ...258 Chapter 11 Maintain the Océ TCS500 Replace the maintenance cassette ...
Page 259: ...259 Chapter 12 System messages and solutions ...
Page 271: ...271 Appendix A Specifications of the Océ TCS500 ...
Page 291: ...291 Appendix B Reader s comment sheet ...
Page 294: ...294 Appendix B Reader s comment sheet Reader s comment sheet ...
Page 295: ...295 Appendix C Addresses of local Océ organisations ...
Page 306: ...306 Index ...