


152
Chapter 6 Use the Océ TCS500 for print jobs
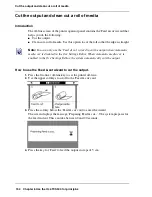
Define the correct media for your jobs
Define the correct media for your jobs
Definition
To achieve optimal output quality, make sure that you load and define the correct
media type on the printer.
You can use the 'Change media type' wizard, to load a media roll and to change the
media type defined on the system.
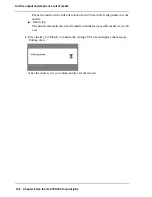
Make sure you define the correct media type for your job. Make sure the media type
and the media format defined in your job is available on the printer.
Define the correct media on the printer and the correct settings in the job submission
tools to set the Océ TCS500 for productive use or high output quality.
[60]
Note:
The above procedure is based on DIN media sizes. You can also use this
procedure with ANSI media sizes.
[61]
[62]
When productivity with different media sizes is the most important
requirement.
1
Load and define 2 or 3 media rolls on the printer with different media sizes
and the same media types.
2
Use the 'Landscape' orientation to print a job on a media size that is one
size smaller than the media defined on the system. For example, A1 prints
in landscape on A0 and A2 prints in landscape on A1. You are not required
to cut the media by hand.
3
Use the 'Auto rotate' setting in the Océ Settings Editor or the job
submission tools to rotate the orientation automatically.
When productivity is the only important requirement.
1
Load and define two media rolls on the printer with the same media sizes
and the same media types.
Note:
When roll 1 is empty, the printer switches automatically
to roll 2. You can load a new roll while the printing process
continues.
When the output quality is the most important requirement.
1
Load and define 2 or 3 media rolls on the printer with the same media sizes
and with different media types.
2
Select the media types you define based on the output quality you require.
Summary of Contents for TCS500
Page 1: ...Océ TCS500 Océ User manual User manual ...
Page 4: ...4 Trademarks ...
Page 11: ...11 Chapter 1 Introduction ...
Page 21: ...21 Chapter 2 Get to know the Océ TCS500 colour printing system hardware ...
Page 47: ...47 Chapter 3 Prepare the Océ TCS500 for use ...
Page 70: ...70 Chapter 3 Prepare the Océ TCS500 for use Configure the network settings of the Océ TCS500 ...
Page 71: ...71 Chapter 4 Use the PLC applications to control your workflow ...
Page 77: ...77 The user interface of the Océ Settings Editor 51 51 The settings area ...
Page 124: ...124 Chapter 4 Use the PLC applications to control your workflow Change the password ...
Page 125: ...125 Chapter 5 Use the Océ TCS500 for scan to file jobs ...
Page 144: ...144 Chapter 5 Use the Océ TCS500 for scan to file jobs Remove strip ...
Page 145: ...145 Chapter 6 Use the Océ TCS500 for print jobs ...
Page 159: ...159 Chapter 7 Use the Océ TCS500 for copy jobs ...
Page 187: ...187 Chapter 8 Ensure the best output quality ...
Page 217: ...217 Chapter 9 Optional Document Management applications for your Océ TCS500 ...
Page 223: ...223 Chapter 10 License management with Océ License Logic ...
Page 235: ...235 Chapter 11 Maintain the Océ TCS500 ...
Page 258: ...258 Chapter 11 Maintain the Océ TCS500 Replace the maintenance cassette ...
Page 259: ...259 Chapter 12 System messages and solutions ...
Page 271: ...271 Appendix A Specifications of the Océ TCS500 ...
Page 291: ...291 Appendix B Reader s comment sheet ...
Page 294: ...294 Appendix B Reader s comment sheet Reader s comment sheet ...
Page 295: ...295 Appendix C Addresses of local Océ organisations ...
Page 306: ...306 Index ...