2
Before use
2-26
CS172
!
Detail
You may also use separate telephone companies for each line.
For example, if one telephone company provides better rates for long
distance and another provides better rates for local calls, each line may
be assigned a different company with the Fax Multi Line.
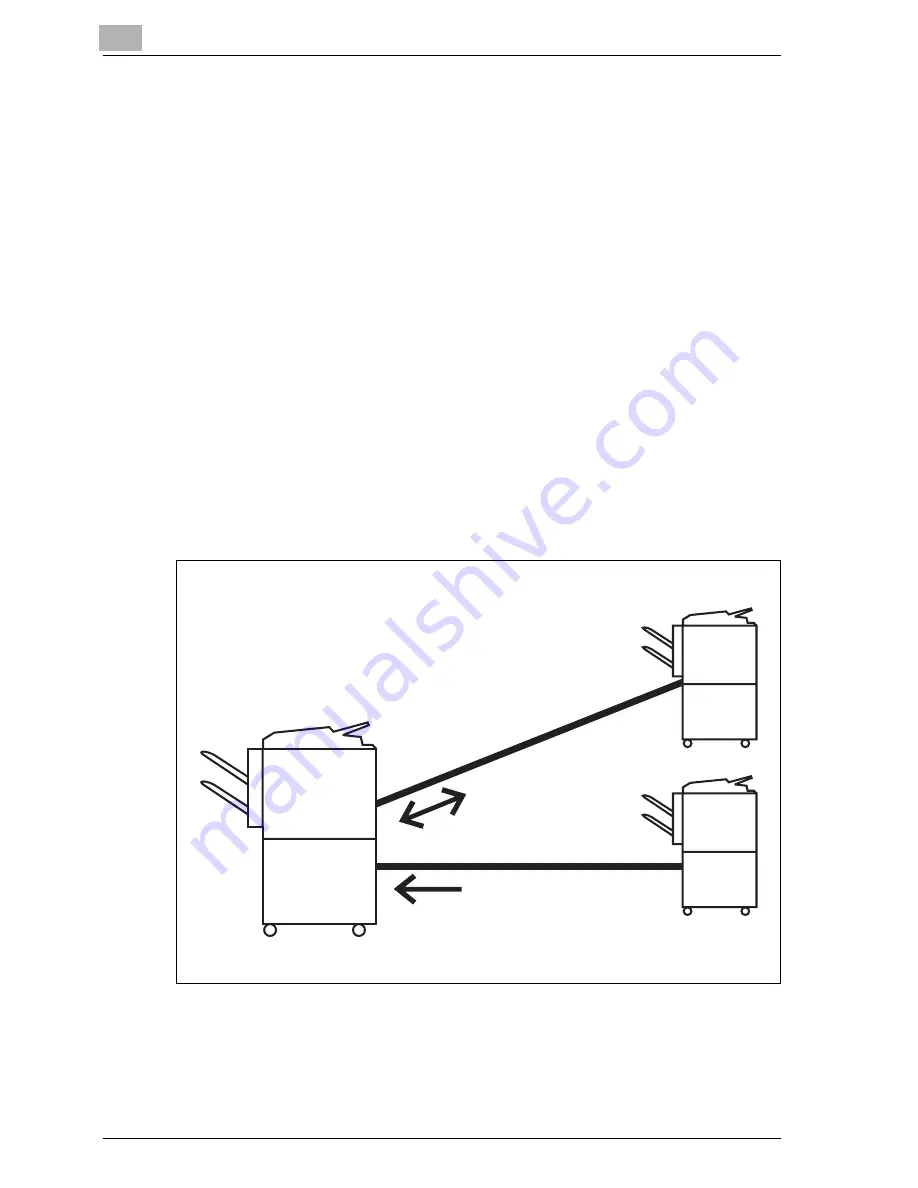
Using a line only for receiving
You can set Line 2 (additional line) only to receive. If such is the case, Line 1
is only used to send. This is useful if you want to specify one line only for
sending and the other only for receiving.
!
Detail
Line 1 is always used for both sending and receiving. You cannot set the
line only for receiving.
Refer to "Set the multi lines setting" on page 11-74 for more information.
Line 1 (standard line)
Line 2 (additional line)
For both sending
and receiving
Only for receiving
Summary of Contents for CS172 FK-502
Page 1: ...Oc CS172 FK 502 User Manual Facsimile Operations...
Page 14: ...Contents 12 CS172...
Page 15: ...1 Introduction...
Page 16: ......
Page 40: ...1 Introduction 1 26 CS172...
Page 41: ...2 Before use...
Page 42: ......
Page 68: ...2 Before use 2 28 CS172...
Page 69: ...3 Transmission...
Page 70: ......
Page 127: ...4 Reception...
Page 128: ......
Page 146: ...4 Reception 4 20 CS172...
Page 147: ...5 Troubleshooting...
Page 148: ......
Page 154: ...5 Troubleshooting 5 8 CS172...
Page 155: ...6 Specifications...
Page 156: ......
Page 158: ...6 Specifications 6 4 CS172...
Page 159: ...7 Transmission applications...
Page 160: ......
Page 211: ...8 Useful functions for reception...
Page 212: ......
Page 220: ...8 Useful functions for reception 8 10 CS172...
Page 221: ...9 Polling...
Page 222: ......
Page 237: ...10 Registering Settings...
Page 238: ......
Page 240: ...10 Registering Settings 10 4 CS172 3 Press Fax Fax Registration screen appears...
Page 294: ...10 Registering Settings 10 58 CS172 3 Press User Box 4 Press Relay User Box 5 Press New...
Page 298: ...10 Registering Settings 10 62 CS172...
Page 299: ...11 Utility mode...
Page 300: ......
Page 303: ...Utility mode 11 CS172 11 5 Exiting from administrator setting 1 Press Exit on the sub area...
Page 384: ...11 Utility mode 11 86 CS172...
Page 385: ...12 Explanation of reports and lists...
Page 386: ......
Page 442: ...12 Explanation of reports and lists 12 58 CS172...
Page 443: ...13 Web Connection...
Page 444: ......
Page 450: ...13 Web Connection 13 8 CS172 The user is logged off and the Login page appears...
Page 452: ...13 Web Connection 13 10 CS172 2 Click Login The User mode page appears...
Page 454: ...13 Web Connection 13 12 CS172 2 Click Login The User mode page appears...
Page 462: ...13 Web Connection 13 20 CS172 3 To delete click the OK 4 Click OK An address is deleted...
Page 465: ...Web Connection 13 CS172 13 23 7 Click OK Registration is performed...
Page 467: ...Web Connection 13 CS172 13 25 3 Select the transmission mode and then click Next...
Page 468: ...13 Web Connection 13 26 CS172 4 Enter the Settings and click Apply...
Page 494: ...13 Web Connection 13 52 CS172...
Page 495: ...14 Appendix...
Page 496: ......


