29
CAPTURING VIDEO USING CLIENT SOFTWARE
Capturing of video using the Client software can be done in two ways:
!
Instruct the Server to do the recording directly onto the Server computer
Recordings can be seen by either transferring the images over
to the Client
when the recording is done and then have it played back or by playing back the
image files from the Server directly;
!
Instruct the Server to send the images over to the Client computer so that the
recording is done on the Client computer.
Note that the telephone line further restricts the frame rate of the video received by the
Client due to it's limited bandwidth. However, the Server can continue to record at the
maximum rate. Separate Menus are provided to set the recording mode of the Server and
the Client, namely, Record-Server and Record-Client found under the Record Control
Menu.
Instructing Server To Record onto Server Computer
Changing the image size on the client will also change the corresponding size of the image
being recorded. The following are the steps for instructing the server to record images onto
the server computer:
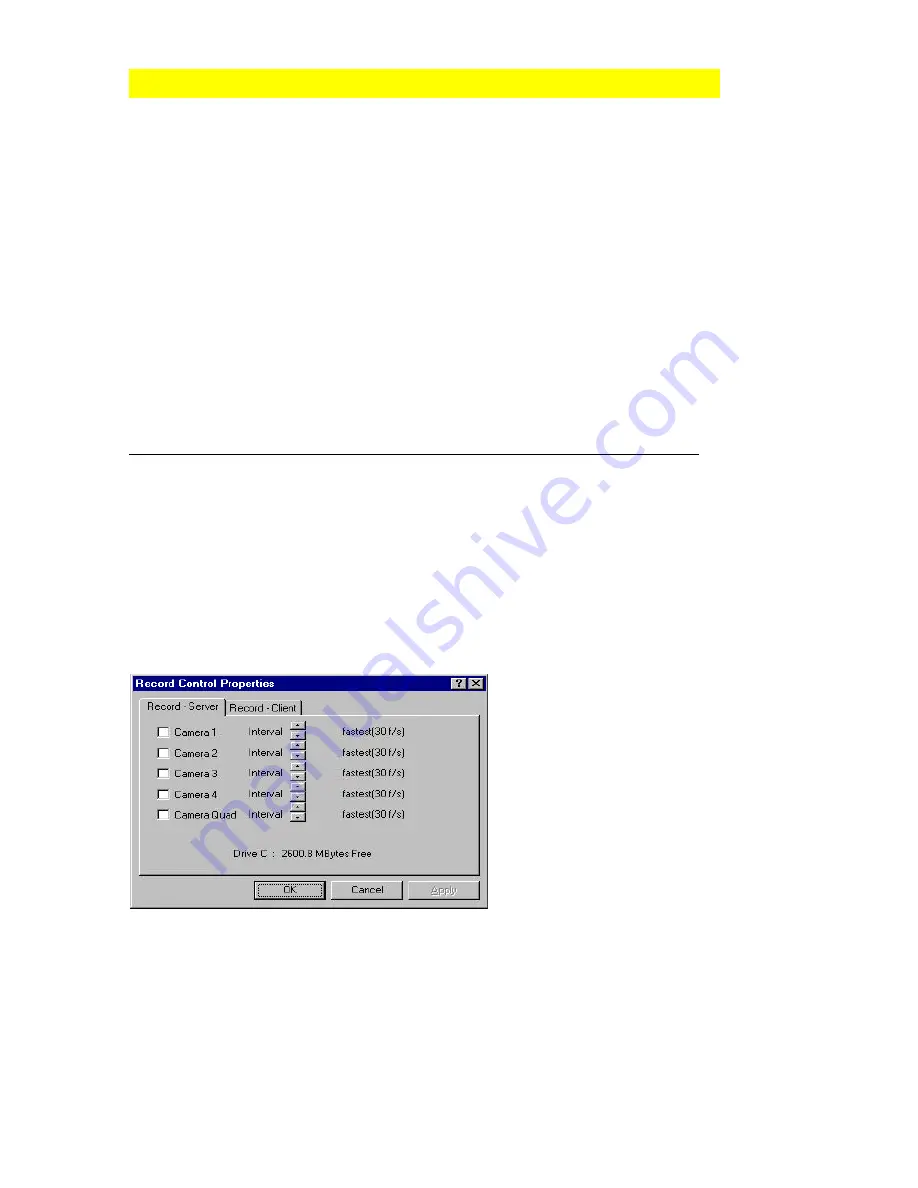
1. Go to the Record menu and select Record Control.
2. Choose the Record-Server tab.
3. You can select any video input that you would like to record by putting a check mark in
the square box of each camera input.
Notice the free space available for
recording on the current destination disk
on the Server computer is shown in this
window.
You can also change the recording time
interval (of each camera) between
frames. Recording will begin when the
OK button is pressed.
To stop the recording process of any video input, go to the Record menu and select Record
Control menu. Choose Record-Server tab. Deselect any video input recording by clicking
on the check mark against which the video recording you would like to stop. Click OK
when you are done.