- 15 -
PREPARATION
BEFORE STARTING
CHECK AND MAKE SURE YOU HAVE THE CORRECT NPK INSTALLATION KIT
FOR YOUR ATTACHMENT.
Check the hammer model against the NPK Hammer
Mounted Grease Pump Assembly description. All NPK Hammer Mounted Grease
Pump Assemblies are designed for a specific NPK Hammer.
IF THERE ARE ANY
DISCREPANCIES, IMMEDIATELY CONTACT NPK OR YOUR DEALER.
OPEN BOX AND TAKE INVENTORY OF PARTS RECEIVED AGAINST NPK
PARTS LIST AND DRAWINGS BEFORE YOU BEGIN.
This will ensure there are
no missing or damaged parts, which may affect installation time. NPK takes every
precaution to ensure every Hammer Mounted Grease Pump Assembly is shipped
complete, but sometimes errors can occur.
Remove one part at a time from the box and check off on the NPK parts list. All
parts are marked with an NPK part number and balloon item number for ease of
identification. Place checked parts in a clean area to prevent damage or
contamination. Do not remove protective packaging from parts until ready for
use.
The Hammer Mounted Grease Pump Assembly can be installed by one
mechanic. Follow safe working practices.
No special tools should be required for this installation. Basic hand tools and a
welding unit may be required.
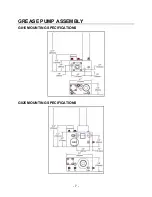
Review the installation drawings for general understanding of installation.
Position the hammer on a flat surface for ease of installation.
All work during the installation should be performed in a protected area. The
Hammer Mounted Grease Pump Assembly parts must not be exposed to rain,
dirt, grinding dust, steam cleaning or other contaminates which can be introduced
into the carrier hydraulic system during installation.
PREPARATION FOR WELDING
Properly ground the negative welder wire as near to the weld area as possible for
good penetration.
Prepare all weld areas by removing dirt, oil, and paint.
Welding may cause a possible fire. Make sure all areas are
free from flammable debris!


