SR Troubleshooting
3. Label Format Specification
C
4. How to Stop the Verifier
3
mm
3
mm
Note
:
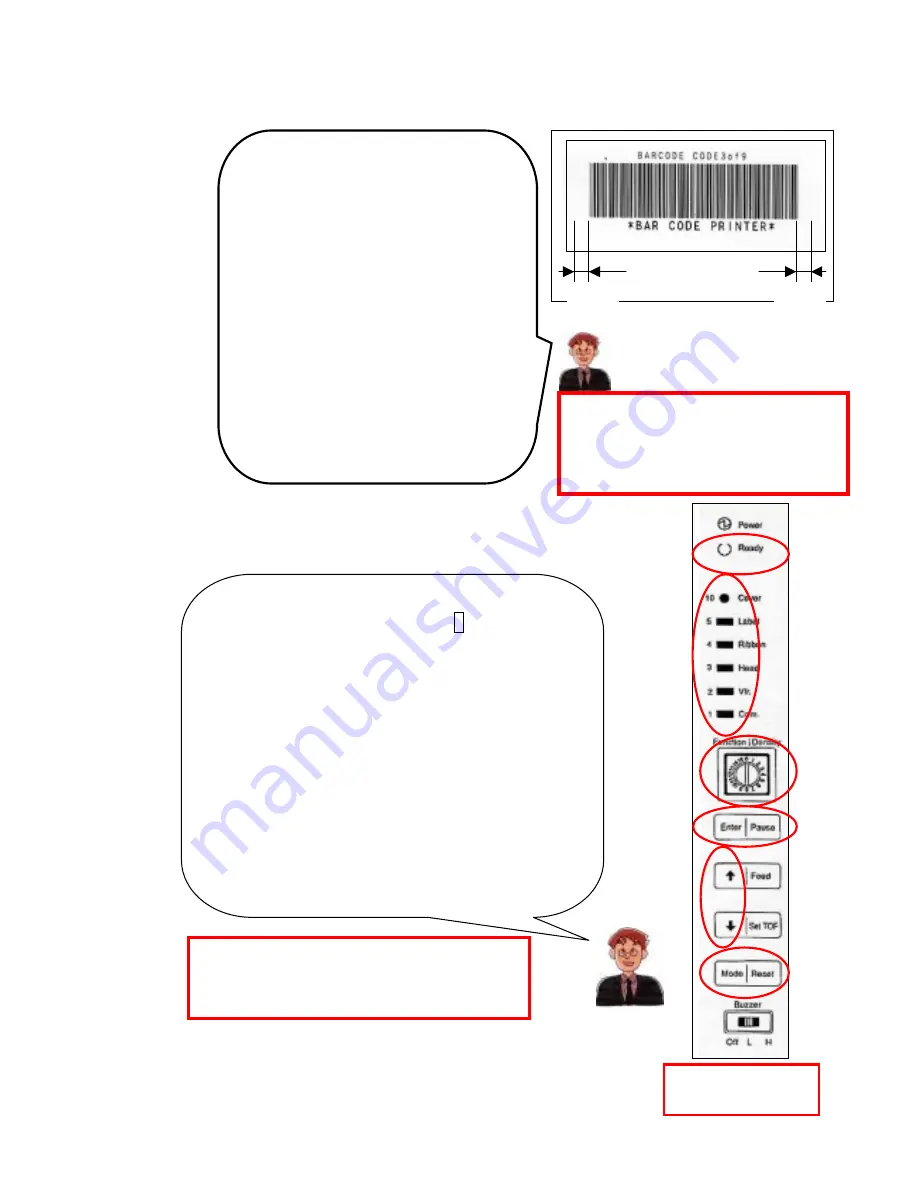
Keep blanks of not less than
3mm
on
both sides of the barcode to prevent
void labels from occurring.
In order to allow the barcode to be
acknowledged, keep quiet zones
(portions where nothing is printed)
of not less than
3mm
on both sides
of the barcode in the label format
(See the figure on the right.).
If
this specification is not fulfilled,
change the label format.
If you want to print labels temporarily without verification,
modify the setting of “
function setting 3
”.
Turn the printer on and print labels.
32
F
E
D
B
A
Note: When the function setting is sent to the
printer by printing software you generated,
the sent setting is effective.
Turn the power off.
Then turn the density switch
C
to 3.
Turn on the power while pressing
F
[Mode/Reset]
(See the figure on the right.). Press and hold the
switch until the buzzer sounds (Release the switch
when the buzzer sounds.).
Check to see that
A
[Ready] LED flashes.
(
The
flashing of [Ready] LED shows that the printer is in
the function setting mode.
)
Which LED of
B
is lit?
(
1or2
?)
Make the LED 4 flash with
↑↓
in
E
and press
and hold
D
[Enter/Pause] at least 2 seconds.
(
The
buzzer makes a series of beeps.
)
Press and hold
F
[Mode/Reset] at least 2 seconds. Turn the power
off and reset the density switch.
Buzzer switch
must be at L or H.


