23
between these two extremes. See ‘Preferences’ for further details. After data has been
captured clicking the trigger button will load the trigger frame into the viewing area.
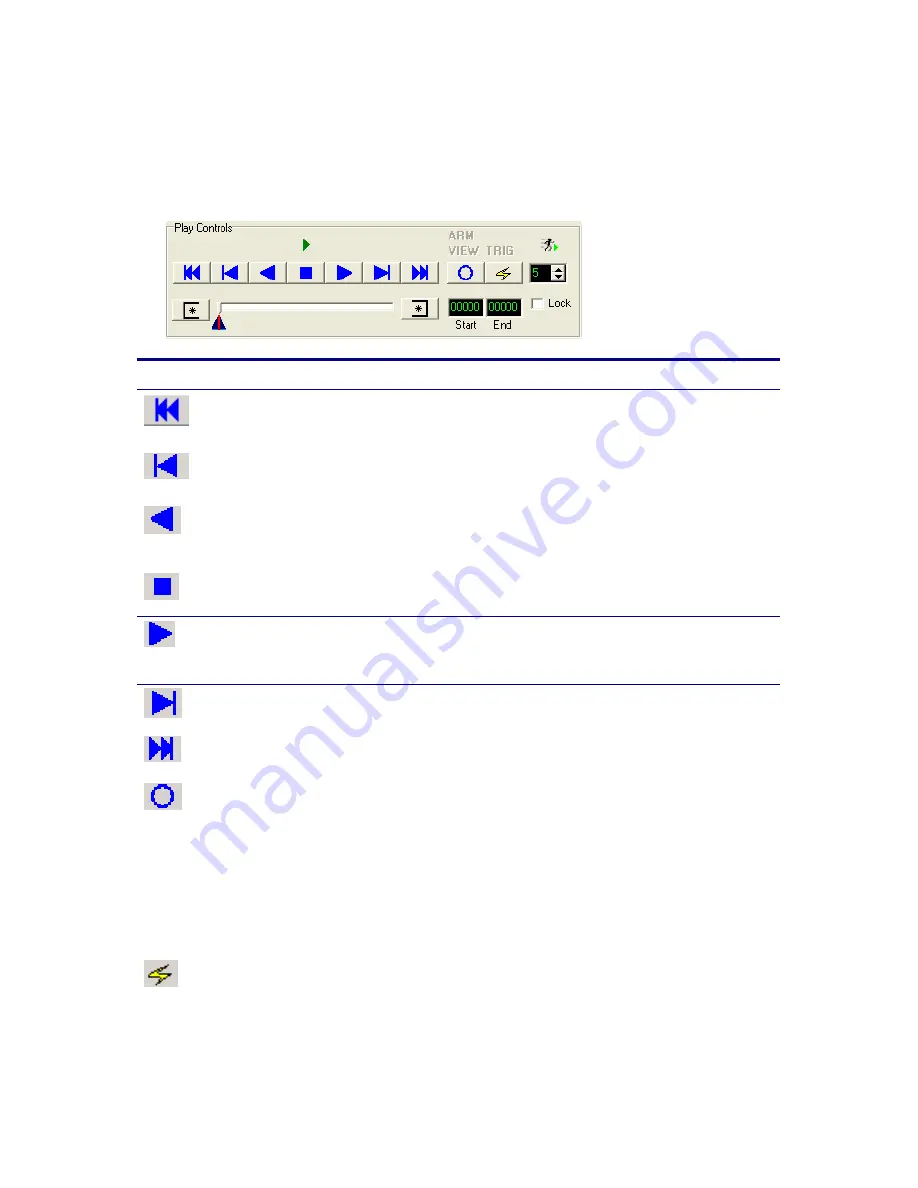
Play Controls
Use this …
To do this…
When?
Rewind
Jump to the first frame of the recording, or the first
frame of the sub range (see below)
After a
recording
Step
Backwards
Step one frame backwards
After a
recording
Play
Backwards
Play the capture sequence backwards. Pushing this
button 2x will put the system into LOOP mode. The
system will keep looping about the sub range
After a
recording
Stop
playback
Stop playback or looping playback
After a
recording
Play
Forwards
Play the capture sequence Forwards. Pushing this
button 2x will put the system into LOOP mode. The
system will keep looping about the sub range
After a
recording
Step
Forwards
Step one frame forwards
After a
recording
Fast Forward Jump to the last frame of the recording, or the last
frame of the sub range (see below)
After a
recording
VIEW/ARM Put the camera(s) into VIEW or ARM Mode.
Pushing this button once will put the camera into
VIEW Mode. A Live image will be displayed on the
screen and also through the sVGA Output of the
camera head if turned on.
Pushing the button a second time will put the camera
into ARM Mode. The camera is recording and waiting
for a trigger
When
you are
preparing
to make a
recording
TRIGGER
(software)
Triggers the recording. This button will initiate a “stop
recording” sequence. Depending on the trigger settings
this will be immediate or after a given delay.
A hardware trigger via the BNC connection has the
same effect.
When
you want
to record


