Chapter 6: Picking Processes
5031496 G
45
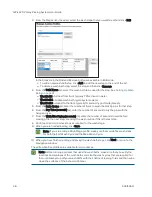
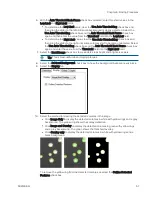
6. Under Destination Microplate Template, click Edit to define the wells to dip or skip. You can
skip wells that you want to use as blank or control wells. The defined template is used for all
the destination plates during the picking routine.
To skip a well, click the well.
Wells to skip show in light blue, for example, in the sample plate template image, see
rows B, D, F, and H.
To skip multiple contiguous wells, right-click and drag across the wells.
To dip a well that you skip, click the well again.
Wells to dip show in light red, for example, in the sample plate template image, see
rows A, C, E, and G.
After you define the wells to dip or skip, click Exit.
7. Click Next to define the picking head and the Sanitise profile.
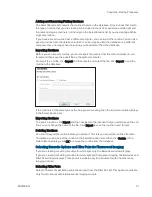
Selecting the Head and Sanitizing Options
To select the head and sanitizing options:
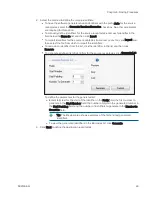
1. In the Head and Sanitise window, from the Picking Head list, select the head to use for the
picking routine.
2. From the Pin Columns (Rows) Before Inoculation list, select the number of pins to use for
picking in each column or row before transferring the picked colonies to the destination
plate.
For the fastest transfer rate, select All to use all available picking pins to pick colonies
before inoculating the destination plate.
For smaller picking groups, the available selections depend on the Deposit Order selection
made in the Destination Options window.
If you select By Columns, you can pick colonies using from 1 to 11 columns.
If you select By Rows, you can pick colonies using from 1 to 7 rows.
To run the wash routine from the Sanitise profile after each partial pick and inoculation,
select the Wash Between Partial Inoculation check box. Clear this check box to wait until all
pins have been used for picking and inoculation before running the wash routine.
3. In the Destination field, enter the distance in millimeters above the bottom of the
destination plate wells to dip the pins for the inoculation.
If you select Make Copy for the destination plate, enter a value for the copy.
4. From the Sanitise Profile list, select the Sanitise profile to use for the picking routine.
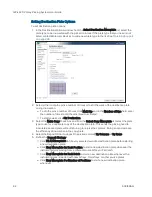
If the available profiles are not suitable for the picking routine, exit the picking process and
create a new Sanitise profile. See
Creating and Editing Sanitise Profiles on page 33
.
5. Click Next to define options for the source receptacle.
Summary of Contents for QPix 420
Page 1: ...5031496 G August 2022 QPix 420 Colony Picking System User Guide...
Page 6: ...QPix 420 Colony Picking System User Guide 6 5031496 G...
Page 20: ...QPix 420 Colony Picking System User Guide 20 5031496 G...
Page 30: ...QPix 420 Colony Picking System User Guide 30 5031496 G...
Page 38: ...QPix 420 Colony Picking System User Guide 38 5031496 G...
Page 62: ...QPix 420 Colony Picking System User Guide 62 5031496 G...
Page 138: ...QPix 420 Colony Picking System User Guide 138 5031496 G...
Page 156: ...QPix 420 Colony Picking System User Guide 156 5031496 G...
Page 186: ...QPix 420 Colony Picking System User Guide 186 5031496 G...
Page 194: ...QPix 420 Colony Picking System User Guide 194 5031496 G...
Page 210: ...QPix 420 Colony Picking System User Guide 210 5031496 G...
Page 214: ...QPix 420 Colony Picking System User Guide 214 5031496 G...
Page 218: ...QPix 420 Colony Picking System User Guide 218 5031496 G...
Page 222: ...QPix 420 Colony Picking System User Guide 222 5031496 G...
Page 224: ...QPix 420 Colony Picking System User Guide 224 5031496 G...


