QPix 420 Colony Picking System User Guide
150
5031496 G
To select the control colonies for picking:
1. From the list in the upper-right area, select the barcode or identifier of the receptacle to
view.
2. Refine the colony Selection criteria.
Compactness sets the level of irregularity for picking colonies. The value is a ratio of
the perimeter divided by the area of the colony, so that irregular shaped colonies are
closer to 0 and colonies that are more of a perfect circle are closer to 1. The system
default value is that a colony equal to or less than 0.65 and is not picked.
Axis Ratio measures how oval the colony is. The value is a ratio of the longest diameter
divided by the shortest diameter, so oval shaped colonies are closer to 0 and round
colonies are closer to 1. The system default value is that a colony equal to or less than
0.65 is not picked.
Min Diameter (mm) sets the minimum diameter of colonies for picking. A colony equal
to or smaller than the value in this field is not picked.
Note: The Min Diameter (mm) cannot be lower than the Diameter value set in the
Debris Discard section of the test image.
Max Diameter (mm) sets the maximum diameter of colonies to pick. A colony equal to
or greater than the value in this field is not picked.
Min Proximity (mm) sets the distance between colonies to pick, so that when picking
one colony, a different adjacent colony is not picked. The system default value is
0.45 mm.
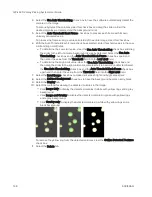
3. Manually change the pickable property of individual objects.
To define an object as pickable, right-click the object and select Pick Item to display the
object in green.
To define an object as unpickable, right-click the object and select Discard Item to
display the object in blue.
4. In the Limit Colonies field, enter the maximum number of colonies to pick from each
receptacle.
The Total Feature Count field displays the total number of pickable objects in the
receptacle.
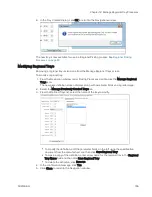
5. Select the Feature Counts tab to view the number of found features in a source receptacle.
The barcode or identifier for the source receptacle displays, along with the number of found
colonies and the number of colonies to pick as determined by the selection criteria.
To save the data in .csv format, right-click and select Export.
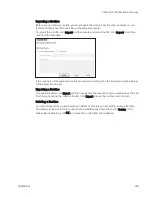
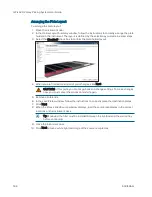
6. Select the Display Options tab to change the display options of the source receptacle
image.
Select the Display Detected Features check box to display all detected features with a
yellow circle.
Select the Shade Features check box to give the detected colonies some shading for
clearer visualization.
Select the Display Proximity Indicators check box to display connecting red lines
between a detected colony and its closest neighbor.
Select the Shade Exclusion Zone check box to display a red-shaded exclusion zone where
the system cannot pick.
7. Click Next.
Summary of Contents for QPix 420
Page 1: ...5031496 G August 2022 QPix 420 Colony Picking System User Guide...
Page 6: ...QPix 420 Colony Picking System User Guide 6 5031496 G...
Page 20: ...QPix 420 Colony Picking System User Guide 20 5031496 G...
Page 30: ...QPix 420 Colony Picking System User Guide 30 5031496 G...
Page 38: ...QPix 420 Colony Picking System User Guide 38 5031496 G...
Page 62: ...QPix 420 Colony Picking System User Guide 62 5031496 G...
Page 138: ...QPix 420 Colony Picking System User Guide 138 5031496 G...
Page 156: ...QPix 420 Colony Picking System User Guide 156 5031496 G...
Page 186: ...QPix 420 Colony Picking System User Guide 186 5031496 G...
Page 194: ...QPix 420 Colony Picking System User Guide 194 5031496 G...
Page 210: ...QPix 420 Colony Picking System User Guide 210 5031496 G...
Page 214: ...QPix 420 Colony Picking System User Guide 214 5031496 G...
Page 218: ...QPix 420 Colony Picking System User Guide 218 5031496 G...
Page 222: ...QPix 420 Colony Picking System User Guide 222 5031496 G...
Page 224: ...QPix 420 Colony Picking System User Guide 224 5031496 G...

