2-20
Options
Setting-up
Chapter 2
4
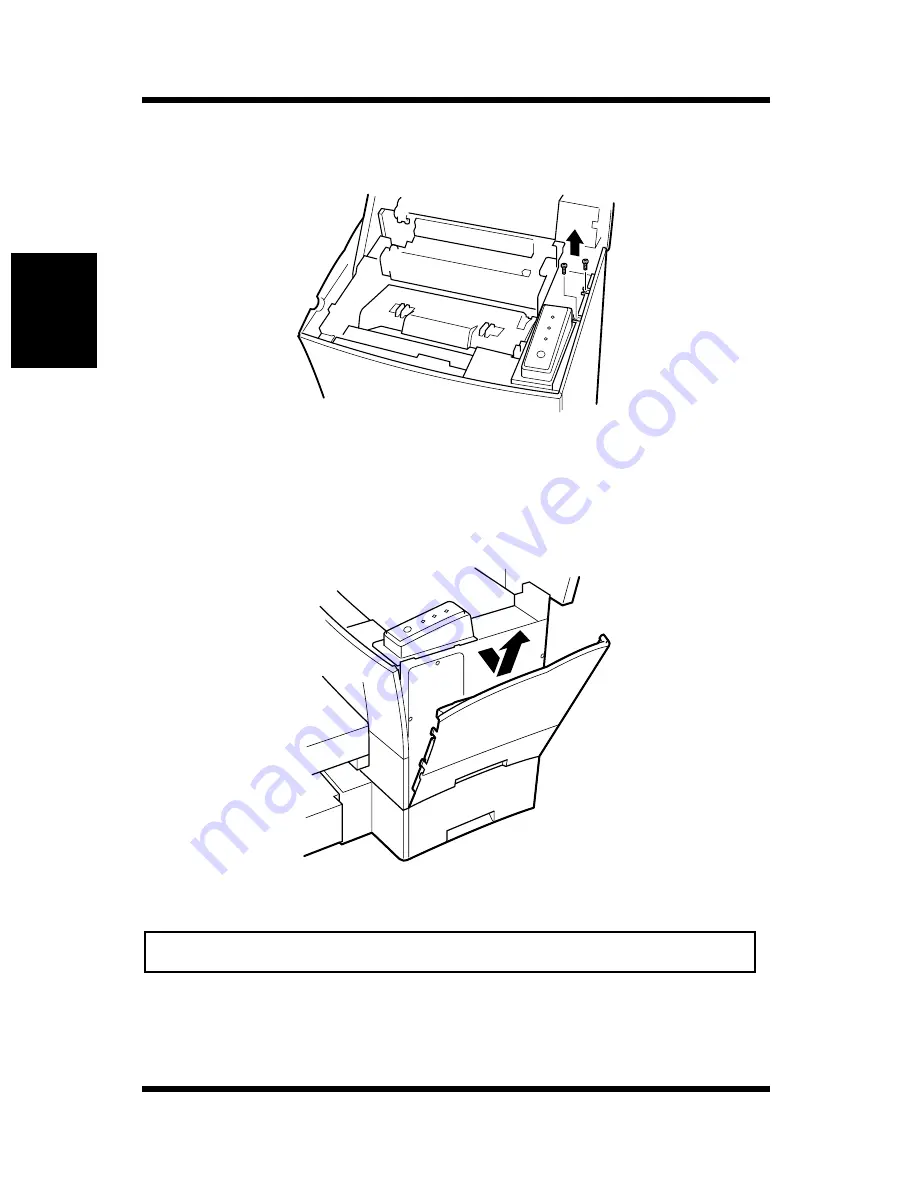
Using a screwdriver, loosen and remove the two screws that
secure the exterior side cover to the printer.
5
Clips secure the exterior side cover from the inside of the printer.
Gently maneuver the exterior side cover until the clips release
(see illustration).
Caution
• Do not touch any part of the main circuit inside of the printer.
Summary of Contents for PageWorks 18N
Page 1: ...User s Manual PageWorks18N...
Page 19: ...Chapter Introduction 1 Introduction Chapter 1...
Page 20: ...Introduction Chapter 1...
Page 29: ...Chapter Setting up 2 Setting up Chapter 2...
Page 30: ...Setting up Chapter 2...
Page 65: ...Chapter Using the Printer 3 Using the Printer Chapter 3...
Page 66: ...Using the Printer Chapter 3...
Page 72: ...3 6 Loading Paper Using the Printer Chapter 3 4 Replace the tray cover onto Tray 1...
Page 83: ...Chapter Printer Driver 4 Printer Driver Chapter 4...
Page 84: ...Printer Driver Chapter 4...
Page 150: ...MEMO Printer Driver Chapter 4...
Page 152: ...Printer Status Display and Control Panel Chapter 5...
Page 165: ...Chapter Maintenance 6 Maintenance Chapter 6...
Page 166: ...Maintenance Chapter 6...
Page 177: ...Chapter Troubleshooting 7 Troubleshooting Chapter 7...
Page 178: ...Troubleshooting Chapter 7...
Page 193: ...Chapter Specifications 8 Specifications Chapter 8...
Page 194: ...Specifications Chapter 8...
Page 203: ...Appendix Glossary A Glossary Appendix A...
Page 204: ...Glossary Appendix A...
Page 211: ...Appendix Index B Index Appendix B...
Page 212: ...Index Appendix B...
Page 216: ...MEMO...
Page 217: ...MEMO...
Page 218: ...MEMO...


