background image

Improving Print Quality

5-30

T

ro

u

b

le

s

h

o

o

ti

n

g

C

h

a

p

te

5

Improving Print Quality

Symptom

Cause

Action

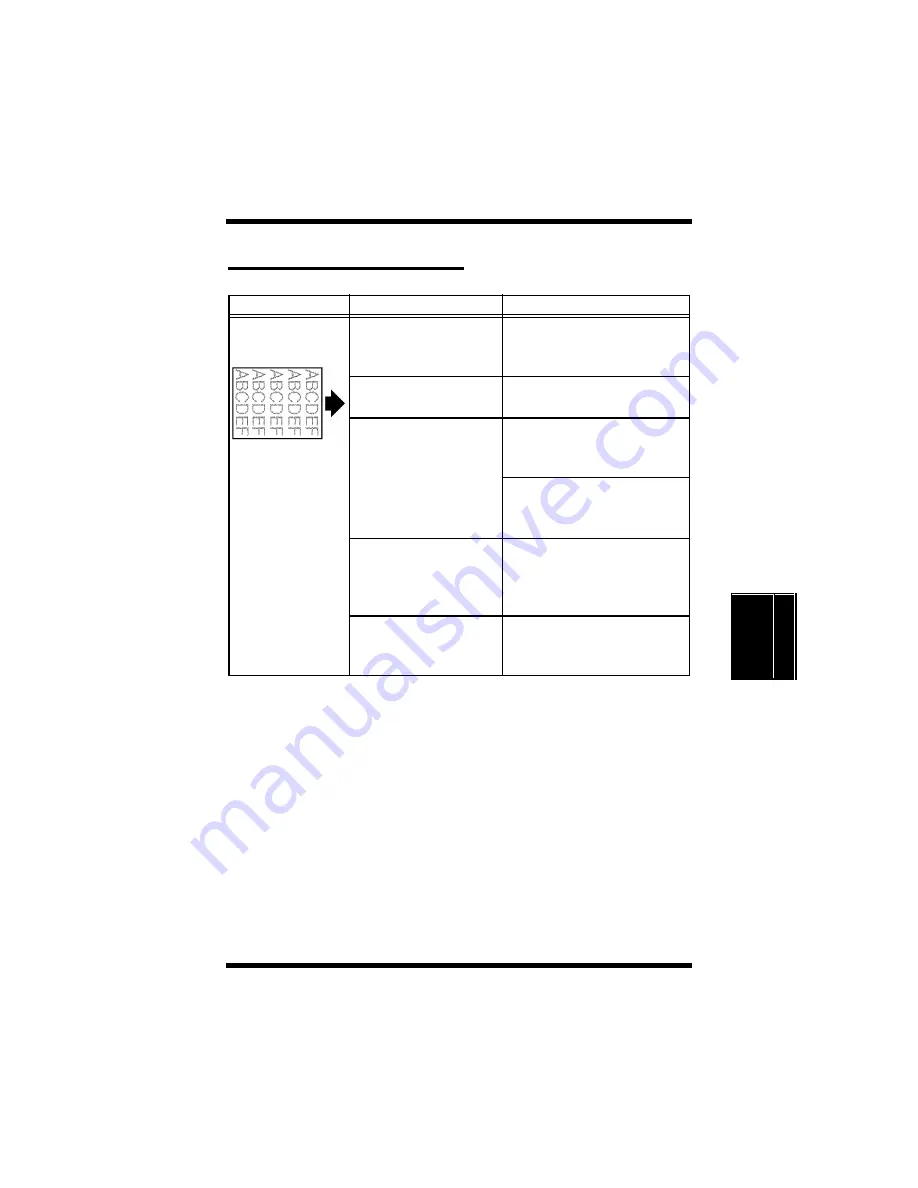
Image is too 
light

The brightness setting 
on the host computer 
is not set properly.

Adjust the brightness set-
ting on the host computer to 
the desired level.

The paper loaded in 
the tray is damp.

Replace the old paper with 
fresh, dry paper. 

+

p. 2-23

The toner cartridge is 
running out of toner.

Remove the toner cartridge 
and shake it to better dis-
tribute the toner. 

+

p. 4-1

Replace the old toner car-
tridge with a new one. 

+

p. 4-1

The toner cartridge 
may be defective.

Remove and check the car-
tridge for damage. 
Install a new cartridge if 
necessary. 

+

p. 4-1

The image transfer 
roller unit requires 
replacement.

Change the image transfer 
roller unit. 

+

p. 4-23

Summary of Contents for Color PageWorks Pro L

Page 1: ...Color PageWorks Pro L User s Guide cover fm Page i Friday April 26 2002 11 13 AM ...

Page 2: ...ines for energy efficiency What is an ENERGY STAR Printer ENERGY STAR Printers have a feature that allows them to automatically go to sleep after a period of inactivity This auto feature can reduce a machine s annual electricity cost by 60 percent Hyou2 fm Page 1 Friday March 1 2002 10 50 AM ...

Page 3: ...marks of Adobe Systems Incorporated or its subsidiaries and may be registered in certain juridictions Agfa and Agfa Intelifont Agfa Font Manager are registered trademarks of Agfa Corporation TrueType are registered trademarks of Apple Computer Inc IBM PC AT and PS 2 are registered trademarks of International Busi ness Machines Corporation Microsoft MS DOS Excel Windows 3 1 Windows NT Windows 95 an...

Page 4: ... laser There is no pos sibility of danger from the laser provided the printer is operated accord ing to the instructions in this manual Since radiation emitted by the laser is completely confined within protective housing the laser beam cannot escape from the machine during any phase of user operation INTERNAL LASER RADIATION For All Users Maximum Radiation Power 1 0 10 3 W Wavelength 770 810 nm T...

Page 5: ... laser prod ucts on August 2 1976 Compliance is mandatory for products marketed in the United States The label shown below indicates compliance with the CDRH regulations and must be attached to laser products marketed in the United States WARNING For All Other Users WARNING This is a semiconductor laser The maximum power of the laser diode is 1 0 10 3 W and the wavelength is 770 810 nm Use of cont...

Page 6: ...ollowing conditions 1 this device may not cause harmful interference and 2 this device must accept any interference received including interference that may cause undesired operation Minolta Corporation 101 Williams Drive Ramsey New Jersey 07446 Telephone number 201 825 4000 This equipment has been tested and found to comply with the limits for a Class B digital device pursuant to Part 15 of the F...

Page 7: ...nd is prohibited under FCC rules Parallel interface cable must be used accessories The design and production of this unit conforms to FCC regulations and any changes or modifications must be registered with the FCC and are subject to FCC control Any changes made by the purchaser or user without first contacting the manufacturer will be subject to pen alty under FCC regulations ...

Page 8: ...digital apparatus complies with Canadian ICES 003 Cet appareil numérique de la classe B est conforme à la norme NMB 003 du Canada This device must be used with shield interface cables The use of non shielded cable is likely to result in interference with radio communica tions and is prohibited under the EMC regulations of your country Espe cially parallel interface cables must be used accessories ...

Page 9: ...ne is released This amount is not large enough to harm anyone adversely However be sure the room where the printer is being used has adequate ventilation espe cially if you are printing a high volume of materials or if the printer is being used continuously over a long period WARNING LABEL ...

Page 10: ...oning Fine MT developing system 8µm small particle toner Color matching technology Windows 95 Windows 98 ICM Printer embedded color matching 2 Printer Description Language PDL Windows Adobe PostScript Level 2 equivalent Z Script 3 High speed printing Full color 3ppm B W 12ppm High performance RISC processor Hitachi HD6437034F20 20 MHZ High speed data transfer IEEE 1284 IEEE1284 C ECP EPP compliant...

Page 11: ...ight 403mm 15 3 4 6 Network ready with option Ethernet Server Windows NT NetWare 3 X 4 X Bindery NDS Client Windows 95 Windows 98 Windows 3 1 Windows NT Workstation 4 0 7 Easy maintenance and operation Easy maintenance with cartridge type supplies GUI driver 8 Environmentally friendly Ozone free Power save mode Energy Star compliant ...

Page 12: ...ng the Oiling Roller Changing the Fusing Unit and Image Transfer Roller Unit Cleaning the Printer and Clearing a Paper Misfeed Note This indicator is used to identify sections that require special attention Action Prohibited This symbol is used over illustrations throughout this manual to indicate that a specified course of action must not be taken Do not follow examples that are superimposed with...

Page 13: ...ies 1 4 Moving the Printer 1 5 Chapter 2 Using the Printer The Printer Parts and Supplies 2 1 Printer 2 1 Supplies and Units 2 5 Control Panel 2 9 Indicator Lights 2 10 Action Key 2 10 Operation and Warning Labels 2 15 Turning the Printer ON and OFF 2 17 Paper 2 19 Type 2 19 Size 2 19 Capacity 2 20 Printable Area 2 21 Paper Supplies 2 21 ...

Page 14: ... Print Job Directly at the Printer 2 45 Chapter 3 Printer Driver and Status Display Using the Printer Driver Under Windows 95 Windows 98 3 2 Displaying the Printer Driver Window 3 3 Exiting the Printer Driver 3 3 Using the 32 bit SuperDriver Setup Dialog 3 4 Common Buttons 3 5 Choosing Menu Settings 3 5 Driver Settings 3 7 Paper 3 7 Page Layout 3 11 Image 3 17 Device Option 3 21 About 3 22 Process...

Page 15: ...g Menu Settings 3 26 Driver Settings 3 27 Paper 3 27 Page Layout 3 31 Image 3 37 Device Option 3 41 About 3 42 Using the Printer Status Display 3 43 Opening the Printer Status Display 3 43 Using the Printer Status Display 3 44 Controlling Pop Up Messages 3 45 Switching Between the Expanded and Reduced Views 3 46 On line Help 3 46 Displaying Printer Information 3 47 ...

Page 16: ...nging the Image Transfer Belt Unit 4 31 Cleaning the Printer 4 39 Cleaning the Outside 4 39 Cleaning the Inside 4 40 Chapter 5 Troubleshooting How to Troubleshoot 5 1 Diagnosing Your Printer 5 1 Customer Support 5 2 Problems During Data Transmission and the Print Cycle 5 3 Troubleshooting prior to the Transmission of Data 5 3 Troubleshooting the Print Cycle 5 3 Messages 5 5 Clearing a Paper Misfee...

Page 17: ...xv Contents Chapter 6 Specifications Specifications of Printer 6 1 Specifications of 250 sheet Third Cassette Unit 6 7 Appendix A Glossary Appendix B Quick Reference Appendix C Index ...

Page 18: ...MEMO ...

Page 19: ...Chapter 1 Introduction Introduction Chapter 1 ...

Page 20: ... C 18 F per hour Humidity 15 to 85 RH with a fluctuation of 20 per hour The environmental zone marked X on the left represents a critical environment in which the printer can be left to stand However the manufacturer does not ensure optimal paper passage performance and image production in this zone Be sure to operate the printer within the operating environment identified within the bold line Hum...

Page 21: ...ire or causing an electrical shock ALWAYS unplug the power cord when the printer is not to be used for an extended period of time NEVER remove any panel or cover unless the procedure is described in the user s manual The printer contains a high volt age component which can cause an electrical shock NEVER alter the engineering or mechanics of the printer as a fire or electrical shock could result N...

Page 22: ...ed to run without taking necessary action Note Remarque Locate the printer in a Well Ventilated Room A negligible amount of ozone is generated during normal operation of this printer An unpleasant odor may however be created in poorly ven tilated rooms during extensive printer operations For a comfortable healthy and safe operating environment it is recommended that the room be well ventilated Pla...

Page 23: ...open flame 3A humid place 3A dusty place Surplus paper which has been removed from its protective pack aging but not yet loaded into the printer tray should be sealed in a plastic bag and stored in a cool dark place Use only the toner cartridge and toner specifically designed for use with this printer Keep supplies out of the reach of children If your hands should come into direct contact with the...

Page 24: ...rt the printer over a long distance consult your technical representative Note Moving the printer with a third cassette unit option The third cassette unit is attached to the printer through the coupling pins only Moving the printer with the third cassette unit attached is not advised as there is a strong possibility that the two pieces may sepa rate and become damaged Be certain to move the print...

Page 25: ...Chapter 2 Using the Printer Using the Printer Chapter 2 ...

Page 26: ...is tray The tray can hold up to 250 sheets of paper p 2 43 2 Power switch Use to turn the printer ON and OFF p 2 17 1 Output tray 2 Power switch 3 Front cover 4 Control panel 5 Front cover lock release lever 6 Tray 1 multipurpose tray 7 Tray 2 250 sheet second cassette 8 Tray 3 250 sheet third cassette optional 9 250 sheet third cassette unit optional 10 Grips ...

Page 27: ... cover 6 Tray 1 multipurpose tray Swing open toward you to load paper Holds up to 150 sheets of paper p 2 19 7 Tray 2 250 sheet second cassette Holds up to 250 sheets of paper p 2 19 8 Tray 3 250 sheet third cassette optional Holds up to 250 sheets of paper p 2 19 9 250 sheet third cassette unit optional Houses a third cassette increasing paper capacity to 650 sheets when installed under the print...

Page 28: ...The Printer Parts and Supplies 2 3 Using the Printer Chapter 2 12 Rear cover lock release lever 13 Rear cover 15 Interface connector 14 Power cord socket 11 Network card panel ...

Page 29: ... card 12 Rear cover lock release lever Pull down to swing open the rear cover 13 Rear cover Swing open to change the oiling roller assembly or clear a paper misfeed 14 Power cord socket Connect the power cord of the printer to this socket 15 Interface connector Provides connection between the printer and host computer ...

Page 30: ...The Printer Parts and Supplies 2 5 Using the Printer Chapter 2 Supplies and Units 2 Toner cartridge 4 Drum cartridge 1 Waste bottle 5 Image transfer roller unit 3 Image transfer belt unit ...

Page 31: ...dges in a plastic bag or according to local regulations p 4 1 3 Image transfer belt unit Transfers the image created by the drum cartridge onto paper Handle with care p 4 31 Dispose of the old unit in a plastic bag or according to local regu lations 4 Drum cartridge Processes the image Handle with care Replace this cartridge with a new one when necessary p 4 11 Dispose of the old cartridge in a pl...

Page 32: ...The Printer Parts and Supplies 2 7 Using the Printer Chapter 2 6 Oiling roller 7 Fusing unit ...

Page 33: ... the fusing rollers Replace the oiling roller with a new one when necessary p 4 11 Dispose of the old roller in a plastic bag or according to local reg ulations 7 Fusing unit Permanently fixes the image onto paper p 4 23 Dispose of the old unit in a plastic bag or according to local regu lations ...

Page 34: ...ed BLINKING A recoverable error has occurred OFF Normal Toner Empty LED ON One or more of the toner cartridges is empty BLINKING One or more of the toner cartridges is almost empty OFF Normal Paper Empty LED ON The selected paper tray is empty BLINKING The selected paper tray is almost empty OFF Normal Error amber Toner empty amber Paper empty amber Ready green Action key ...

Page 35: ...icator lights turn on off or blink in combination to let you know the current status of the printer You can find out details of the printer s status by checking the information that appears on your computer screen Action Key The LED display will change as you push the Action key The appearance of this icon throughout this manual indicates when you need to press the Action key Examples of the messa...

Page 36: ...r 2 When the Ready LED is on LED Display Description Response Required Initializing Power on initializ ing Wait a few moments Warming Up Printer is warming up Wait a few moments for the printer to warm up Ready Printer is ready and able to print Send a print job ...

Page 37: ... mode Please wait a few moments Paper Low Tray 2 or Tray 3 is almost out of paper Press the Action key and check to see which tray is almost out of paper For details see Chapter 5 Trouble shooting p 5 7 Paper Empty No Tray Paper Empty The paper supply of one of the trays is empty Press the Action key and check to see which tray is out of paper For details see Chapter 5 Trou bleshooting p 5 8 No Tr...

Page 38: ... Toner Low The supply of toner inside of the toner cartridge is low but printing is still pos sible Press the Action key and check to see which color of the toner cartridges is almost empty For details see Chapter 5 Trouble shooting p 5 10 Drum Cartridge Almost Used It is almost time to replace the drum cartridge Ready a drum car tridge replacement Since the drum car tridge is on the same replacem...

Page 39: ...ill resume using the paper size currently loaded in the printer by pressing the Action key p 2 23 Size Mismatch The wrong size of paper has been detected in Tray 2 or Tray 3 Replace Toner Put Toner Cartridge Replace Toner One of the toner car tridges is empty Press the Action key to determine which toner cartridge is empty For details see Chapter 5 Trou bleshooting p 5 14 Put Toner Cartridge One o...

Page 40: ...ies 2 15 Using the Printer Chapter 2 Operation and Warning Labels 3 Clearing paper misfeeds 1 Installing the toner cartridge 4 Loading paper 5 WARNING HIGH TEMPERATURE 2 Changing the waste bottle drum cartridge and oiling roller ...

Page 41: ...e bottle drum cartridge and oiling roller are preset to be replaced simultaneously Replace these three units at the same time 3 Clearing paper misfeeds Describes how to clear the paper path after a misfeed For details refer to Clearing a Paper Misfeed on page 5 21 4 Loading paper Describes how to replenish the paper feed tray For details refer to Loading Paper on page 2 23 5 WARNING HIGH TEMPERATU...

Page 42: ... Printer Chapter 2 Turning the Printer ON and OFF Turning the Printer ON and OFF Turning the printer ON Press the power switch to the I ON position Turning the printer OFF Press the power switch to the O OFF position ...

Page 43: ...printer is On The printer is ready to print approximately 90 seconds after the power switch is turned ON Note If no print commands are sent from the host computer to the printer within 15 min the printer automatically enters the Power save mode Initializing Warming Up Ready ...

Page 44: ...60 to 90 g m2 16 to 24 lbs Trans parency sheet Labels Letter head Enve lopes J Post Postcard size 100 148 mm 4 5 3 4 Thickpaper weighing 90 to 157 g m2 24 to 41 1 4 lbs Tray 1 m m m m m m m m Tray 2 m m m None None None None None Tray 3 m m m None None None None None Paper feeding port A4 210 297 mm 8 1 4 11 3 4 JIS B5 182 257 mm 7 1 4 10 A5 148 210 mm 5 3 4 8 1 4 Legal 8 1 2 14 216 356mm Letter 8...

Page 45: ...g 60 to 90 g m2 16 to 24 lbs Special Paper Recycled paper weighing 60 to 90 g m2 16 to 24 lbs Trans parency sheet Labels Letter head Enve lopes J Post Postcard size 100 148 mm 4 5 3 4 Thickpaper weighing 90 to 157 g m2 24 to 41 1 4 lbs Tray 1 150 150 50 50 50 20 50 50 Tray 2 250 250 50 None None None None None Tray 3 250 250 50 None None None None None ...

Page 46: ... margins of the document increase to 6mm 0 24 Paper Supplies Use the following precautions when handling the paper Avoid storing paper in any of the following places A place subject to direct sunlight A hot place or near an open flame A humid place A dusty place Store paper which has been removed from its wrapper but not loaded into the printer tray in a sealed plastic bag in a cool dark place Kee...

Page 47: ... on right angles 3 Paper bound by glue staples or clips 3 Paper affixed with labels which are easily removed 3 Post cards that are warped or bent Envelopes should meet the following requirements 3 Sharp folds and edges 3 General mailing envelopes without seals on the glued portion 3 Those having flaps the full width of the envelope unacceptable if the flap is glued 3 Wrinkle free no fasteners Gene...

Page 48: ...ure 3 Paper already used in a thermal transfer printer or ink jet printer 3 Paper that is too thin under 60 g m2 16 lbs or too thick over 157 g m2 41 1 4 lbs 3 Paper folded curled or torn 3 Paper having holes or perforations 3 Paper of varying surfaces that are too smooth or too rough 3 Paper with special coated surfaces such as carbon paper heat sensitive and pressure sensitive paper 3 Sheets of ...

Page 49: ...24 Using the Printer Chapter 2 2 Adjust the paper guides to fit the size of the paper Load the paper stack on the tray print side facing up 3 When loading a long stack of paper open the paper support Face up Paper guides Paper support To Be Continued t ...

Page 50: ...the level indicator When paper remains in the tray do not stack more paper on top Loading with force may cause a paper misfeed To replenish the paper supply take out the remaining paper from the tray and add it to the new supply Fan the paper and load it It is recommended that the paper supply be replenished only when the tray is empty OK NG Paper guides ...

Page 51: ... 26 Using the Printer Chapter 2 Tray 2 second cassette Tray 3 third cassette optional 1 Slide out Tray 2 second cassette or Tray 3 third cassette 2 Press down on the paper lifting plate until it locks Tray 2 Tray 3 Paper lifting plate To Be Continued t ...

Page 52: ...g the Printer Chapter 2 3 Install thetrailing edge guide to fit the size of the paper to be loaded Note When loading legal size paper the trailing edge guide is not used Return it to the guide space in the cassette Trailing edge guide A4 1 2 Letter Guide space ...

Page 53: ...d no higher than the maximum on the level indi cator Do not load additional paper on top of the remaining paper in the paper tray Loading the paper with force may cause a paper misfeed To replenish the paper supply take out the remaining paper from the tray and add it to the new supply Fan the paper and load It is recommended that the paper supply be replenished only when the tray is empty Face do...

Page 54: ... guides to fit the size of the paper 6 Set the paper size indicator to the size of the paper used Note If the paper size indicator is not reset to the corresponding size the document may not print correctly When you have changed the paper size always reset the paper size indicator Guide lock Paper guides lever Paper size indicator ...

Page 55: ...aper 2 30 Using the Printer Chapter 2 7 Slide in the cassette Note Make sure that Tray 2 is completely loaded into the printer whenever you print from Tray 3 Printing from Tray 3 is not possible if Tray 2 is not completely loaded into the printer ...

Page 56: ... quality a misfeed or a failure 3 Labels which are easily or partially peeled 3 Labels which are leaking adhesives It is highly recommended to test any label s compatibility with the printer before purchasing it in large quantities Multiple transparencies or labels can be printed continuously but the feeding capability may be affected by the materials used and the operat ing environment It may be ...

Page 57: ...1 Swing open Tray 1 multipurpose tray 2 Adjust the paper guides to fit the size of the transparency or label sheets to be loaded When loading a stack of long paper open the paper support Load the stack of transparencies or labels on the tray print side up Face up Paper support Paper guides To Be Continued t ...

Page 58: ...more than 50 sheets on the tray Do not load additional labels or transparencies on top of those remain ing in the tray Loading with force may cause a misfeed To replenish the transparency or label sheets take out those that remain in the tray and add them to the new supply Fan the transparencies or labels and load them It is recommended that the cassette be replenished only when it is empty White ...

Page 59: ...Loading Paper Loading Transparencies and Labels 2 34 Using the Printer Chapter 2 MEMO ...

Page 60: ...e or Tray 3 third cassette 2 Press down on the paper lifting plate until it locks 3 Install thetrailing edge guide to fit the size of the transparencies to be loaded Note When loading Legal size transparencies the trailing edge guide is not used Return it to the guide space in the cassette Tray 2 Tray 3 Paper lifting plate Trailing edge guide A4 1 2 Letter Guide space ...

Page 61: ...sparencies Minolta CF 200 D 3MCG3710 Minolta CF 100 D or 3M PP2500 into the cassette so that their front sides are facing up The transparencies should be loaded no higher than the maximum level indicator Do not load additional transparencies on top of those remaining in the tray Loading the transparencies with force may cause a misfeed Paper separator Face down Face side up The face of the transpa...

Page 62: ...de lock lever adjust the paper guides to the size of the transparencies To replenish the transparen cies take out those that remain in the tray and add them to the new supply Straighten the edges on a level surface It is recommended that the cassette be replenished only when it is empty Guide lock lever Paper guides ...

Page 63: ...tte Note If the paper size indicator is not reset to the corresponding size the document may not print correctly When you have changed the paper size always reset the paper size indicator Make sure that Tray 2 is completely loaded into the printer whenever you print from Tray 3 Printing from Tray 3 is not possible if Tray 2 is not completely loaded into the printer Paper size indicator ...

Page 64: ... as carbon paper heat sensitive paper and pressure sensitive paper 3 Sheets of various sizes 3 Paper not cut on right angles 3 Paper bound by glue staples or clips 3 Paper affixed with labels which are easy to peel 3 Post cards that are warped or bent Envelopes should meet the following requirements 3 Sharp folds and edges 3 General mailing envelopes without seals on the glued portion 3 Those havi...

Page 65: ...ck on the tray print side facing up 3 When printing envelopes fold their flaps securely and load them on the tray with their flap side down When printing letterhead load it on the tray with the header at the take up end Note Generally envelopes take to printing well but some types may wrinkle We strongly recommend testing any type of envelope with the printer before buying it in large quantities F...

Page 66: ... more than 50 sheets on the tray at one time Do not load additional sheets of paper on top of those remaining in the tray If you load them forcibly it may cause a misfeed To replenish the tray take out the remaining paper and add it to the new supply Fan the paper and load it into the cassette It is recommended that the cassette be replenished only when it is empty ...

Page 67: ...Loading Paper Loading Special Paper 2 42 Using the Printer Chapter 2 MEMO ...

Page 68: ...nter from either Tray 1 multi purpose tray Tray 2 second cassette or Tray 3 third cassette This will allow you to use the paper port that best suits your application 1 Turn the printer on See Turning the Printer ON and OFF p 2 17 Make sure that the Ready LED pattern is displayed ...

Page 69: ...the Printer Chapter 2 2 Load the paper Tray 1 multipurpose tray pp 2 23 2 32 2 40 Tray 2 second cassette Tray 3 third cassette pp 2 26 2 35 3 To print long paper open the paper support in the output tray To Be Continued t ...

Page 70: ...ly at the Printer All print jobs can be cancelled directly at the printer by pressing the Action key continuously for 10 seconds The output tray can hold up to 250 sheets of paper Be careful not to exceed this limit when making multiple prints Face down Initializing 10 seconds When the job has been cancelled the initializing LED display will no longer show and you may stop pressing the Action key ...

Page 71: ...Chapter Printer Driver and Status Display 3 Printer Driver and Status Display Chapter 3 ...

Page 72: ...MEMO 3 1 Printer Driver and Status Display Chapter 3 ...

Page 73: ...can make For detailed information regarding the items contained in the tabs please refer to the printer driver s online help Note Memory In order to achieve the best results for your printed documents your computer should be equipped with at least 32MB of RAM Additional RAM beyond the recommended 32MB will allow your printer to provide you with the high standards of performance for which it was de...

Page 74: ...ngs and then Printers to display the Printers dialog box 2 Click Minolta Color PageWorks Pro L to highlight it and then select Properties from the File menu Exiting the Printer Driver After you are finished using the printer driver you can exit it either by clicking the OK or Cancel button or by clicking the window close button in the upper right corner of the window ...

Page 75: ... The 6 tabs of the driver are contained in the 32 bit SuperDriver Setup tab Click on one of the tabs and enter settings for the items contained in the tab The following sections show the contents of each of the 6 tabs and provides brief explanations for each available setting Refer to the driver s online help for full details on each setting ...

Page 76: ...lick to save any changed settings without closing the dialog Help Click to view online help Choosing Menu Settings The following standard Windows procedures can be used when making settings in the printer driver s menu pages Clicking an option button or name Clicking a check box Dragging the scroll box on a scroll bar Clicking a drop down list box and then clicking on an item to select it Holding ...

Page 77: ...Using the Printer Driver Under Windows 95 Windows 98 3 6 Printer Driver and Status Display Chapter 3 MEMO ...

Page 78: ...gs you can make with this printer driver Paper The Paper tab is the opening dialog of the printer driver It contains functions that effect the format and output of your printed documents Paper Size The various sizes of paper that are supported by your printer are displayed in the drop down list Select the appropriate size or add a custom size ...

Page 79: ... 9 1 2 inches Envelope DL 110 220 mm Envelope C5 162 229 mm Envelope Monarch 3 7 8 7 1 2 inches Copies This item specifies the number of copies to be printed You can specify any value from 1 to 999 Orientation This setting allows you to determine how your document is positioned on the printed page Portrait Portrait documents are printed lengthwise vertically relative to the page Landscape Landscap...

Page 80: ...ce The Paper Source item specifies the tray from which paper is fed from the printer To change this setting just select the desired paper source from the drop down list If the desired tray is an option and does not appear as a paper source make sure that it has been added in the Device Option tab ...

Page 81: ...ted and either Tray2 or Tray3 runs out of paper the printer will automatically go to the next tray if it con tains the same size and type of paper Note 2 Manual The manual feed mode allows you to review each output document by feeding individual sheets one at a time into the printer When manual is selected the wait action message will be displayed Printing will take place when a piece of paper is ...

Page 82: ...ssible selections Off This default setting specifies one document per sheet of paper 2 up This setting will print two documents onto one sheet of paper 4 up This setting will print four documents onto one sheet of paper 6 up This setting will print six documents onto one sheet of paper 9 up This setting will print nine documents onto one sheet of paper 16 up This setting will print 16 documents on...

Page 83: ...ck on the Detail of N up button to open a dialog that will allow you to specify the order in which N up documents are placed on the page There are four patterns to choose from horizontal ascending horizontal descending vertical ascending and vertical descending Note The Scaling feature of the printer driver cannot be used when printing N up documents To Be Continued t ...

Page 84: ...rmark pop up dialog Watermarks can be specified to appear on the first page only of a multi page document by clicking the First Page only box Otherwise a watermark that is specified to appear will be placed on every page of the multi page document When the In Background box is checked watermarks will appear as shadow text behind the actual content of the document When the In Background box is not ...

Page 85: ...e These settings can be used to specify the style of the watermark s font Font The typeface and point size of the watermark are specified here Angle Rotate the angle of the watermark s placement through the value specified in this box Position Adjust the vertical and horizontal values to position the watermark on the document To Remove a Watermark from the List Select the watermark that you wish t...

Page 86: ... the area of a document through the Scaling feature The maximum percentage of enlargement is 200 The maximum percentage of reduction is 50 Default Click the Default button to reset the functions of the tab to their original values The Scaling feature of the printer driver cannot be used when printing N up documents ...

Page 87: ...Driver Settings Windows 95 Windows 98 3 16 Printer Driver and Status Display Chapter 3 MEMO ...

Page 88: ...rint resolution Color Enable this setting when generating documents that contain color images or text Legal paper or larger sizes are not supported when this setting is enabled Colors to Patterns This setting is optimal for printing documents that will be sent via facsimile The Color setting is unavailable when this setting is enabled Enhance Contrast This setting enhances the definition between d...

Page 89: ...efault setting produces a standard finish that should be optimal for most applications The High setting produces a glossy finish that is appropriate for high quality high resolution document printing Resolution The resolution setting determines the dots per inch dpi used when a document is printed Document printing quality will increase as the value of dpi increases Please note however that printi...

Page 90: ...Driver Settings Windows 95 Windows 98 3 19 Printer Driver and Status Display Chapter 3 Detail Click this button to open the Graphics pop up dialog ...

Page 91: ... Usually the median values toward the center of the bars will provide the best display To fine tune these settings click and hold on the sliders in order to make left and right adjustments Value changes are reflected in the view window as you make them The factory defaults for these settings are 50 for Contrast 50 for Brightness 0 for Saturation and 20 for Sharpness Default Click the Default butto...

Page 92: ...o add an available option from the Installable Options list to the Installed Options list select the option and click the Add button The Installed Options list catalogs the optional accessories that have been added to your printer To remove an option from the Installed Options list select the option and click the Remove button Removed options can be reinstalled using the previous procedure ...

Page 93: ...Driver Settings Windows 95 Windows 98 3 22 Printer Driver and Status Display Chapter 3 About This tab displays version and copyright information about this printer driver ...

Page 94: ...s Windows 95 Windows 98 3 23 Printer Driver and Status Display Chapter 3 Processing When Show Status is checked a pop up dialog will appear that displays the printing status of jobs as they are output by the printer ...

Page 95: ...r driver For detailed information regarding the items contained in the tabs please refer to the printer driver s online help Note Memory In order to achieve the best results for your printed documents your computer should be equipped with at least 64MB of RAM Additional RAM beyond the recommended 64MB will allow your printer to provide you with the high standards of performance for which it was de...

Page 96: ...ialog box 2 Select the Minolta Color PageWorks Pro L driver icon by clicking on it with the mouse pointer Next open the file menu and click on the Document Defaults item Exiting the Printer Driver You can exit the printer application by clicking the OK or Cancel button at the bottom of any of the application s five main screens or by clicking the window close button X in the upper right corner of ...

Page 97: ... Properties dialog without saving any changes made Help Click to view online help Choosing Menu Settings The following standard Windows procedures can be used when making settings in the printer driver s menu pages Clicking an option button or name Clicking a check box Dragging the scroll box on a scroll bar Clicking a drop down list box and then clicking on an item to select it For details refer ...

Page 98: ...you can make with this printer driver Paper The Paper tab is the opening dialog of the printer driver It contains functions that effect the format and output of your printed documents Paper Size The various sizes of paper that are supported by your printer are displayed in the drop down list Select the appropriate size or add a custom size ...

Page 99: ...1 2 inches Envelope DL 110 220 mm Envelope C5 162 229 mm Envelope Monarch 3 7 8 7 1 2 inches Copies This item specifies the number of copies to be printed You can specify any value from 1 to 999 Orientation This setting allows you to determine how your document is positioned on the printed page Portrait Portrait documents are printed lengthwise vertically relative to the page Landscape Landscape d...

Page 100: ...The Paper Source item specifies the tray from which paper is fed from the printer To change this setting just select the desired paper source from the drop down list If the desired tray is an option and does not appear as a paper source make sure that it has been added in the Device Option tab ...

Page 101: ... and either Tray2 or Tray3 runs out of paper the printer will automatically go to the next tray if it con tains the same size and type of paper Note 2 Manual The manual feed mode allows you to review each output document by feeding individual sheets one at a time into the printer When manual is selected the wait action message will be displayed Printing will take place when a piece of paper is set...

Page 102: ...le selections Off This default setting specifies one document per sheet of paper 2 up This setting will print two documents onto one sheet of paper 4 up This setting will print four documents onto one sheet of paper 6 up This setting will print six documents onto one sheet of paper 9 up This setting will print nine documents onto one sheet of paper 16 up This setting will print 16 documents onto o...

Page 103: ...n the Detail of N up button to open a dialog that will allow you to specify the order in which N up documents are placed on the page There are four patterns to choose from horizontal ascending horizontal descending vertical ascending and vertical descending Note The Scaling feature of the printer driver cannot be used when printing N up documents To Be Continued t ...

Page 104: ...rk pop up dialog Watermarks can be specified to appear on the first page only of a multi page document by clicking the First Page only box Otherwise a watermark that is specified to appear will be placed on every page of the multi page document When the In Background box is checked watermarks will appear as shadow text behind the actual content of the document When the In Background box is not che...

Page 105: ...ese settings can be used to specify the style of the watermark s font Font The typeface and point size of the watermark are specified here Angle Rotate the angle of the watermark s placement through the value specified in this box Position Adjust the vertical and horizontal values to position the watermark on the document To Remove a Watermark from the List Select the watermark that you wish to re...

Page 106: ... area of a document through the Scaling feature The maximum percentage of enlargement is 200 The maximum percentage of reduction is 50 Default Click the Default button to reset the functions of the tab to their original values The Scaling feature of the printer driver cannot be used when printing N up documents ...

Page 107: ...Driver Settings Windows NT 4 0 3 36 Printer Driver and Status Display Chapter 3 MEMO ...

Page 108: ... resolution Color Enable this setting when generating documents that contain color images or text Legal paper or larger sizes are not supported when this setting is enabled Colors to Patterns This setting is optimal for printing documents that will be sent via facsimile The Color setting is unavailable when this setting is enabled Enhance Contrast This setting enhances the definition between dark ...

Page 109: ...lt setting produces a standard finish that should be optimal for most applications The High setting produces a glossy finish that is appropriate for high quality high resolution document printing Resolution The resolution setting determines the dots per inch dpi used when a document is printed Document printing quality will increase as the value of dpi increases Please note however that printing t...

Page 110: ...Driver Settings Windows NT 4 0 3 39 Printer Driver and Status Display Chapter 3 Detail Click this button to open the Graphics pop up dialog ...

Page 111: ...ally the median values toward the center of the bars will provide the best display To fine tune these settings click and hold on the sliders in order to make left and right adjustments Value changes are reflected in the view window as you make them The factory defaults for these settings are 50 for Contrast 50 for Brightness 0 for Saturation and 20 for Sharpness Default Click the Default button to...

Page 112: ...d an available option from the Installable Options list to the Installed Options list select the option and click the Add button The Installed Options list catalogs the optional accessories that have been added to your printer To remove an option from the Installed Options list select the option and click the Remove button Removed options can be reinstalled using the previous procedure ...

Page 113: ...Driver Settings Windows NT 4 0 3 42 Printer Driver and Status Display Chapter 3 About This tab displays version and copyright information about this printer driver ...

Page 114: ...t to Programs point to Minolta Printer Utilities and then click Minolta Color PageWorks L Status The operation described above opens the screen shown on page 3 44 To close the Printer Status Display On the Printer Status Display File menu click Exit The Status Display allows you to monitor the operating status of the printer only when the printer is locally directly connected to the host computer ...

Page 115: ...s of what you need to do in order to correct problems and recover from error conditions Warning Status This area displays text messages that warn you of such conditions as low toner Printer Status figure This area shows a graphic representation of the printer and indicates where there is a problem Printing Status These items indicate the status of an ongoing print job Job Name shows the name of th...

Page 116: ...ror conditions that do not cause popup error messages to appear To move an error condition from the Inactivate Popup list to the Activate Popup list click on the error condition to highlight it and then click Add To move an error condition from the Activate Popup list to the Inactivate Popup list click on the error condition to highlight it and then click Delete After you are finished click OK to ...

Page 117: ...educe to reduce the size of the display or Expand to expand it The expanded view is shown on page 3 44 The reduced view is shown below Note that the Expand command is dimmed while the expanded view is on the display while Reduce is dimmed while the reduced view is on the display On line Help Use the Help menu to display online help about the Status Display ...

Page 118: ...utput by the printer Black Cyan Magenta Yellow Counters These counters allow you to keep track of the documents that have been output by the printer according to toner color All monochrome documents are monitored by the Black Toner Counter Tray 3 Tray 3 Installed will be displayed here to indicate when a third cassette unit has been installed onto the printer Printer Memory The amount of RAM that ...

Page 119: ...Chapter 4 Maintaining Your Printer Maintaining Your Printer Chapter 4 ...

Page 120: ...dge as a replacement When any color toner cartridge runs out of toner REPLACE TONER is displayed and the printing functions of the printer will cease to operate You can still print by pressing the Action key for each copy however the image density will become lighter and lighter It is recommended that you change the toner car tridge as soon as possible When using the Action key the REPLACE TONER i...

Page 121: ...ge 1 Check the control panel to see that the Toner Empty LED message is displayed 2 Press the Action key The LED display will change to indicate which of the toner cartridges require replacement Black Yellow Magenta Cyan On On Blinking On Blinking Blinking Blinking On To Be Continued t ...

Page 122: ... toner cartridge rack dial clockwise to turn the toner cartridge rack the dial will not rotate counter clockwise The toner cartridges are attached to the rack in the order of Black Yellow Magenta Red and Cyan Blue Turn the rack to the particular cartridge to be changed Example magenta toner empty Front cover lock release lever Front cover Toner cartridge Removal inserting Toner cartridge rack rack...

Page 123: ...e dial tighten while turning it This is the position for removing the cartridge CYN MAG BLK YEL Yellow toner cartridge Black toner cartridge Toner cartridge rack Cyan Blue toner cartridge Toner cartridge rack dial Magenta Red toner cartridge Printer side view To Be Continued t ...

Page 124: ...al position indicator will alert the user to the proper removal position Note 6 Hold the handle of the used toner cartridge and pull it toward you Before installing or removing the toner cartridge always make sure that the rack is in the proper position Never install or remove the toner cartridge if the rack is not properly positioned Removal position indicator ALL GREEN OK NG Handle ...

Page 125: ... toner cartridge from its carton and holding the cartridge as shown shake it well Note 9 Make sure that the label on the toner cartridge rack is the same color as the toner cartridge Never touch the roller in the toner cartridge Print quality will be reduced Toner cartridge Roller Toner color label To Be Continued t Roller protective shutter ...

Page 126: ...ng the cartridge hold the rack dial with your hand to prevent the rack from rotating 11 Holding the new cartridge as shown insert the green pin on the right side of the cartridge into the green installation guide of the rack Rack dial Handle Green pin Green installation guide ...

Page 127: ...uide of the rack 13 Firmly insert the cartridge into the rack until it clicks into place Make sure that the toner cartridge is installed properly and is held in position by the toner cartridge lock plate refer to the illustration Green pin Green installation guide Toner cartridge lock plate Toner cartridge OK LOCKED NG UNLOCKED To Be Continued t ...

Page 128: ...nserted into the printer Note 15 Gently close the front cover Do not slam the front cover to avoid causing damage to the printer 16 Make sure that the front cover is completely closed You will hear the sound of the printer operating Before shutting the printer s exterior cover make sure that the drum unit is securely installed by applying pressure at its top where the Press label is affixed Drum u...

Page 129: ...ridges 4 10 Maintaining Your Printer Chapter 4 17 Wait until the sound of the printer operation has stopped indicating that the printer is ready Check the control panel to see that the Ready LED message is displayed ...

Page 130: ...monochrome print ratio image conditions etc Change the drum cartridge together with the waste bottle and oiling roller these parts are preset to be replaced at the same time When it is time or almost time to change the drum cartridge waste bottle or oiling roller a control panel display will appear Press the Action key The control panel display will change The following message displayed will indi...

Page 131: ...le and oiling roller are designed for the same cycle of service replace all three units using the instructions provided on the following page Note Dispose of the old drum cartridge waste bottle and oiling roller in plastic bags according to your local regulations or return them to your sales representative LED message displays other than those described above may appear after the Action key is pre...

Page 132: ...apter 4 Changing the Drum Cartridge 1 Grasp and pull down the front cover lock release lever and swing open the front cover 2 Holding onto the grip pull out the drum cartridge Front cover lock release lever Grip Front cover Drum cartridge Drum cartridge ...

Page 133: ... the drum protective shutter of the drum cartridge Also never touch the internal PC drum This will reduce print quality If the drum cartridge will not be immediately installed in the printer be sure to cover it with a cloth to shield it from light DO NOT GRASP or handle the drum protective shutter during installation This may damage the transfer belt unit Drum protective PC drum shutter Front slot...

Page 134: ...t will lock into place when it has been correctly inserted into the printer Note When the drum cartridge is correctly installed into the printer the drum protective shutter will automatically open Be careful not to disturb or apply pressure to the shutter DO NOT PRESS on the drum protective shutter during installation This may damage the drum cartridge Drum protective shutter Drum unit Drum protec...

Page 135: ...ld waste bottle from the printer 7 Remove the cap from the old toner waste bottle and place it into the mouth of the old bottle to prevent spills 8 Make sure that the shutter of the image transfer belt unit is closed Waste bottle Cap Shutter OK Close NG Open Image transfer belt unit To Be Continued t ...

Page 136: ...he image transfer belt unit on the left side of the printer Install the waste bottle behind the image transfer belt drawn in the diagram with dash marks inside of the printer 10 Press down on the waste bottle until it clicks into place Waste bottle Green label Waste bottle Slot Image transfer belt unit Waste bottle ...

Page 137: ... transfer belt unit 12 Gently close the front cover Do not slam the front cover to avoid causing damage to the printer 13 Make sure that the front cover is completely closed You will hear the sound of the printer operating Pin Hook Waste bottle Image transfer belt unit Front cover OK LOCKED NG UNLOCKED Front cover lock release lever To Be Continued t ...

Page 138: ...nit lock release lever and pull out the fusing unit ATTENTION The fusing unit is hot Be careful not to touch the area surrounding the WARNING HIGH TEMPERATURE label Before changing the oiling roller wait until the surface temperature of the fusing unit cools to a safe level Rear cover Button of the fusing unit lock release lever WARNING HIGH TEMPERATURE label ...

Page 139: ...stallation screws 17 Holding onto the grip take out the oiling roller 18 Remove the new oiling roller from its carton Install the new oiling roller by inserting the tabs on its front end under the edge of the fusing unit Oiling roller Fusing unit Bed of oiling roller Fusing unit 1 2 To Be Continued t ...

Page 140: ... press down on the green tab while tightening the screws of theoiling roller Tighten the screws so that the spring action of the cover is completely closed 20 Holding the lock release lever insert the fusing unit until it clicks into place Do not touch the oiling roller as its surface is covered with silicone oil Screws Green tab ...

Page 141: ... Make sure that the button of the fusing unit lock release lever is pushed up as shown 22 Close the rear cover until it clicks locking into place 23 Make sure that the rear cover lock release lever is pushed up as shown OK LOCKED NG UNLOCKED OK LOCKED NG UNLOCKED ...

Page 142: ... etc Change the fusing unit and image transfer roller unit at the same time Dispose of the old fusing unit and image transfer roller unit in plastic bags according to your local regulations or return them to your sales representative Changing the Image Transfer Roller Unit 1 Grasp and pull down the front cover lock release lever and swing open the front cover 2 Lift the image transfer roller unit ...

Page 143: ...the new image transfer roller unit from its carton 5 Insert both bearings of the image transfer roller unit into the shafts as shown 6 Install the image transfer roller unit Do not touch the surface of the image transfer roller as this may lead to reduced print quality Image transfer roller Bearings To Be Continued t ...

Page 144: ...ctly inserted into the printer Note 8 Gently close the front cover Do not slam the front cover to avoid causing damage to the printer 9 Make sure that the front cover is completely closed You will hear the sound of the printer operating Before shutting the printer s exterior cover make sure that the drum unit is securely installed by applying pressure at its top where the Press label is affixed Dr...

Page 145: ...g unit lock release lever and slide out the fusing unit ATTENTION The fusing unit is hot Be careful not to touch the area surrounding the WARNING HIGH TEMPERATURE label Before changing the fusing unit wait until its surface cools to a safe level Rear cover Button of the fusing unit lock release lever WARNING HIGH TEMPERATURE label To Be Continued t ...

Page 146: ... the fusing unit 13 Slide out the fusing unit in the direction shown Remove the fusing unit from its mount 14 Remove the new fusing unit from its carton 15 Insert the guide of the fusing unit mount into the installation hole of the new fusing unit as shown Fusing unit Screws Guide Hole ...

Page 147: ...allation screws 18 Turn the misfeed clearing dial of the fusing unit coun terclockwise and make sure that the white gear shown rotates smoothly 19 Holding the lock release lever insert the fusing unit until it clicks into place 20 Make sure that the button of the fusing unit lock release lever is pushed up as shown Installation hole Dowel Installation hole Dowel OK LOCKED NG UNLOCKED To Be Continu...

Page 148: ...9 Maintaining Your Printer Chapter 4 21 Close the rear cover The rear cover will click when it is closed completely 22 Make sure that the button of the rear cover lock release lever is pushed up as shown OK NG LOCKED UNLOCKED ...

Page 149: ...Changing Cartridges 4 30 Maintaining Your Printer Chapter 4 MEMO ...

Page 150: ...ansfer belt unit operates four times four images per color print When 150 000 images are calculated in terms of color prints about 37 500 sheets can be printed This value will vary accord ing to the color to monochrome print ratio image conditions etc Dispose of the old image transfer belt unit in a plastic bag according to your local regulations or return it to your sales rep resentative 1 Grasp ...

Page 151: ... the printer Do not touch the drum cartridge s protective shutter Also never touch the internal PC drum to do so will reduce print quality If the drum cartridge will not be immediately installed in the printer be sure to cover it with a cloth to shield it from light Drum cartridge Drum protective PC drum shutter Waste bottle To Be Continued t ...

Page 152: ...rton Caution Note When removing the image transfer belt unit from the box NEVER DROP or SUBJECT THE UNIT TO SHOCKS When installing the image transfer belt unit be sure to hold onto the grips NEVER handle the shutter to avoid damaging the image transfer belt Left side Right side grip grip Right side grip Left side grip Image transfer belt unit Image transfer belt shutter ...

Page 153: ...t to the position shown to unlock the bracket 2 Pull out the belt fixing bracket Unlock and pull out the belt fixing bracket from the right side of the image transfer belt unit following the same procedure as used for the left side Lock Unlock Belt fixing brackets Rear slot Front slot Rear slot Front slot 7 Install theimage transfer belt unit in the printer aligning its pins with the slots inside ...

Page 154: ...er Chapter 4 8 Check that the connector from the image transfer belt unit is securely connected to the printer s connector 9 Make sure that the shutter of the image transfer belt unit is closed OK NG Shutter OK Close NG Open Image transfer belt unit ...

Page 155: ... transfer belt unit on the left side of the printer Install the waste bottle behind the image transfer belt drawn in the diagram with dash marks inside of the printer 11 Press down on the waste bottle until it clicks into place Waste bottle Green label Waste bottle Slot Image transfer belt unit Waste bottle To Be Continued t ...

Page 156: ...rum cartridge when installing it into the printer Note 14 Align the drum cartridge s pins with the slots inside the printer for easy installation DO NOT HANDLE the drum protective shutter during installation to avoid damaging the transfer belt unit Pin Hook Waste bottle Image transfer belt unit Green handle Drum cartridge Drum protective shutter Front slot Front slot Front slot Guiding pin Green h...

Page 157: ... the front cover Do not slam the front cover to avoid causing damage to the printer 17 Make sure that the front cover is completely closed You will hear the sound of the printer operating DO NOT PRESS ON the drum cartridge s shutter during installation Doing so may damage the drum cartridge Drum unit Drum protective shutter Front cover OK LOCKED NG UNLOCKED Front cover lock release lever ...

Page 158: ...eaning the Outside 1 Using a soft cloth and a mild dishwashing detergent wipe the outside of the printer Before cleaning be sure to turn OFF the power switch and unplug the power cord from the outlet Use a soft cloth for cleaning Do not use abrasives or corrosive deter gents ATTENTION The fusing unit inside the rear cover can become very hot during operation To avoid burning yourself avoid touchin...

Page 159: ... the front cover lock release lever to swing open the front cover Note 2 Lift the misfeed clearing lever Whenever the printer is open drape the front cover with a cloth so that the drum cartridge is not exposed to light Front cover lock release lever Front cover Misfeed clearing lever To Be Continued t ...

Page 160: ... 3 Using a soft cloth wipe dirt and paper debris off the roller as shown Note 4 Return the misfeed clearing lever to the down position Do not touch the surface of the image transfer roller as it may cause reduced print quality Roller Roller Image transfer roller ...

Page 161: ...ed into the printer Note 6 Gently close the front cover Do not slam the front cover to avoid causing damage to the printer 7 Make sure that the front cover is completely closed You will hear the sound of the printer operating Before shutting the printer s exterior cover make sure that the drum unit is securely installed by applying pressure at its top where the Press label is affixed Drum unit Fro...

Page 162: ...MEMO Maintaining Your Printer Chapter 4 ...

Page 163: ...Chapter 5 Troubleshooting Troubleshooting Chapter 5 ...

Page 164: ...er Different steps of action should be taken for different trouble symptoms First find out which one of the following categories your printer s symptom fits into then go to the corresponding action pages Troubleshooting prior to the Transmission of Data Typical symptoms include The printer does not turn ON See p 5 3 Troubleshooting the Print Cycle The printer fails to print data that has been rece...

Page 165: ...erica Minolta also maintains a Web site which provides printer driver downloads Frequently Asked Questions and handles all e mail requests for technical assistance at http www minoltaprinters com Please be prepared to provide the following information when contacting Minolta Customer Support Model name Serial number A detailed description of the problem Any message displayed on the control panel F...

Page 166: ...r lights is blank and the printer makes no sound but the printer can be turned ON The voltage of the printer does not match the power outlet volt age Check the power out let for correct voltage Symptom Cause Action The indicator lights up and the print cycle does not start The printer has detected an error The details of the error are shown on the indica tor lights See the Messages section to dete...

Page 167: ...d follow the instructions provided For the types of paper that can be used see Paper p 2 19 Reload the transpar encies paper p 2 31 To clear a paper misfeed see Clear ing a Paper Mis feed p 5 21 Reinstall the third cassette unit Set up Guide Change the fusing unit p 4 23 Double feed Multiple sheets are output together Fan the paper stack thoroughly and reload it The error message shown below appea...

Page 168: ... the LED chart p 5 6 On or blinking ErrorLED See the explanation for Error on the LED chart p 5 12 The LED display will change as you push the Action key The appearance of this icon throughout this manual indi cates when you need to press the Action key Error amber Toner empty amber Paper empty amber Ready green Action key On Off Blinking Indicator lights ...

Page 169: ...g Chapter 5 When the Ready LED is on 1 6 LED Display Description Response Required Initializing Power on initializ ing Wait a few moments Warming Up Printer is warming up Wait a few moments for the printer to warm up Ready Printer is ready and able to print Send a print job ...

Page 170: ... Printing is possible The printer will go into the Ready mode as soon as it receives the next print job Send a print job It takes some time before the printer can print while in the power conserva tion mode Please wait a few moments Tray 2 Paper Low Tray 2 is almost out of paper Prepare to refill the paper supply Tray 3 Paper Low Tray 3 is almost out of paper Prepare to refill the paper supply Slo...

Page 171: ...apter 5 When the Ready LED is on 3 6 LED Display Description Response Required Tray 1 Paper Empty Tray 1 is out of paper Add paper pp 2 23 2 32 2 40 Tray 2 Paper Empty Tray 2 is out of paper Add paper pp 2 26 2 35 Tray 3 Paper Empty Tray 3 is out of paper Add paper pp 2 26 2 35 ...

Page 172: ... is on 4 6 LED Display Description Response Required No Tray 2 Tray 2 is not in place Load Tray 2 No Tray 3 Tray 3 is not in place Load Tray 3 Wait Action Press the Action key in the event of a paper size error a size mismatch or when operating in the manual mode Press the Action key Printing will begin ...

Page 173: ...ter 5 When the Ready LED is on 5 6 LED Display Description Response Required Black Toner Low The supply of toner inside of the toner cartridge is low but printing is still pos sible Ready a new toner cartridge for replacement p 4 1 Yellow Toner Low Magenta Toner Low Cyan Toner Low ...

Page 174: ...is on 6 6 LED Display Description Response Required Drum Cartridge Almost Used It is almost time to replace the drum cartridge Ready a drum car tridge replacement Since the drum car tridge is on the same replacement cycle as the waste bottle and oiling roller pre pare to replace these items as well p 4 11 ...

Page 175: ... Response Required Paper Misfeed 1 A paper misfeed occurred near the paper intake area Remove the misfed sheet of paper For details see Clear ing a Paper Misfeed p 5 21 Paper Misfeed 2 A paper misfeed occurred near the paper intake and fus ing unit area Paper Misfeed 3 A paper misfeed occurred between the fusing unit and paper exit area ...

Page 176: ...in Cancel the print job through the printer driver and resend it Warning Cover Open The front or rear cover is open Close the front or rear cover pp 2 1 2 3 Paper Size Error The wrong size of paper has been detected in Tray 1 Supply the specified size of paper to the selected paper source Printing will resume using the paper size currently loaded in the printer by pressing the Action key p 2 23 Si...

Page 177: ...print at a time by pressing the Action key How ever the image den sity will gradually become lighter It is recommended that you change the toner cartridge as soon as possible p 4 1 Replace Yellow Toner Put Yellow Toner Cartridge Replace the old toner cartridge with a new one p 4 1 Put Toner Cartridge One or more of the toner cartridges is missing Load the toner car tridge s p 4 1 Replace Magenta T...

Page 178: ...e Bottle The waste bottle is full The drum cartridge waste bottle and oil ing roller are on the same replacement cycle Replace all three units together p 4 11 The waste bottle has not been installed Install the waste bot tle p 4 11 Replace Drum Cartridge Put Drum Cartridge The drum cartridge requires replace ment The drum cartridge waste bottle and oil ing roller are on the same replacement cycle ...

Page 179: ... Error LED is on 5 9 LED Display Description Response Required Fatal Error Transfer Roller Requires servicing Turn the power to the printer off and then on again If the same LED message continues to be dis played contact cus tomer support or your dealer Fatal Error SRAM Drum ROM Engine I F CPU ...

Page 180: ...Description Response Required I O Error Network A network port error occurred Switch power off and on The printer will return ready Run the print cycle again p 2 17 Turn the power to the printer off and then on again If the same LED message continues to be dis played contact cus tomer support or your dealer I O Error Parallel ...

Page 181: ...e Error LED is on 7 9 LED Display Description Response Required Fatal Error Laser Unit Requires servising Turn the power to the printer off and then on again If the same LED message continues to be dis played contact cus tomer support or your dealer Fatal Error Fan Motor Fatal Error Main Motor ...

Page 182: ...e Error LED is on 8 9 LED Display Description Response Required Fatal Error Toner Rack Requires servising Turn the power to the printer off and then on again If the same LED message continues to be dis played contact cus tomer support or your dealer Fatal Error Fuser Fatal Error Transfer Belt ...

Page 183: ...ting Chapter 5 When the Error LED is on 9 9 LED Display Description Response Required Fatal Error Toner Motor Requires servising Turn the power to the printer off and then on again If the same LED message continues to be dis played contact cus tomer support or your dealer ...

Page 184: ...er remove the paper according to the following procedure 1 Pull the paper from the paper exit port out toward you 2 Swing open the rear cover 3 Pull down the paper from the paper exit port ATTENTION The fusing unit inside the rear cover can become very hot during operation Do not touch the area to avoid injury Rear cover ...

Page 185: ...5 While turning the misfeed clearing dial of the fusing unit counterclockwise pull out the paper from the fusing unit ATTENTION The fusing unit is hot Be careful not to touch the area surrounding the WARNING HIGH TEMPERATURE label Button of the fusing unit lock release lever WARNING HIGH TEMPERATURE label Misfeed clearing dial To Be Continued t ...

Page 186: ...t 7 Lift the misfeed clearing guide of the fusing unit and pull out the paper 8 Hold the lock release lever button and push in the fusing unit until it locks back into position 9 Make sure that the button of the lock release lever is pushed up as shown Misfeed clearing guide OK LOCKED NG UNLOCKED ...

Page 187: ...n of the lock release lever is pushed up as shown 12 Grasp and pull down the front cover lock release lever and swing open the front cover Note Whenever the printer is open drape the front cover with a cloth to protect the drum cartridge from light OK LOCKED NG UNLOCKED Front cover lock release lever Front cover To Be Continued t ...

Page 188: ... Lift the misfeed clearing lever 14 Pull out the paper from the rear rollers Note 15 Push down on the misfeed clearing lever Do not touch the surface of the image transfer roller It may lead to reduced print quality Misfeed clearing lever Image transfer roller ...

Page 189: ... Paper Misfeed 5 26 Troubleshooting Chapter 5 16 Lift the misfeed clearing guide 17 Pull out the paper from the rollers toward the top 18 Close the misfeed clearing guide Misfeed clearing guide To Be Continued t ...

Page 190: ...to the printer Note 20 Gently close the front cover Do not slam the front cover to avoid causing damage to the printer 21 Make sure that the front cover is completely closed You will hear the sound of the printer operating Before shutting the printer s exterior cover make sure that the drum unit is securely installed by applying pressure at its top where the Press label is affixed Drum unit Front ...

Page 191: ...er Misfeed 5 28 Troubleshooting Chapter 5 22 Pull out the paper misfed in Tray 1 23 Slide out the second cassette 24 Pull out the paper from the paper path toward you 25 Replace the second cassette To Be Continued t ...

Page 192: ...Clearing a Paper Misfeed 5 29 Troubleshooting Chapter 5 26 Slide out the third cassette option 27 Pull out the paper from the paper path toward you 28 Replace the third cassette ...

Page 193: ...aded in the tray is damp Replace the old paper with fresh dry paper p 2 23 The toner cartridge is running out of toner Remove the toner cartridge and shake it to better dis tribute the toner p 4 1 Replace the old toner car tridge with a new one p 4 1 The toner cartridge may be defective Remove and check the car tridge for damage Install a new cartridge if necessary p 4 1 The image transfer roller ...

Page 194: ...fective The image transfer belt unit may be defective The image transfer roller unit requires replacement Change the image transfer roller unit p 4 23 The toner smudges The toner cartridge may be defective Change the cartridges and or the transfer belt unit See Toner Cartridge p 4 1 See Drum Cartridge p 4 11 See Image Transfer Belt Unit p 4 31 The drum cartridge may be defective The image transfer...

Page 195: ...artridge p 4 1 See Drum Cartridge p 4 11 See Image Transfer Belt Unit p 4 31 The drum cartridge may be defective The image transfer belt unit may be defective The image transfer roller unit requires replacement Change the image transfer roller unit p 4 23 Inconsistent image density Toner is not distrib uted evenly inside the cartridge Remove the toner cartridge and shake it several times p 4 1 The...

Page 196: ...ath is dirty Run several prints to flush out the debris The toner cartridge may be defective Change the cartridges and or the transfer belt unit See Toner Cartridge p 4 1 See Drum Cartridge p 4 11 See Image Transfer Belt Unit p 4 31 The drum cartridge may be defective The image transfer belt unit may be defective The image transfer roller unit requires replacement Change the image transfer roller ...

Page 197: ...cartridge may be defective Change the cartridges and or the transfer belt unit See Drum Cartridge p 4 11 See Image Transfer Roller Unit p 4 23 See Image Transfer Belt Unit p 4 31 The image transfer roller unit may be defective The image transfer belt unit may be defective The Image is coarse Too much data The printer cannot fully process the image with the present mem ory capacity Install the opti...

Page 198: ...nt Change the fusing unit p 4 23 Incorrect image registration lines are bro ken or characters are out of posi tion The print parameters and paper settings of the application soft ware are different from the settings on the control panel Make sure that the settings for the application software correspond with the control panel settings especially the media options The printer takes too long to out ...

Page 199: ...Chapter 6 Specifications Specifications Chapter 6 ...

Page 200: ...600 dpi dpi dot inch Paper feeding system 2 way system TRAY 1 multipurpose tray TRAY 2 250 sheet second cassette Paper size Standard size A4 A5 JIS B5 Letter 8 1 2 11 Legal 8 1 2 14 Executive 7 1 4 10 1 2 Invoice 8 1 2 5 1 2 All paper sizes are lengthwise only 1 Does not support legal size thick paper 2 Optional 250 sheet third cassette unit Paper feeding port A4 JIS B5 A5 Legal 1 Letter Execu tiv...

Page 201: ...Does not support legal size thick paper 6 Optional 250 sheet third cassette unit Paper feeding port Plain paper Special paper Recycled paper Transpar ency sheet Labels Letter head Envelopes J Post Post card Thick paper 3 Tray 1 m m m m m m m m Tray 2 m m m None None None None None Tray 3 4 m m m None None None None None Paper feeding port Plain paper Special paper Recycled paper Transpar ency shee...

Page 202: ...less None paper size print type A4 Letter Legal Monochrome plain paper 12 0 s m or more 6 0 s m or more Monochrome thick paper 1 3 s m or more None Full color plain paper 3 0 s m or more None Full color transparency sheet 0 97 s m or more None Warm up time Within 90 seconds when power is sup plied at 23 C 73 4 F Developing system Fine Micro Toning system PC drum OPC Organic Photoconductor PC charg...

Page 203: ... 20 MHz Memory ROM 64 KB DRAM 16 512 MB SRAM 64 KB for mode settings and counters PM 2mj buffer Interpreters GDI Interface Parallel type C connector IEEE 1284 for Windows 95 Windows 98 and Windows NT Work station 4 0 ECP EPP compatible mode Network option Ethernet 10 100BaseT TCP IP SPX IPX Windows 95 and Windows 98 Peer to Peer support Fonts PC internal font Image data compression PM 2mj Pixel Ma...

Page 204: ...low Magenta Cyan after 3 500 sheets when the color to white ratio is 20 on multi prints Waste bottle Monochrome prints to 20 000 sheets when the black to white ratio is 5 on multi prints Full color prints to 5 000 sheets when the color to white ratio is 20 on multi prints Oiling roller Monochrome prints to 20 000 sheets when the black to white ratio is 5 on multi prints Full color prints to 5 000 ...

Page 205: ...er hour Humidity 15 to 85 RH with a fluctuation of 20 per hour The environmental zone marked by X on the left represents a critical environment in which the printer can be left to stand However the manufacturer does not ensure optimal paper passage performance and image production in this zone Be sure to operate the printer within the operating environment identified within the bold line Options 2...

Page 206: ...g system 1 way system Paper types Plain paper recycled paper 60 90 g m2 16 to 24 lbs transparency sheet Paper size A4 letter 8 1 2 11 legal 8 1 2 14 All paper sizes are lengthwise only Paper capacity Plain and recycled paper 250 sheets transparency sheet 50 sheets Power supply Supplied from the printer Dimensions Width 505 mm 20 Depth 479 mm 18 3 4 Height 78 mm 3 479mm 18 3 4 78mm 3 505mm 20 ...

Page 207: ...Glossary Appendix A Appendix A Glossary ...

Page 208: ...overall image CMY Cyan magenta and yellow These color toners are used to create the subtractive system array of printed colors Default A setting automatically used when you or your application software do not make a selection Drum The part of the printer mechanism where the image is formed Fusing unit The internal part of a page printer that bonds the toner to the paper It consists of heat and pre...

Page 209: ...etwork interface card A part that is installed in the computer in order for the computer to be connected to a network environment Orientation The direction of print on a page Printing such that the shorter edges of the paper are at the top and bottom is called portrait orientation Printing such that the longer edges of the paper are at the top and bottom is called landscape orientation Power Save ...

Page 210: ...All data stored in RAM is lost when the printer is turned off Resolution Refers to printing clarity Resolution depends on the number of dots per inch High resolution more dots is finer and more precise than low resolution which is coarser with rougher edges ROM Read Only Memory A portion of memory that can only be read and cannot be used for data storage ROM retains its contents when you turn off ...

Page 211: ...Quick Reference Appendix B Appendix B Quick Reference ...

Page 212: ...nter Use the LED display in combination with the Troubleshooting chapter of this manual to maintain the high level of performance that your printer was engineered to provide Indicator lights Action key The LED display will change as you push the Action key The appearance of this icon throughout this manual indicates when you need to press the Action key On Off Blinking ...

Page 213: ...eady LED is on 1 2 Initializing p 5 6 Warming Up p 5 6 Ready p 5 6 Power Save p 5 7 Tray 2 Paper Low p 5 7 Tray 3 Paper Low p 5 7 Tray 1 Paper Empty pp 2 23 2 32 2 40 5 8 Tray 2 Paper Empty pp 2 26 2 35 5 8 Tray 3 Paper Empty pp 2 26 2 35 5 8 Slowly blinking ...

Page 214: ...endix B When the Ready LED is on 2 2 No Tray 2 p 5 9 No Tray 3 p 5 9 Wait Action p 5 9 Black Toner Low pp 4 1 5 10 Yellow Toner Low pp 4 1 5 10 Magenta Toner Low pp 4 1 5 10 Cyan Toner Low pp 4 1 5 10 Drum Cartridge Almost Used pp 4 11 5 11 ...

Page 215: ...pendix B When the Error LED is on 1 2 Paper Misfeed 1 pp 5 12 5 21 Paper Misfeed 2 pp 5 12 5 21 Paper Misfeed 3 pp 5 12 5 21 Video Under Run p 5 13 Warning Cover Open pp 2 1 2 3 5 13 Paper Size Error pp 2 23 5 13 Size Mismatch pp 2 23 5 13 ...

Page 216: ...Yellow Toner Car tridge pp 4 1 5 14 Replace Magenta Toner Put Magenta Toner Cartridge pp 4 1 5 14 Replace Cyan Toner Put Cyan Toner Car tridge pp 4 1 5 14 Need Oiling Roller pp 4 11 4 23 5 15 Replace Waste Bottle Put Waste Bottle pp 4 11 5 15 Replace Drum Car tridge Put Drum Car tridge pp 4 11 5 15 I O Error Network pp 2 17 5 17 I O Error Parallel pp 2 17 5 17 ...

Page 217: ...e Appendix B When the Error LED is on Fatal Error 1 1 Transfer Roller p 5 16 SRAM Drum ROM Engine I F CPU p 5 16 Laser Unit p 5 18 Fan Motor p 5 18 Main Motor p 5 18 Toner Rack p 5 19 Fuser p 5 19 Transfer Belt p 5 19 Toner Motor p 5 20 ...

Page 218: ...MEMO Quick Reference Appendix B ...

Page 219: ...Index Appendix C Appendix C Index ...

Page 220: ... Option Windows NT 4 0 3 41 Displaying Printer Information 3 47 Displaying the Printer Driver Win dow Windows 95 Windows 98 3 3 Displaying the Printer Driver Win dow Windows NT 4 0 3 25 Driver Settings Windows 95 Windows 98 3 7 Driver Settings Windows NT 4 0 3 27 Drum cartridge 2 5 4 11 Energy Star Information inside of front cover Error LED 2 9 Exiting the Printer Driver Windows 95 Windows 98 3 3...

Page 221: ...2 6 4 1 Safety informationii Specifications of printer 6 1 Specifications of 250 sheet third cassette unit 6 7 Switching Between the Expanded and Reduced Views 3 46 Toner cartridge 2 5 4 1 The LED Display B 1 The printer parts and supplies 2 1 Tonner empty LED 2 9 Tray 1 multi purpose tray 2 1 2 23 2 32 2 40 Tray 2 250 sheet second cassette 2 1 2 26 2 35 Tray 3 250 sheet third cassette 2 1 2 26 2 ...

Page 222: ...MEMO ...

Reviews: