6
In order to check with a mandrel press lightly
on the valve clearance compensating element
and thus check the clearance. Continue turning
the engine until the next cylinder in the firing
order can be checked.
A valve clearance compensating element must
only be replaced when a clearance of
mm
is established between cam and element. If the
valve tappet sinks quicker than the others, or
has play at the cam base circle, the pre-stroke of
the valve tappet must be measured.
Measuring pre-stroke
7
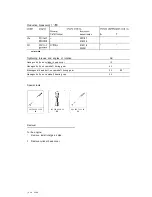
The basic setting of the dial gauge has to be
undertaken before measurement. To do this
insert the dial gauge in the measuring bridge
601 589 08
21 00
and push in until there is a
preload of approx. 1 mm. The probe in the
measuring bridge must be in the basic position
(lower stop).
The basic setting must not be changed during
measurement.
8
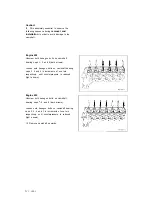
In order to measure and note dimension
(cylinder head mating surface to valve tappet),
put measuring bridge on the cylinder head
mating surface over the valve tappet.
Note
If required, measure dimension
on all valve
tappets.
0510 211 6
Summary of Contents for 602
Page 1: ...Mercedes Benz Mercedes Benz of North America Inc Montvale NJ 07645 ...
Page 5: ...General technical data 00 ...
Page 15: ...Crankcase and Cylinder Head 01 ...
Page 22: ......
Page 33: ......
Page 89: ......
Page 140: ......
Page 191: ...This page int ntiowally left blank 03 10 32113 ...
Page 227: ...ine Timing Valvstr ...
Page 282: ...Special tool f 05 10 310 5 ...
Page 301: ...ystern Air r Turbocharger 09 ...


