M
EDEX
Medfusion 3500
Medex Operation Manual
Artwork GD000608 Revision 5
Page 58
L
IBRARY AND
T
EMPLATE
W
ARNINGS
&
C
AUTIONS
Warning!
Confirm All
Settings
Before starting ANY delivery, ALWAYS confirm correctness of ALL infusion values you
just set.
When using E-Plates, preset values are automatically inserted without pausing to verify
each setting. You go directly to the B
EGIN
I
NFUSION
screen where all the infusion values
are displayed at once. Be sure to verify their correctness before starting the delivery.
Certain data fields may be programmed blank (eg. patient weight) and require data
entry before the infusion will proceed
Extra caution should be exercised when using E-Plates. It is recommended each
organization, unit, or department maintain a written logbook of the contents of every E-
Plate, and have this logbook available as a reference resource for personnel using E-
Plates in their daily operations.
Displaying
E-Plate Options
The steps in this section are hypothetical. The
Medfusion 3500
infusion pumps are
shipped with all the libraries both blank and disabled. So the actual E-Plates you have
available depend entirely on whatever E-Plates and standard library entries your
system operator has programmed into your pump.
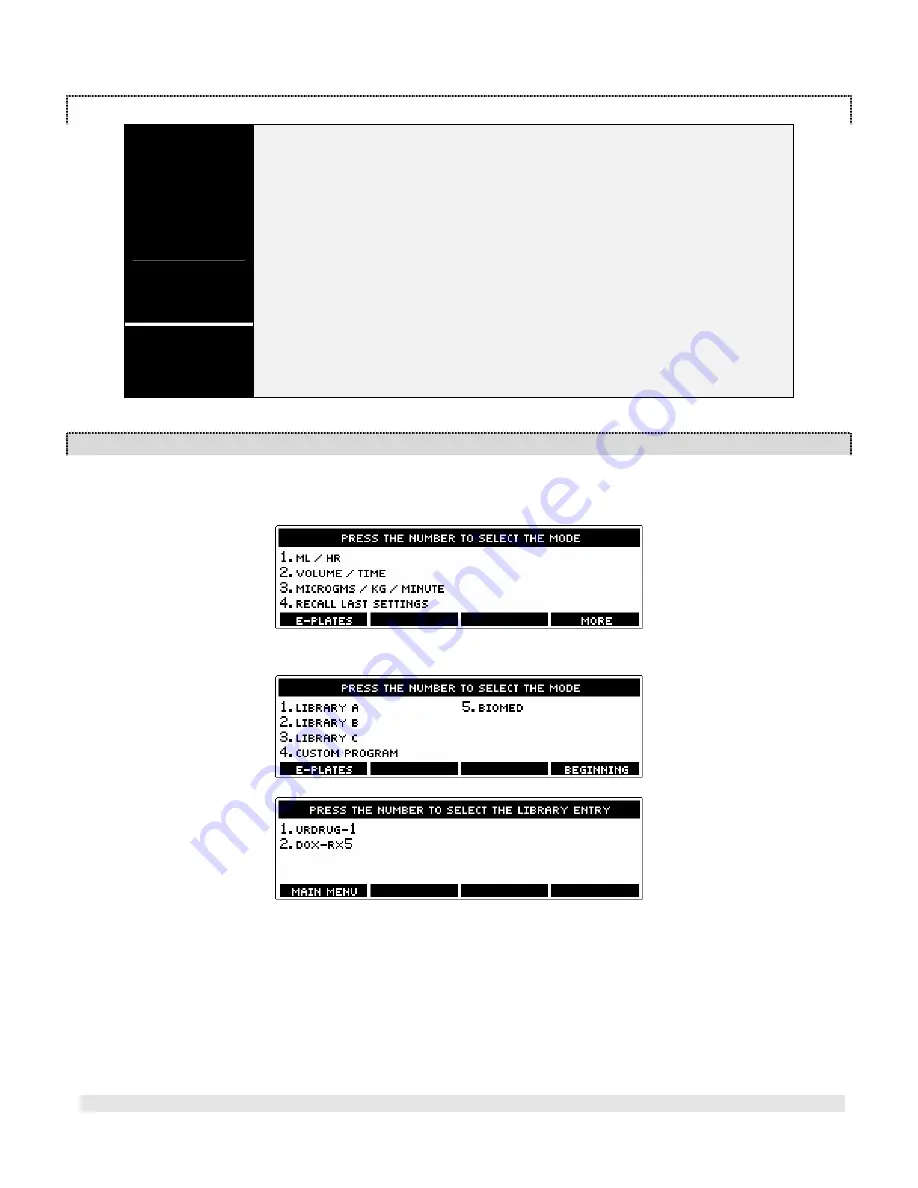
Using “Standard” Libraries
If a standard library
enabled
, the pump displays this library selection under the Main menu.
1.
If you don’t see a library listing on the S
ELECT THE
M
ODE
screen, press the
More
button to find it on
another screen; otherwise it is necessary to enable that library using the custom configuration.
2.
Select a library from the menu. For example: If “3” below is selected, then the L
IBRARY
C
screen appears.
Libraries may be specifically named per facility preference such as NICU, or Anesthesia, or Antibiotics, etc.
Select a L
IBRARY
E
NTRY
(template) by pressing its number.
For example: If you select template “1” you get the presets for infusing
U
RDRUG
-1
.
3.
You are next prompted to load a syringe, then confirm & accept each level of settings by pressing the
Enter
button. Some data fields may require data input prior to proceeding (eg. Patient Weight).
4.
When all settings are confirmed, you go to the B
EGIN
I
NFUSION
screen. Press Start to begin the infusion.


