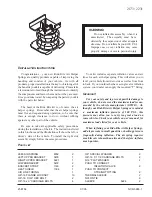
4) Remove air cleaner assembly to observe “V” mark (2) on crank-
shaft pulley (1).
5) Using 17 mm socket, turn crankshaft pulley clockwise until “V”
mark (in white paint) on pulley aligns with “0” (zero) calibrated
on timing belt cover.
6) Check if the rocker arms of No.1 cylinder are off the respective
cam lobes (of camshaft); if so, valves (1), (2), (5) and (7) in figure
are ready for clearance checking and adjustment.
Check valve lashes at valves (1), (2), (5) and (7).
If the rocker arms of No.4 cylinder are off the respective cam
lobes, check valve lashes at valves (3), (4), (6) and (8).
NOTE:
When checking valve clearance, insert thickness gauge
between camshaft and cam-riding face of rocker arm.
7) If valve lash is out of specification, adjust it to specification by
turning adjusting screw after loosening lock nut.
After adjustment, tighten lock nut to specified torque while hold-
ing adjusting screw stationary, and then make sure again that
valve lash is within specification.
Special Tool
(A): 09917-18210
Tightening Torque
(a): 12 N
.
m (1.2 kg-m, 9.0 lb-ft)
1. Thickness gauge
ENGINE MECHANICAL
6A1-7
SH410
Valve
clearance
S
ifi
When cold
(Coolant
temperature is
15 – 25
_
C
or 59 – 77
_
F)
When hot
(Coolant
temperature is
60 – 68
_
C or
140 – 154
_
F)
Specifica-
tion
Intake
0.13 – 0.17 mm
(0.005 – 0.007 in.)
0.17 – 0.21 mm
(0.007 – 0.008 in.)
Exhaust
0.23 – 0.27 mm
(0.009 – 0.011 in.)
0.27 – 0.31 mm
(0.011 – 0.012 in.)


