108
MAINTENANCE
Check the slewing ring gear bearings for wear
The factory setting of the play of the bearings is
between
0.05
and
0.25 mm
.
The limit of wear above which the slewing ring gear
must be replaced is
2.2 mm;
to check the condition
of wear of the bearings, proceed as follows.
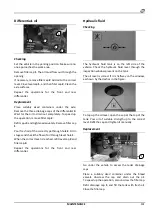
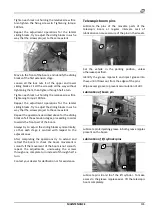
Park the vehicle stably on level ground, align the turret
to the chassis axis, without load.
Place a measuring device in front of the slewing ring gear
with the base on the chassis and measuring needle on
the upper surface of the turret.
Lower the boom completely and reset the measuring
device to create the reference “0”.
Lift the boom all the way to the limit stop and note
down the axial play value measured by the measuring
device.
The value displayed is the play value.
Stabilisers
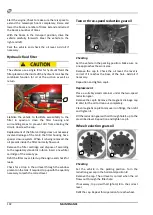
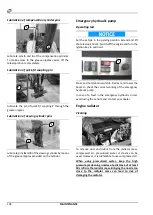
Set the vehicle in the parking position. Extend the
stabilisers completely and rest these on the ground
for easier access to the areas to be lubricated.
Lubricate areas 1 in contact with the sliding blocks of
the scissor type stabilisers. Apply the lubricant using
a brush.
Repeat the operation for all four stabilisers. Extend
and retract the telescopic boom a number of times to
distribute the grease uniformly. Remove the excess
grease.
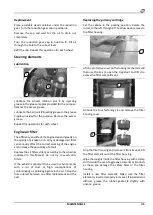
Lubricate all the rotation pins of the stabilisers,
including the pins of the hydraulic cylinders.
Lubricate by injecting grease in the grease nipples
present on each pin. Wipe excess grease to prevent
accumulation of dirt.
Operate the hydraulic movement of the stabilisers a
number of times to distribute the grease uniformly.
Make sure the stabiliser foot oscillates freely.
Increase the lubrication frequency of the base
support pin if necessary.
Wheels
Checking the tyre pressure
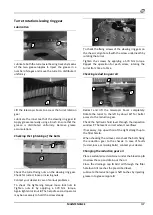
Set the vehicle in the parking position.
Clean the area around the valve stem. Remove the
protective cap from the valve stem.
Measure the pressure of each tyre using a pressure
gauge. If the pressure is different from that prescribed,
make the necessary adjustments.
Refit the protective cap.
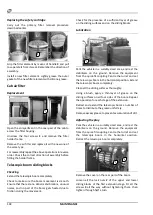
Checking the tightening of the nuts
Set the vehicle in the parking position.
Check the tightening torque of the new wheels.
Check the tightening torque of the repaired wheels.
Tighten the wheel nuts in the cross-wise sequence
applying the correct tightening torques.
The checking must be done every 10 hours of service,
until the torque remains constant. It is then possible
to return to normal checking intervals.
The tightening torque of the wheel nuts is 630 Nm.
The tightening torque is shown on the plate affixed to
the chassis near the axles.
Summary of Contents for RTH 4.18
Page 6: ......
Page 27: ...SECTION ON PRODUCT INFORMATION 27 DIMENSIONS RTH 4 18 RTH 5 18 ...
Page 28: ...28 SECTION ON PRODUCT INFORMATION RTH 5 21 RTH 5 23 ...
Page 29: ...SECTION ON PRODUCT INFORMATION 29 RTH 5 25 RTH 6 21 ...
Page 30: ...30 SECTION ON PRODUCT INFORMATION RTH 6 23 RTH 6 25 ...
Page 78: ......

