MAINTENANCE
101
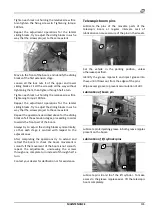
Differentials oil
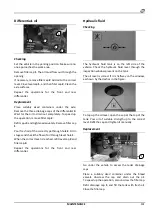
Checking
Set the vehicle in the parking position. Make sure no
one approaches the work area.
Remove filler cap
1
. The oil must flow out through the
opening.
If necessary, remove filler cap
2
. Add oil to the correct
level. Close level cap
1
, and then filler cap
2
. Clean the
axle surfaces.
Repeat the operations for the front and rear
differential.
Replacement
Place suitably sized containers under the axle.
Remove the three drainage caps of the differential
3
.
Wait for the oil to drain out completely. To speed up
the operation, remove filler cap
2
.
Refit caps
3
and tighten adequately. Remove filler cap
1
.
Pour fresh oil of the correct type through hole
2
. Fill in
stages and check the flow of oil through level hole
1
.
When the correct level is reached, refit level cap
2
and
filler cap
3
.
Repeat the operations for the front and rear
differential.
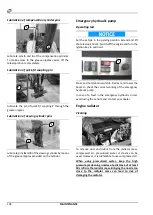
Hydraulic fluid
Checking
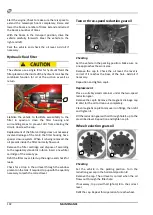
The hydraulic fluid tank is on the left side of the
vehicle. Check the hydraulic fluid level through the
inspection window present on the tank.
The oil level is correct if it is halfway on the window,
as shown by the dashes in the figure.
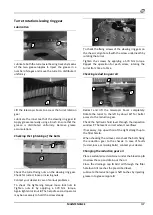
To top up the oil level, open the cap at the top of the
tank. Pour oil of suitable strength up to the correct
level. Refit the cap and tighten it manually.
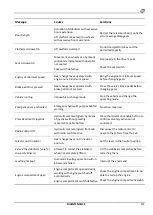
Replacement
Go under the vehicle to access the tanks drainage
caps.
Place a suitably sized container under the bleed
valve
1
. Unscrew the cap and drain out the oil.
To speed up the operation, also unscrew the filler cap.
Refit drainage cap
1
, and fill the tank with fresh oil.
Close the filler cap.
1
1
2
3
3
3
Summary of Contents for RTH 4.18
Page 6: ......
Page 27: ...SECTION ON PRODUCT INFORMATION 27 DIMENSIONS RTH 4 18 RTH 5 18 ...
Page 28: ...28 SECTION ON PRODUCT INFORMATION RTH 5 21 RTH 5 23 ...
Page 29: ...SECTION ON PRODUCT INFORMATION 29 RTH 5 25 RTH 6 21 ...
Page 30: ...30 SECTION ON PRODUCT INFORMATION RTH 6 23 RTH 6 25 ...
Page 78: ......


