


MidAir 25/37 User Guide » 8
7.
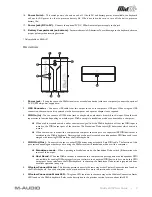
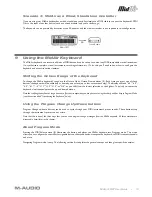
Activity LEDs
– The MidAir receiver’s three LEDs indicate the operational status of the unit:
<
Yellow – The yellow LED illuminates whenever incoming wireless MIDI data is detected by the receiver unit.
<
Red – The red LED illuminates whenever data is received at the wired, 5-pin MIDI input port on the receiver.
Note
: When you are in Standalone mode, only the active input source’s LED will illuminate. In other words, only the yellow or
red LED can be on at any given time. If your Standalone Mode switch is set to “Wireless” then the yellow LED will light when
there is wireless MIDI activity and the red LED will remain off. If the Standalone Mode switch is set to “MIDI” then the red LED
will illuminate when there is activity at the wired MIDI port and the yellow LED will remain off. If the Standalone Mode switch
is set to “Auto” then the LED for whichever source that is currently being routed to the MIDI out port will illuminate.
When the MidAir receiver is connected to a computer through USB, two separate streams of MIDI data can be sent to the
computer. Therefore, both yellow and red LEDs can illuminate at the same time.
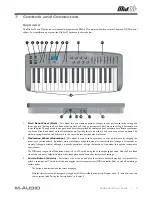
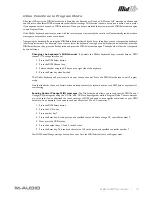
8.
Standalone Mode Switch
– This switch only affects the signal routing when using MidAir as a standalone (non-USB)
device. It selects the source of the receiver’s MIDI output port.
The Standalone Mode switch can be set in the following three ways:
<
MIDI In
– Data from the receiver’s 5-pin MIDI In port is sent to its MIDI Out port. Any data received from
the wireless input is ignored.
<
Wireless
– Data from the receiver’s wireless input is sent to its MIDI Out port. Any data received from the
wired MIDI In port is ignored.
<
Auto – The receiver monitors both the MIDI In port and wireless input and selects whichever input is currently
active. On this setting, the following rules are observed:
<
The wireless and 5-pin MIDI In port data streams are never merged—when MIDI data is being received from the
receiver’s MIDI In port, any data received at its wireless input is ignored.
<
If no MIDI data is received from the receiver’s wired MIDI In port for 250 milliseconds and incoming MIDI data
is detected at the wireless input, the receiver unit will automatically switch to output the incoming wireless MIDI
data stream.
<
If the receiver switches from one stream to another, a set of “Note Off” and other MIDI reset commands will be
sent to the MIDI Out port. This prevents any notes that are currently playing from becoming “stuck.”
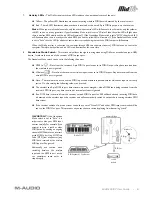
IMPORTANT
: If the Standalone
Mode switch is set to “Auto,” it is
important to plan your MIDI input
sources carefully. For example, if you
attempt to drive a synth or other
MIDI device by sending an ongoing
stream of MIDI data to the receiver’s
wired MIDI In port (e.g. MIDI Time
Code (MTC) from a sequencer), any
MIDI data received at the wireless
MIDI input will be ignored.
Additionally, use caution when
switching between the wireless
input and the MIDI In port as this
can sometimes cause notes to
stop abruptly.
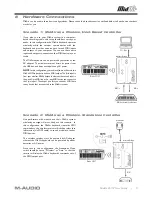
MidAir
25/37
MIDI
In
MIDI
Out
Wireless
Bridge
MIDI
Keyboard
/
Synthesiser
sound
module
IN
OUT
Wireless
In
MIDI
In
MIDI
Out


