23
User Manual
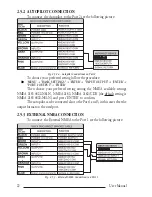
To choose your preferred setting follow the procedure:
'MENU' + "BASIC SETTINGS" + 'ENTER' + "INPUT/OUTPUT" + 'ENTER' +
"PORT 1 INPUT" + 'ENTER'
Then choose your preferred setting among the NMEA available settings
NMEA 1200-N81-N, NMEA 4800-N81-N, NMEA 4800-N82-N, NMEA 9600-O81-
N, NMEA 9600-N81-N (the default setting is 4800-N81-N) and press 'ENTER' to
confirm.
An NMEA device can be connected also to the Port 2 and 3, in this case
select the format on the used port. Doing connection remember that only the Port 1
is optoisolated in input.
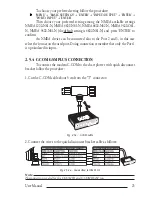
2.5.4 C-COM GSM PLUS CONNECTION
To connect the modem C-COM to the chart plotter with quick disconnect
bracket follow the procedure:
1. Cut the C-COM cable about 5 cm from the "T" connector:
Fig. 2.5.4 - C-COM cable
2. Connect the wires to the quick disconnect bracket cable as follows:
Fig. 2.5.4a - Connection for the Port 1
Note
The connection is valid for the C-COM IR and C-COM RS232 too.
Summary of Contents for Compact 7 Plus
Page 14: ...16 User Manual...
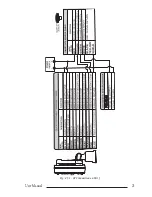
Page 19: ...21 User Manual Fig 2 5 1 GPS Connection on Port 3...
Page 50: ...52 User Manual...
Page 87: ...89 User Manual 6 For the Technician 6 1 DIMENSIONS Fig 6 1 EXCALIBUR models Dimensions...
Page 92: ...94 User Manual Fig 6 4a GPS Connection on Port 3 for chartplotter with external GPS receiver...
Page 98: ...100 User Manual...


